The store will not work correctly in the case when cookies are disabled.
Feeder-Robot: Motor assembly installation guide
Learn how to remove and install the Feeder-Robot Motor Assembly.
Tools needed:
Magnetic Phillips-head screwdriver
Parts included:
Motor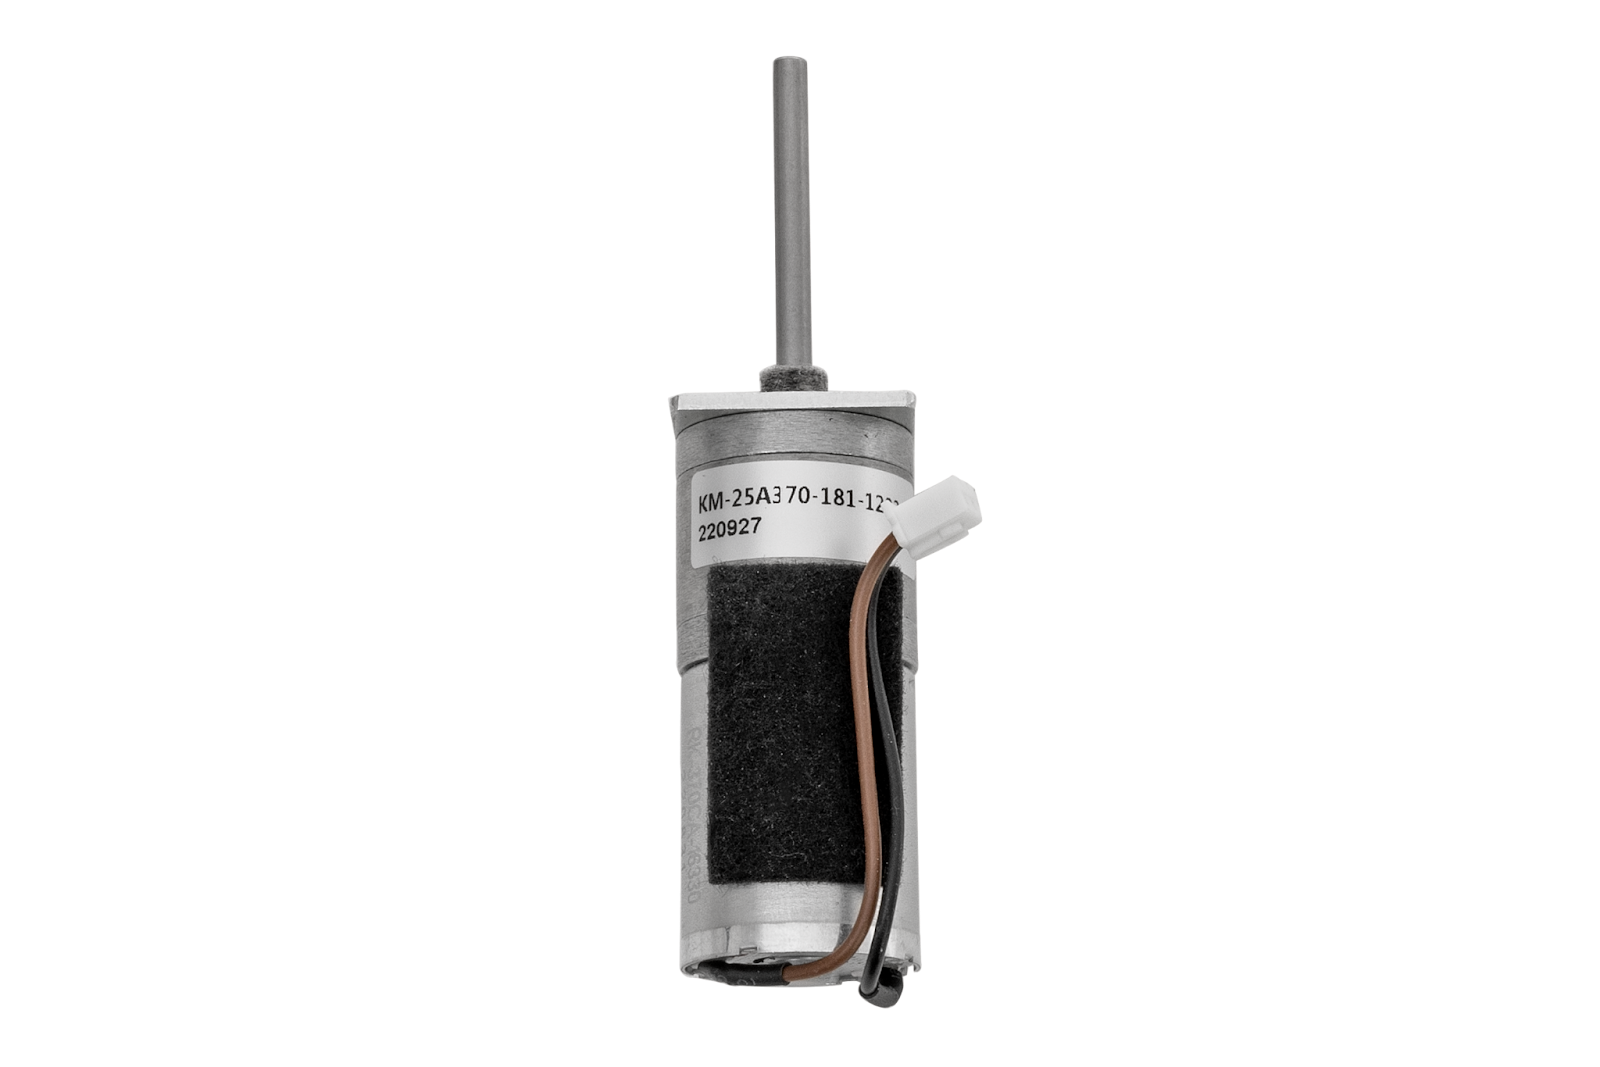
Motor bracket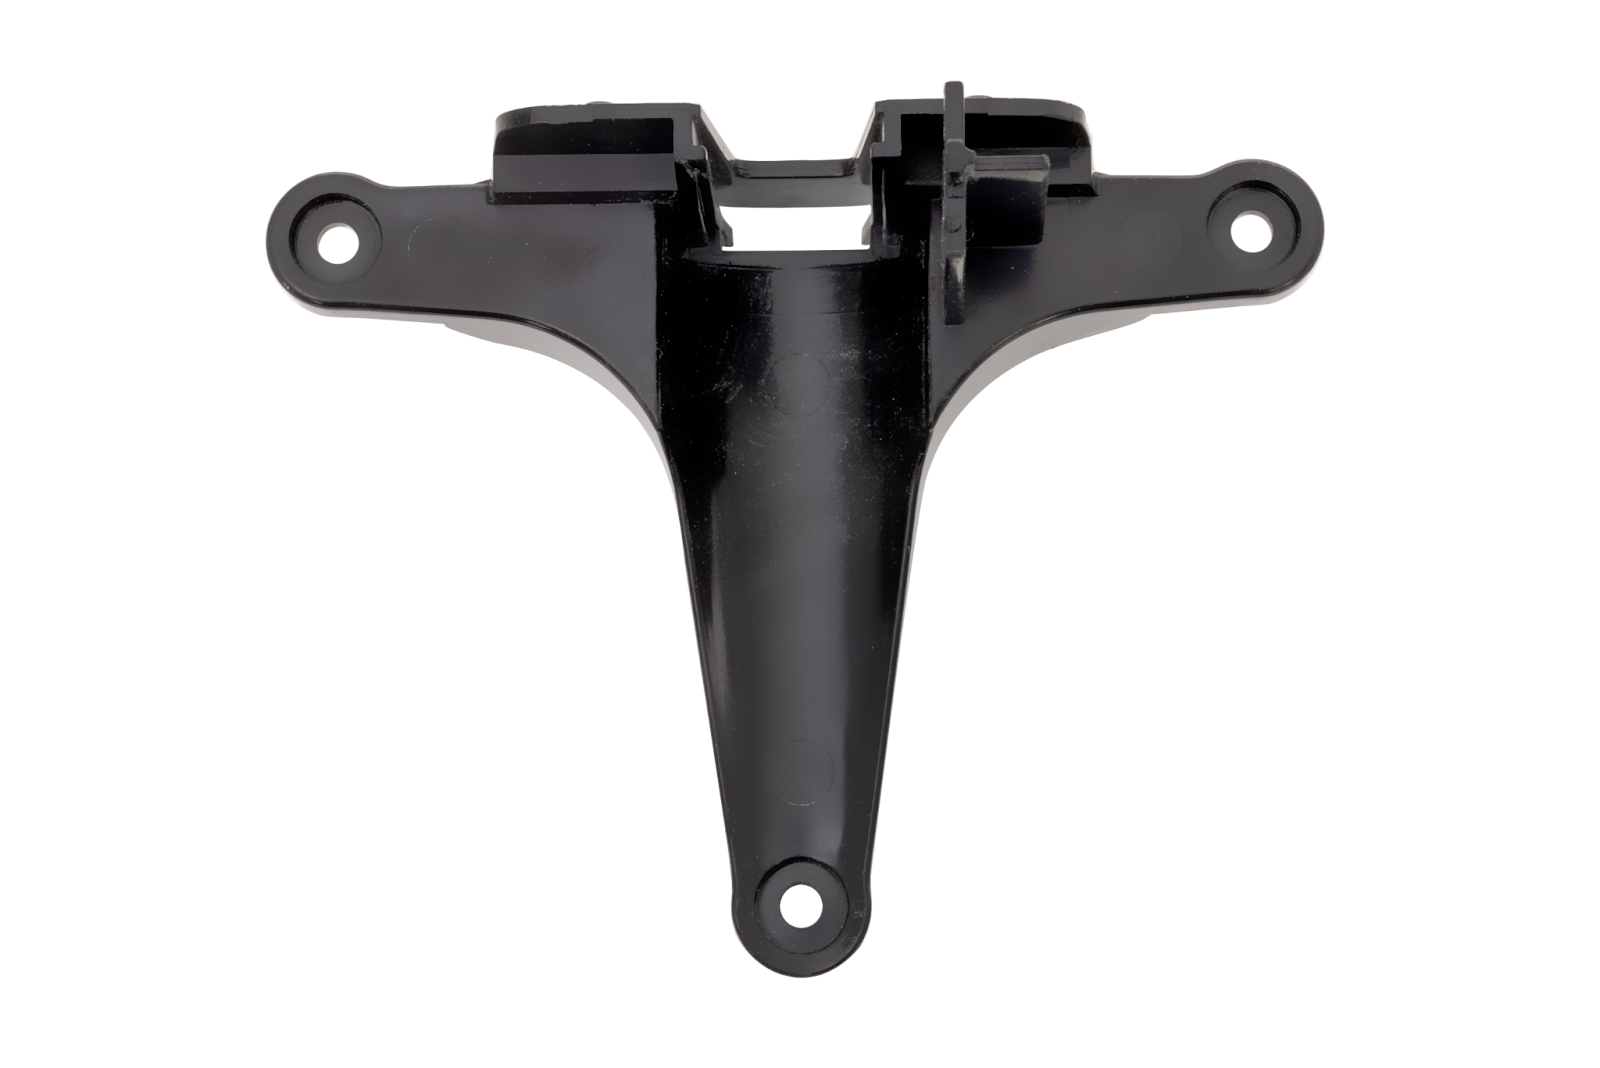
Circuit board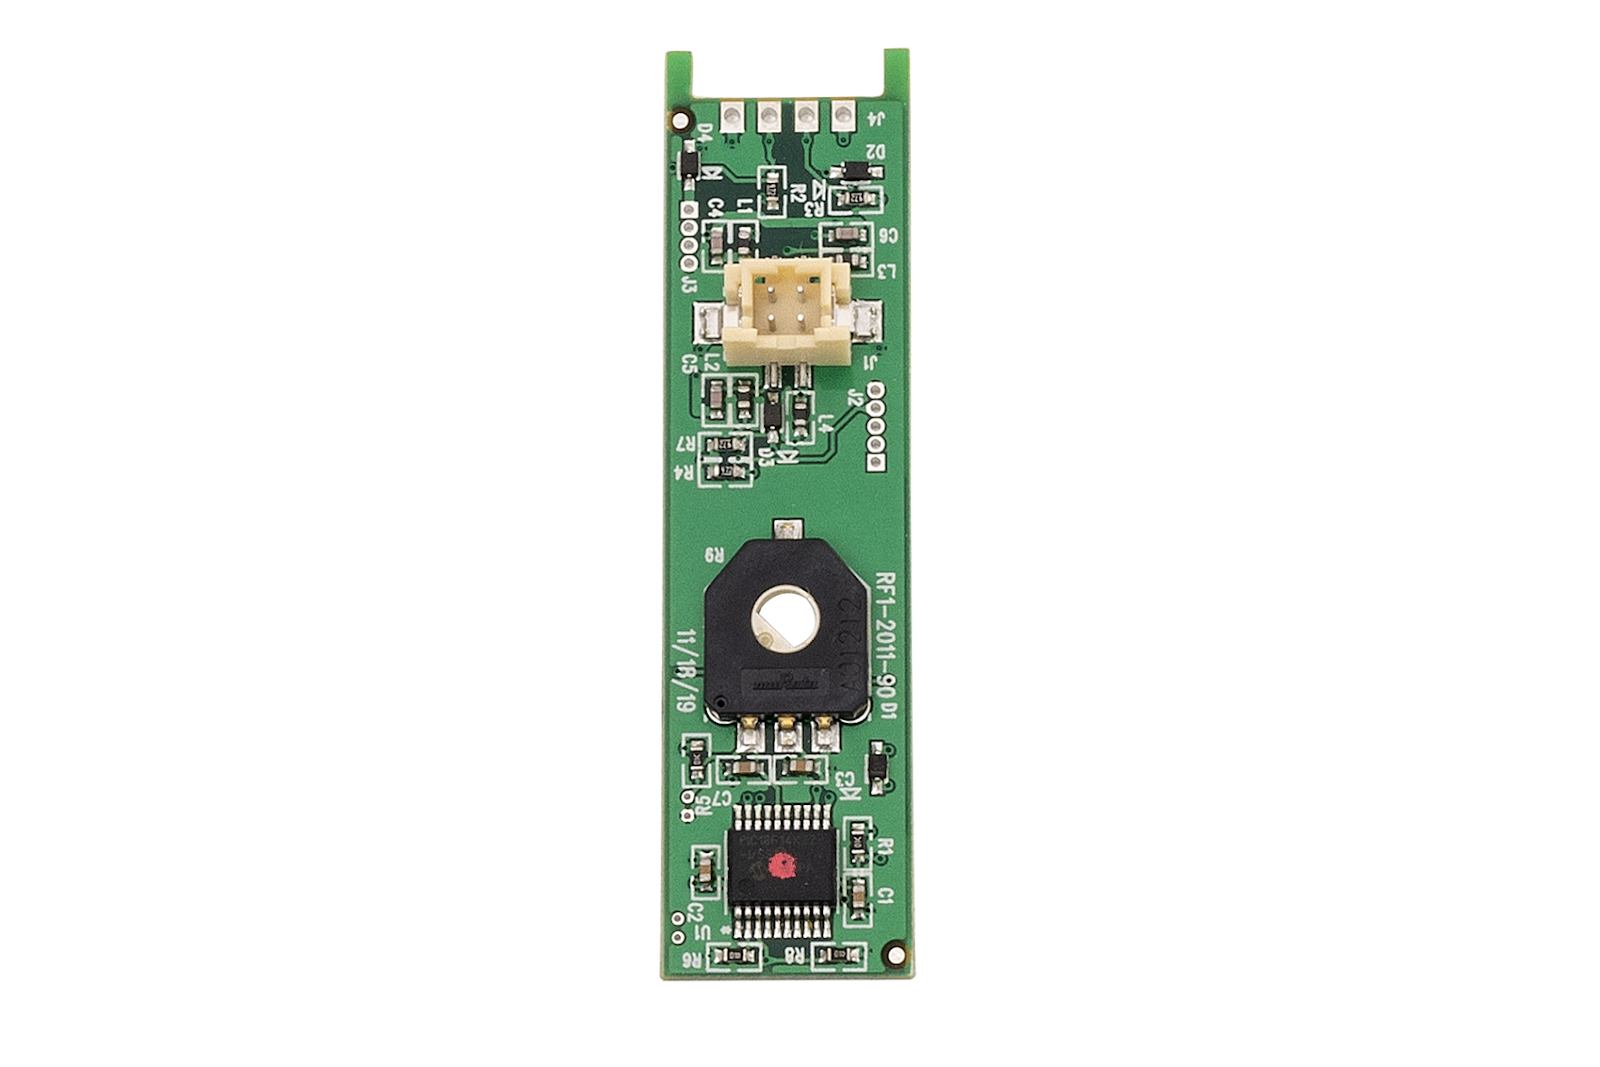
Disassembly
Press the Power button to turn the unit off and unplug it.
![Turning Feeder-Robot off]()

Remove the hopper lid by squeezing the release in the center of the lid.
![Removing the Feeder-Robot hopper lid by squeezing the release in the center of the lid]()
Remove all food from Feeder-Robot and lift the hopper insert out of the hopper.
![Removing all food from Feeder-Robot and lift the hopper insert out of the hopper.]()
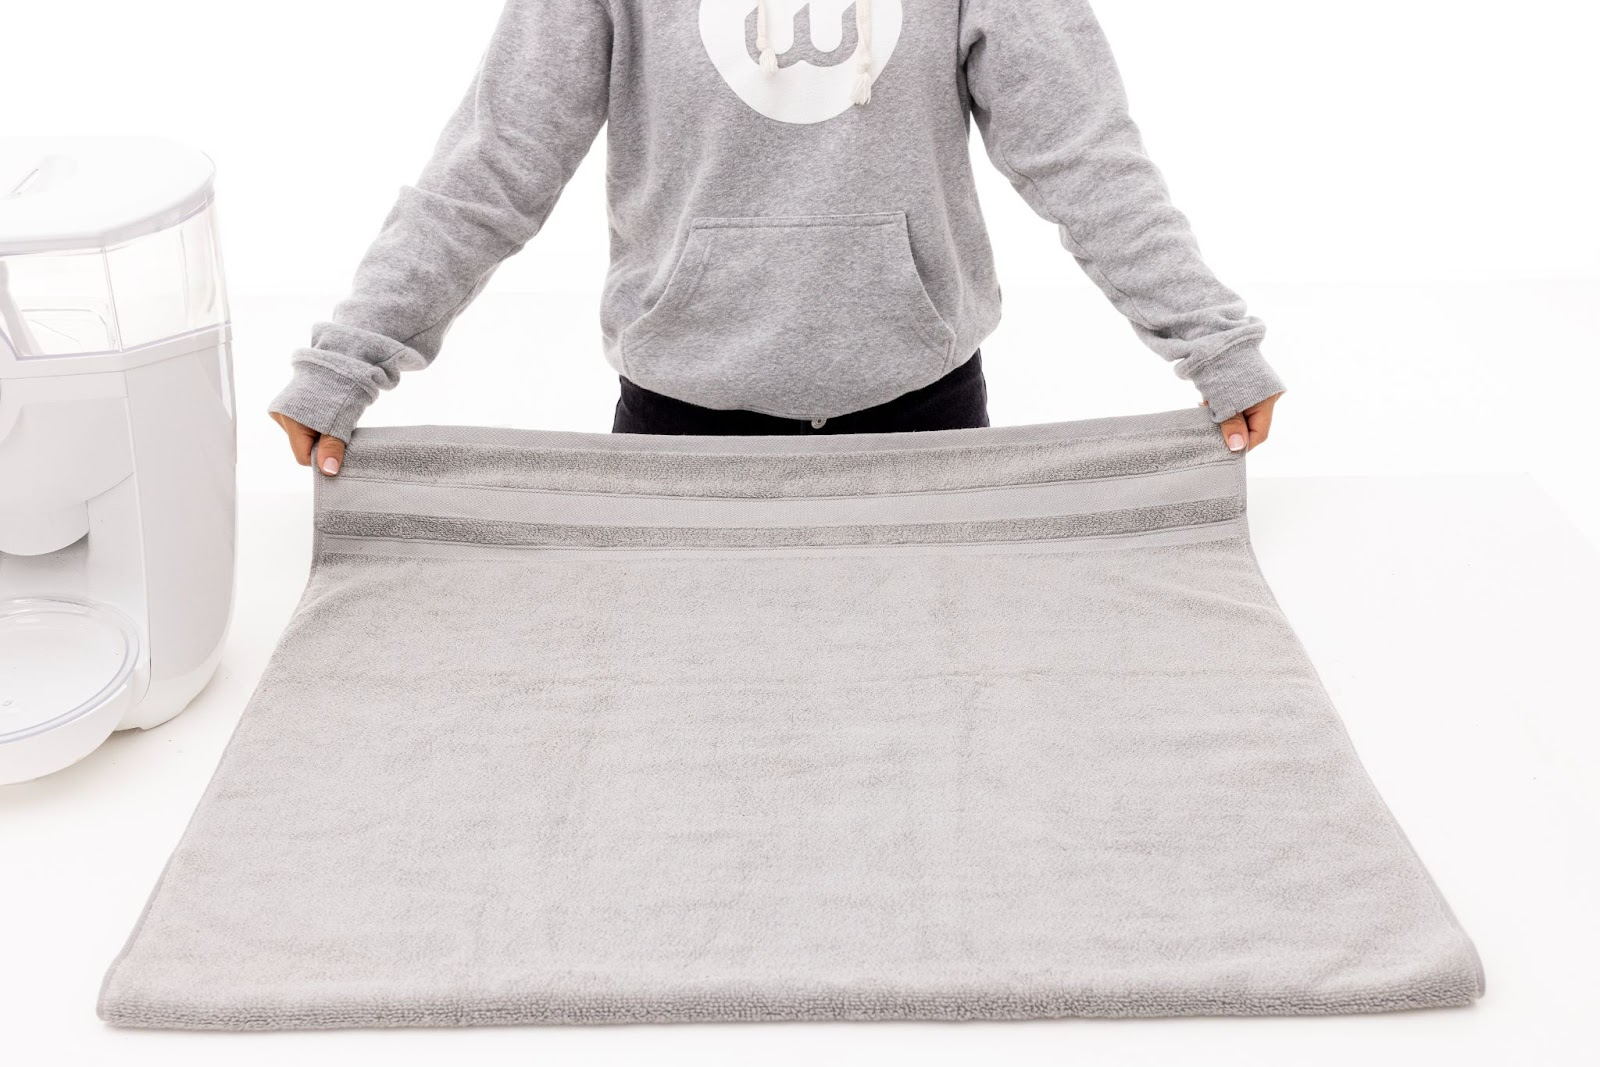
Lay a towel on a flat surface.
![Laying a towel on a flat surface.]()


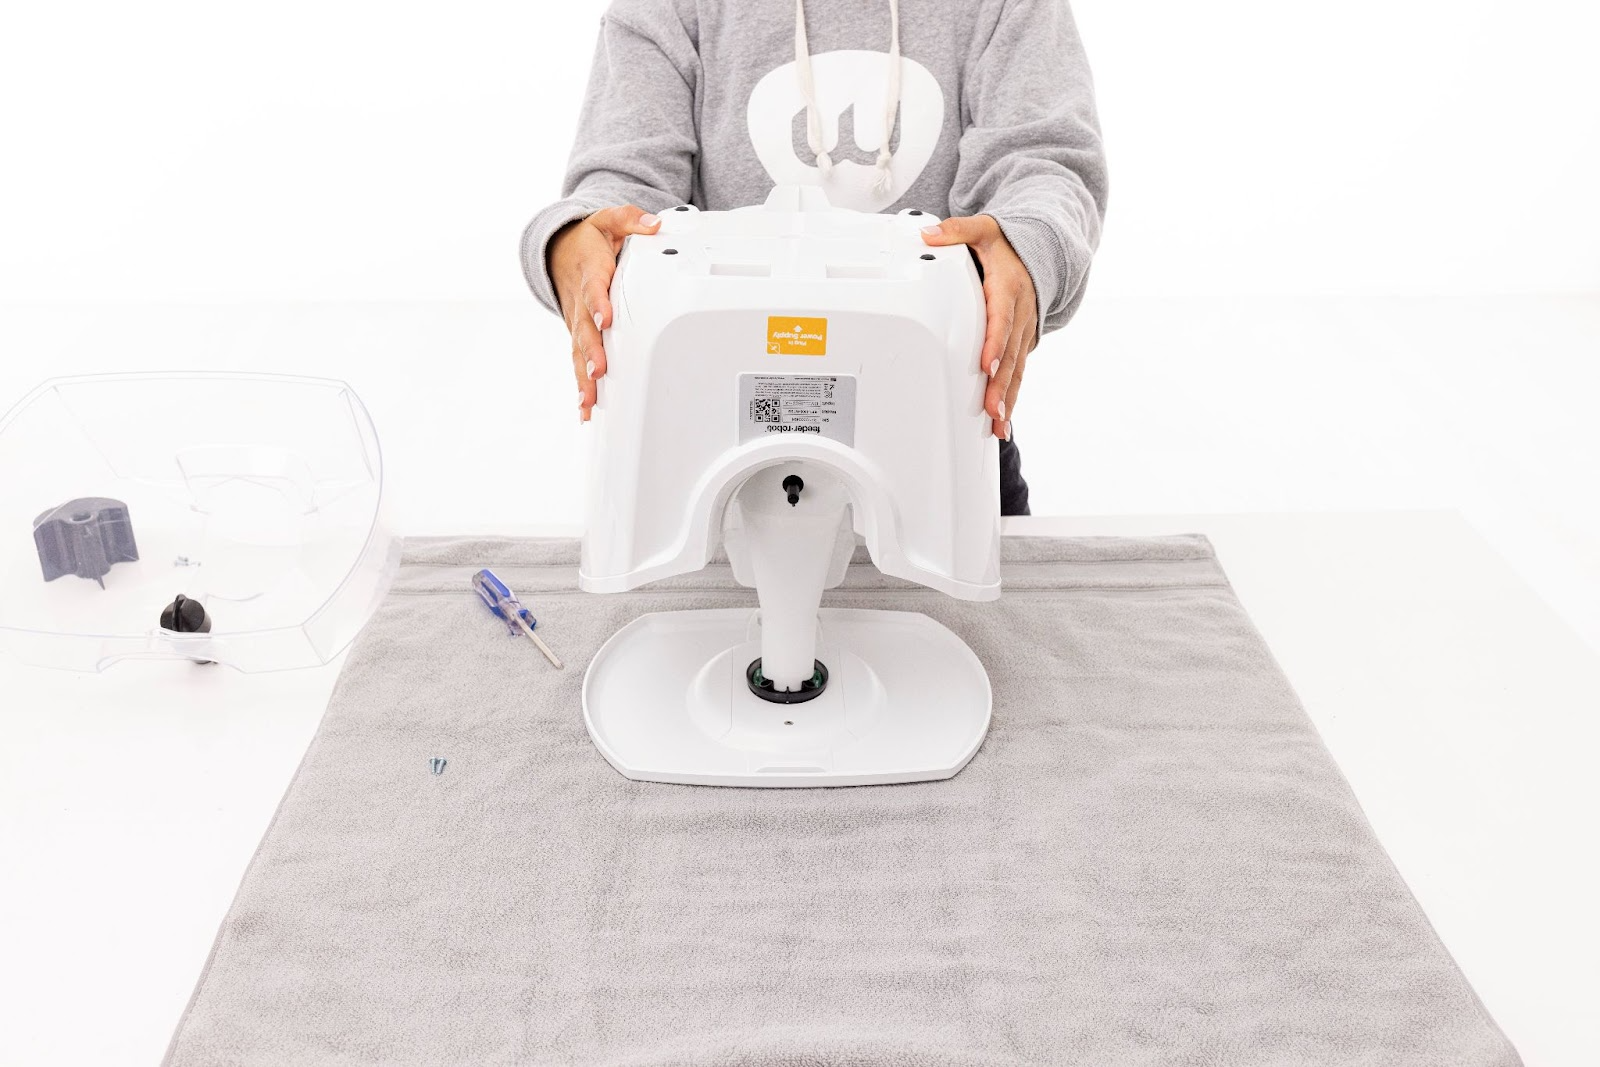
Flip Feeder-Robot upside down, onto the towel.
![Flipping Feeder-Robot upside down, onto the towel.]()

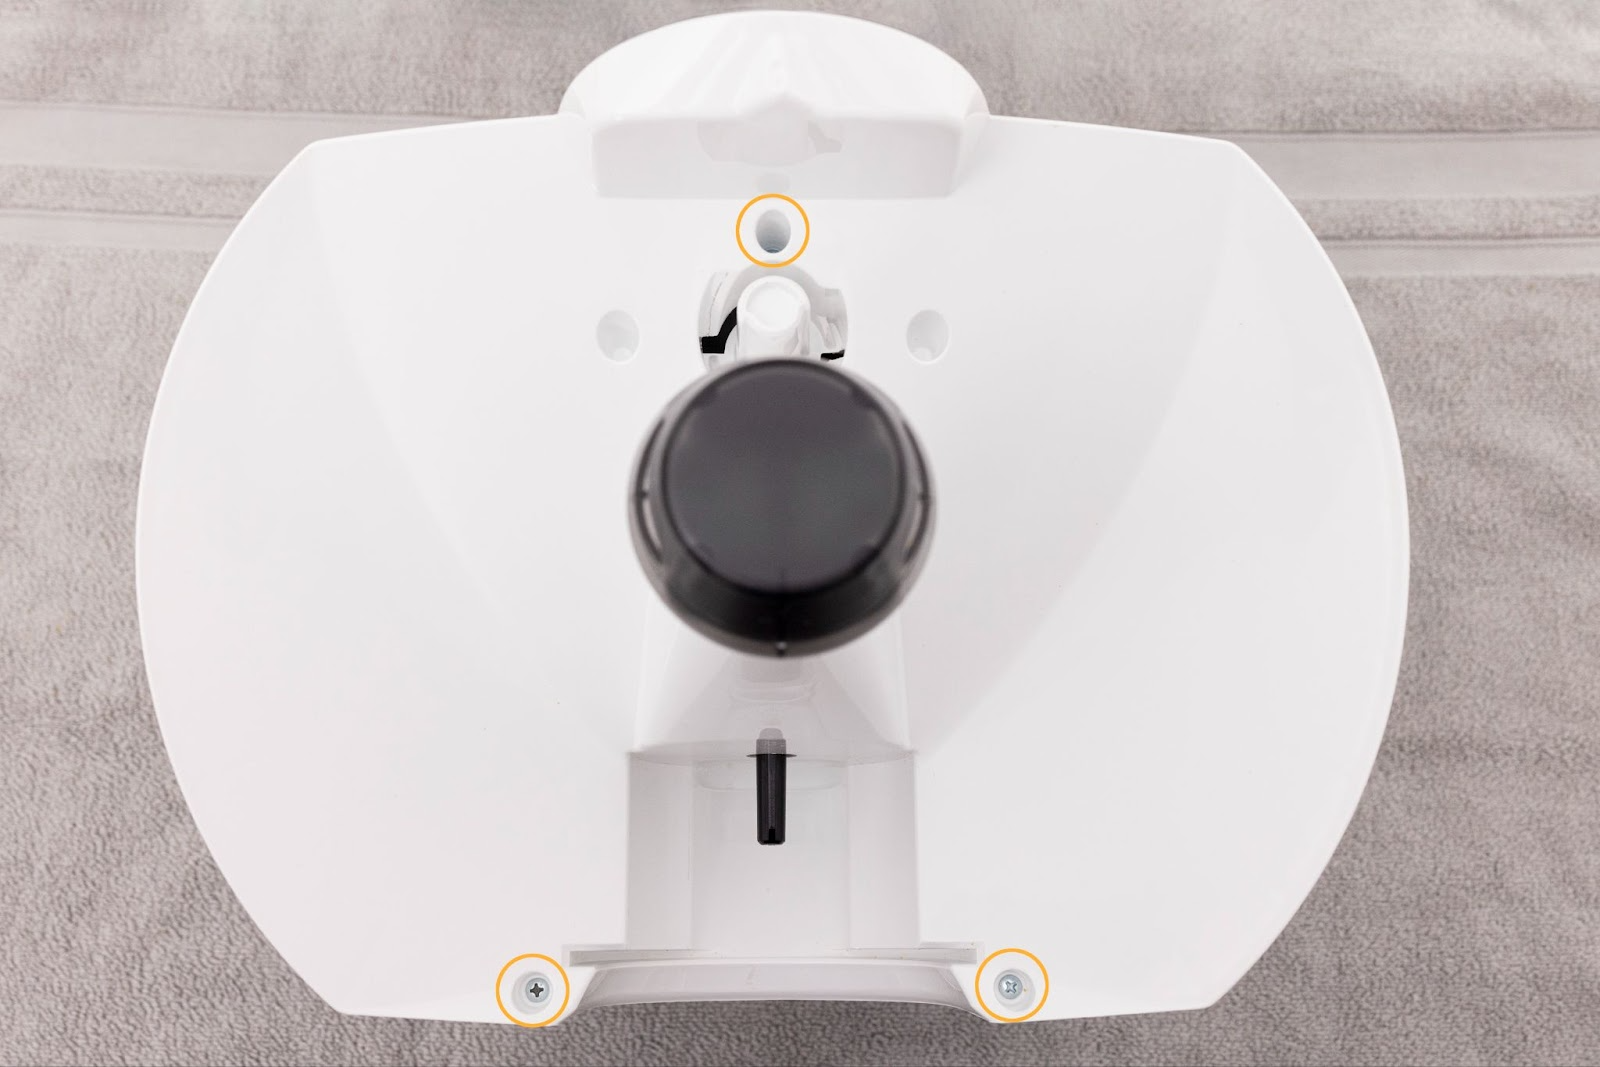
Remove the two screws in the bottom of the base.
![Removing the two screws in the bottom of Feeder-Robot's base.]()

Flip Feeder-Robot upright.
![Flipping Feeder-Robot upright]()

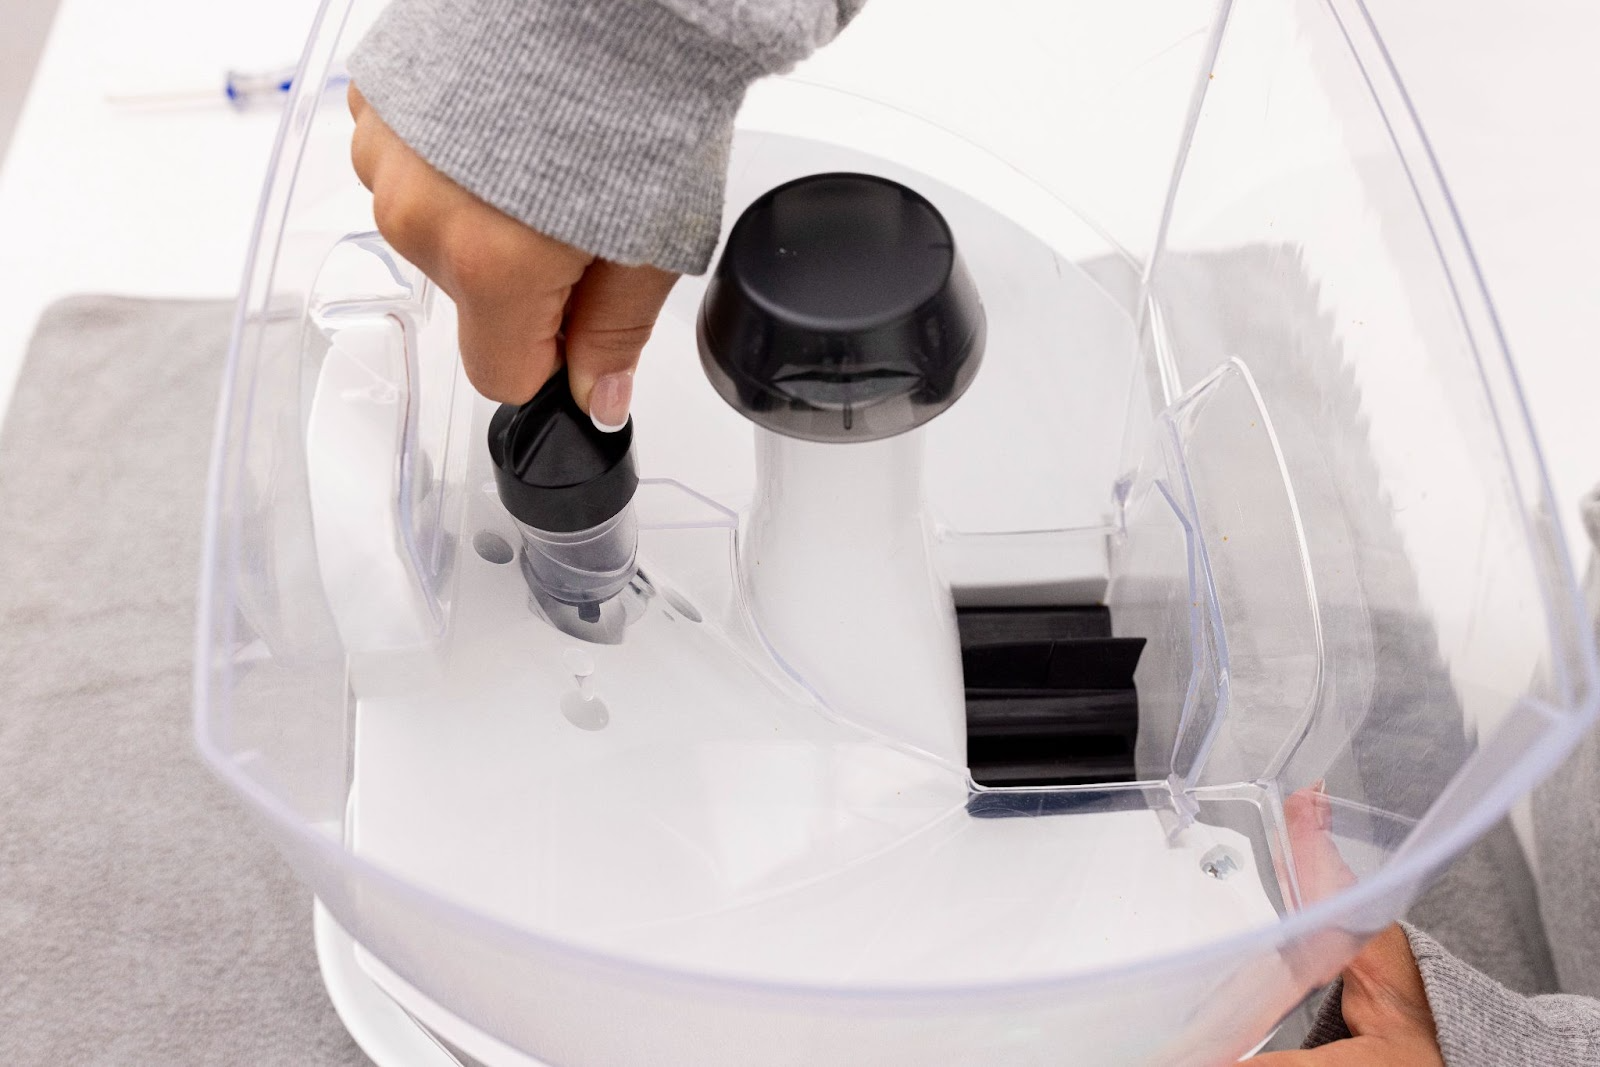
Remove the hopper by rotating the hopper lock knob counterclockwise. Lift the hopper away from the base of the unit.
![Removing the Feeder-Robot hopper by rotating the hopper lock knob counterclockwise. Lift the hopper away from the base of the unit]()

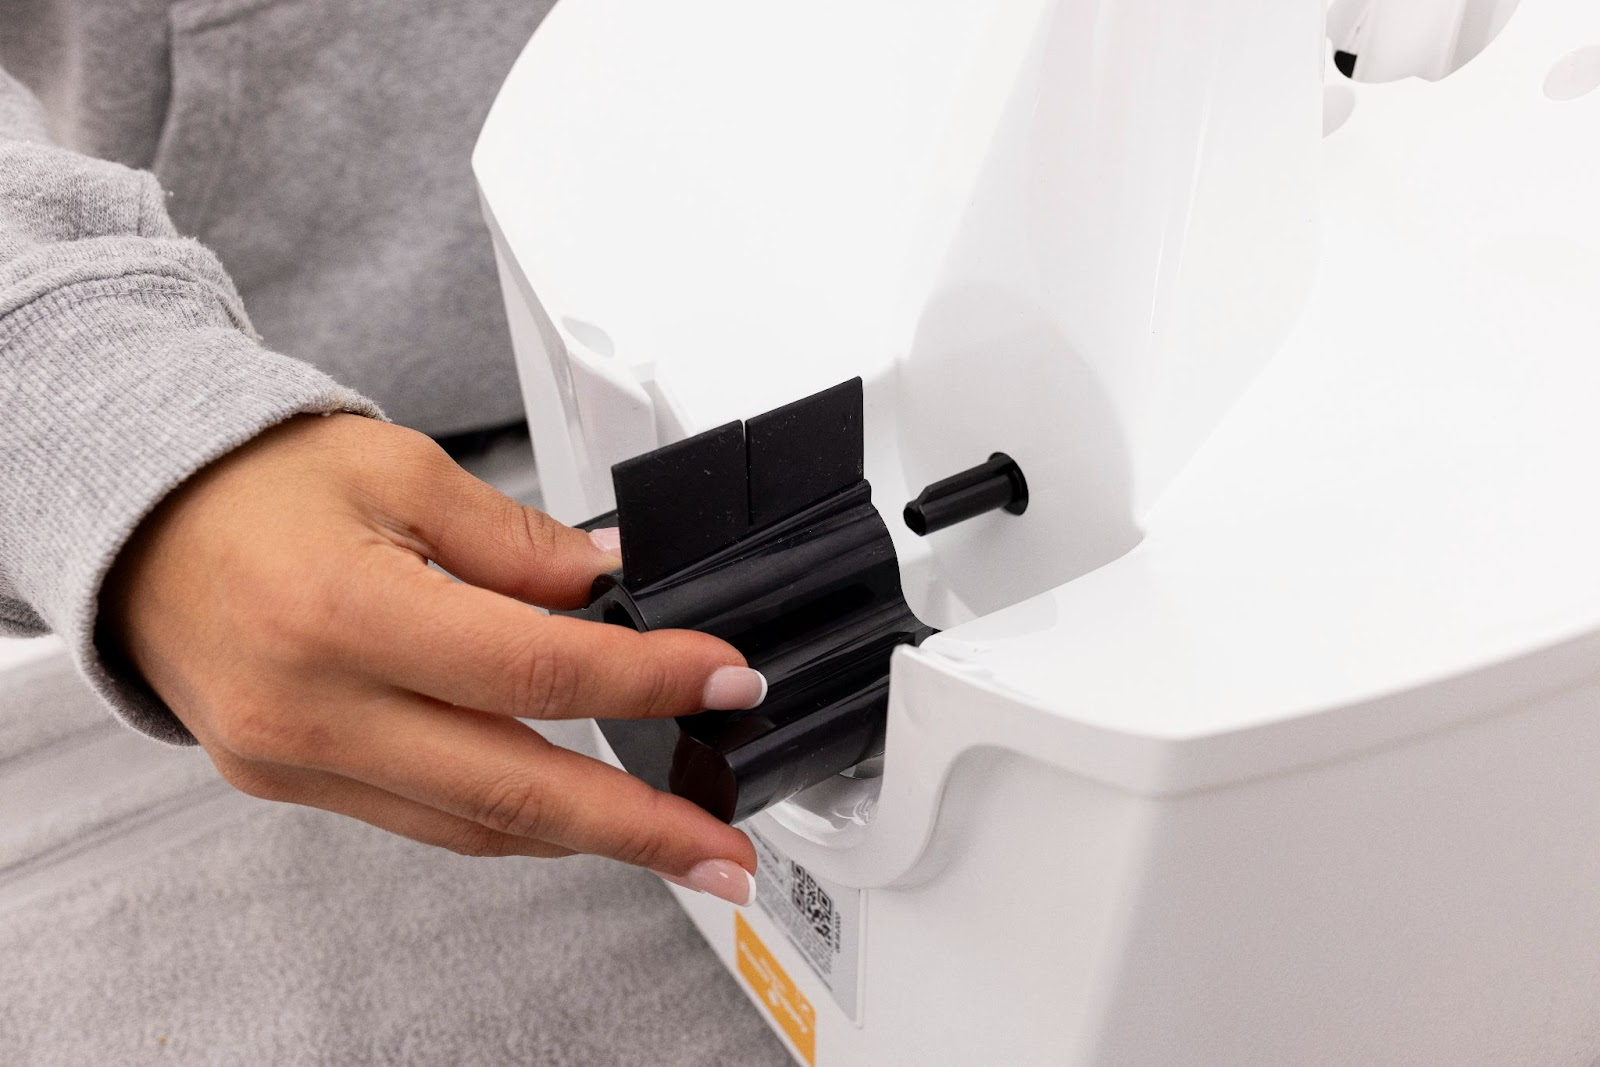
Remove the dispenser by simply sliding the dispenser away from the unit. The rubber dispenser flap can also be removed from the dispenser for cleaning.
![Removong the dispenser by simply sliding the dispenser away from the unit. The rubber dispenser flap can also be removed from the dispenser for cleaning]()
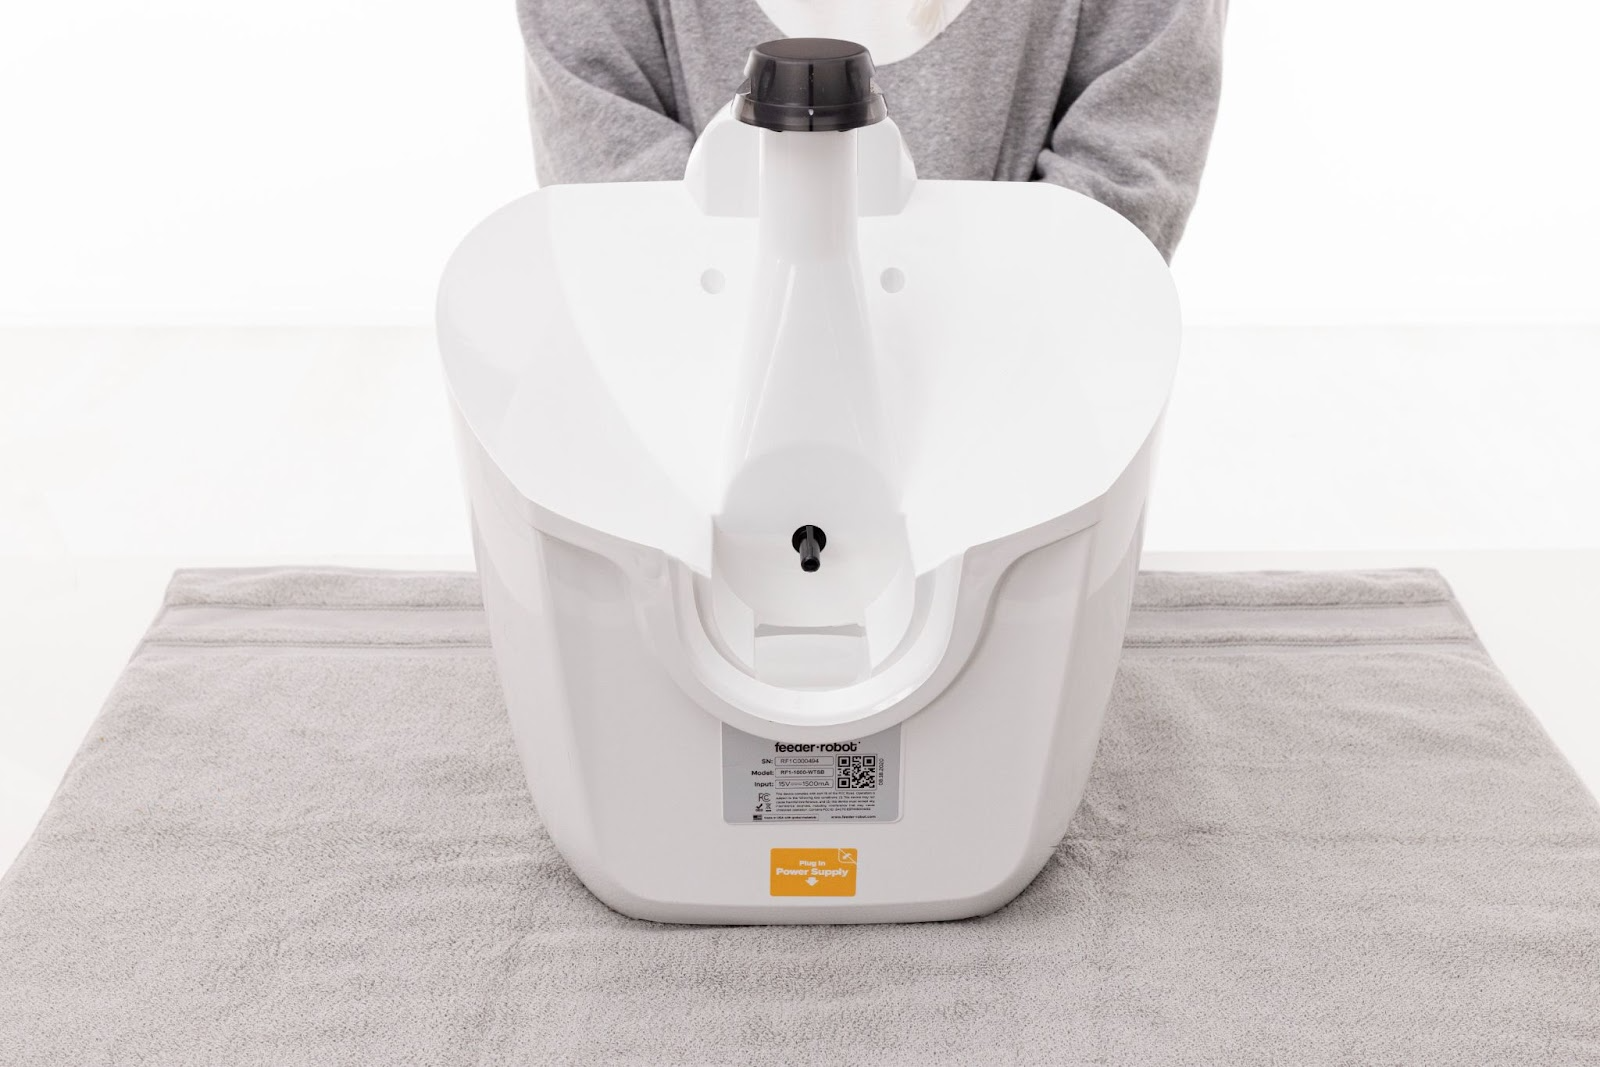
Note: This is how your unit will appear after removing the hopper insert, hopper, and dispenser.
![Feeder-Robot without the hopper insert, hopper, and dispenser]()
Remove three screws from the top of the base.
![Removing three screws from the top of the base]()

Replace the lid and make sure it locks in place with a “click.”
![Replacing the lid and make sure it locks in place]()

Flip over Feeder-Robot.
![Flipping over Feeder-Robot]()

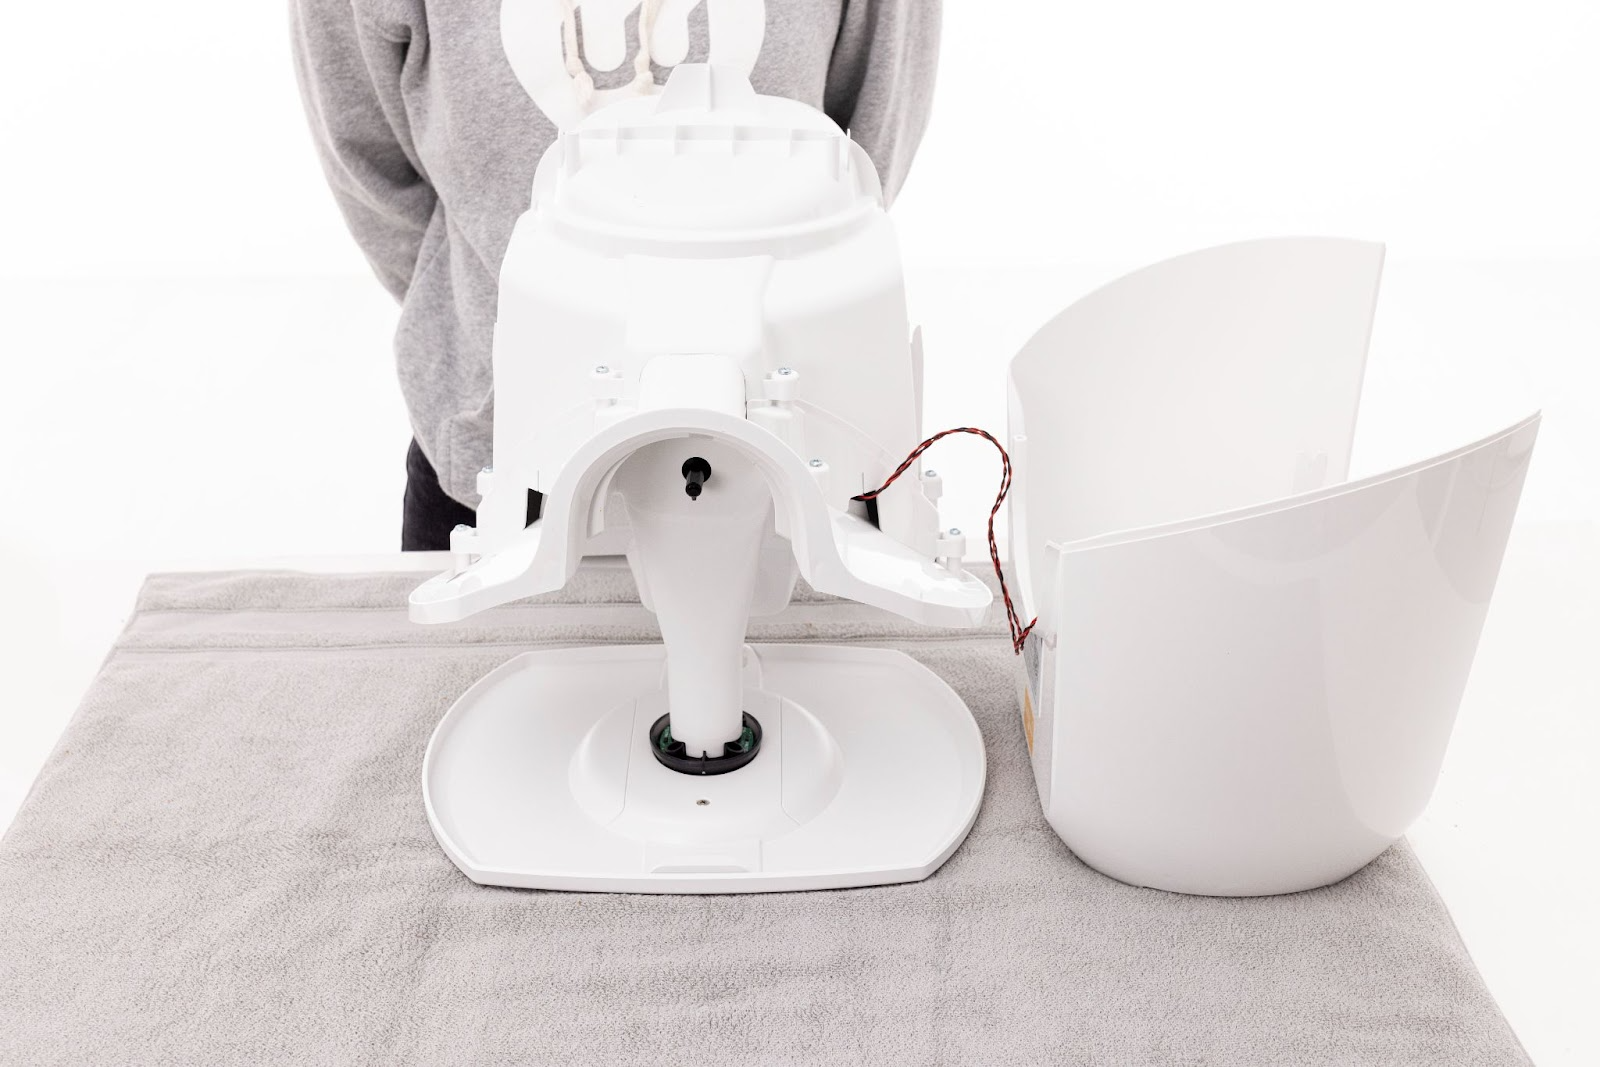
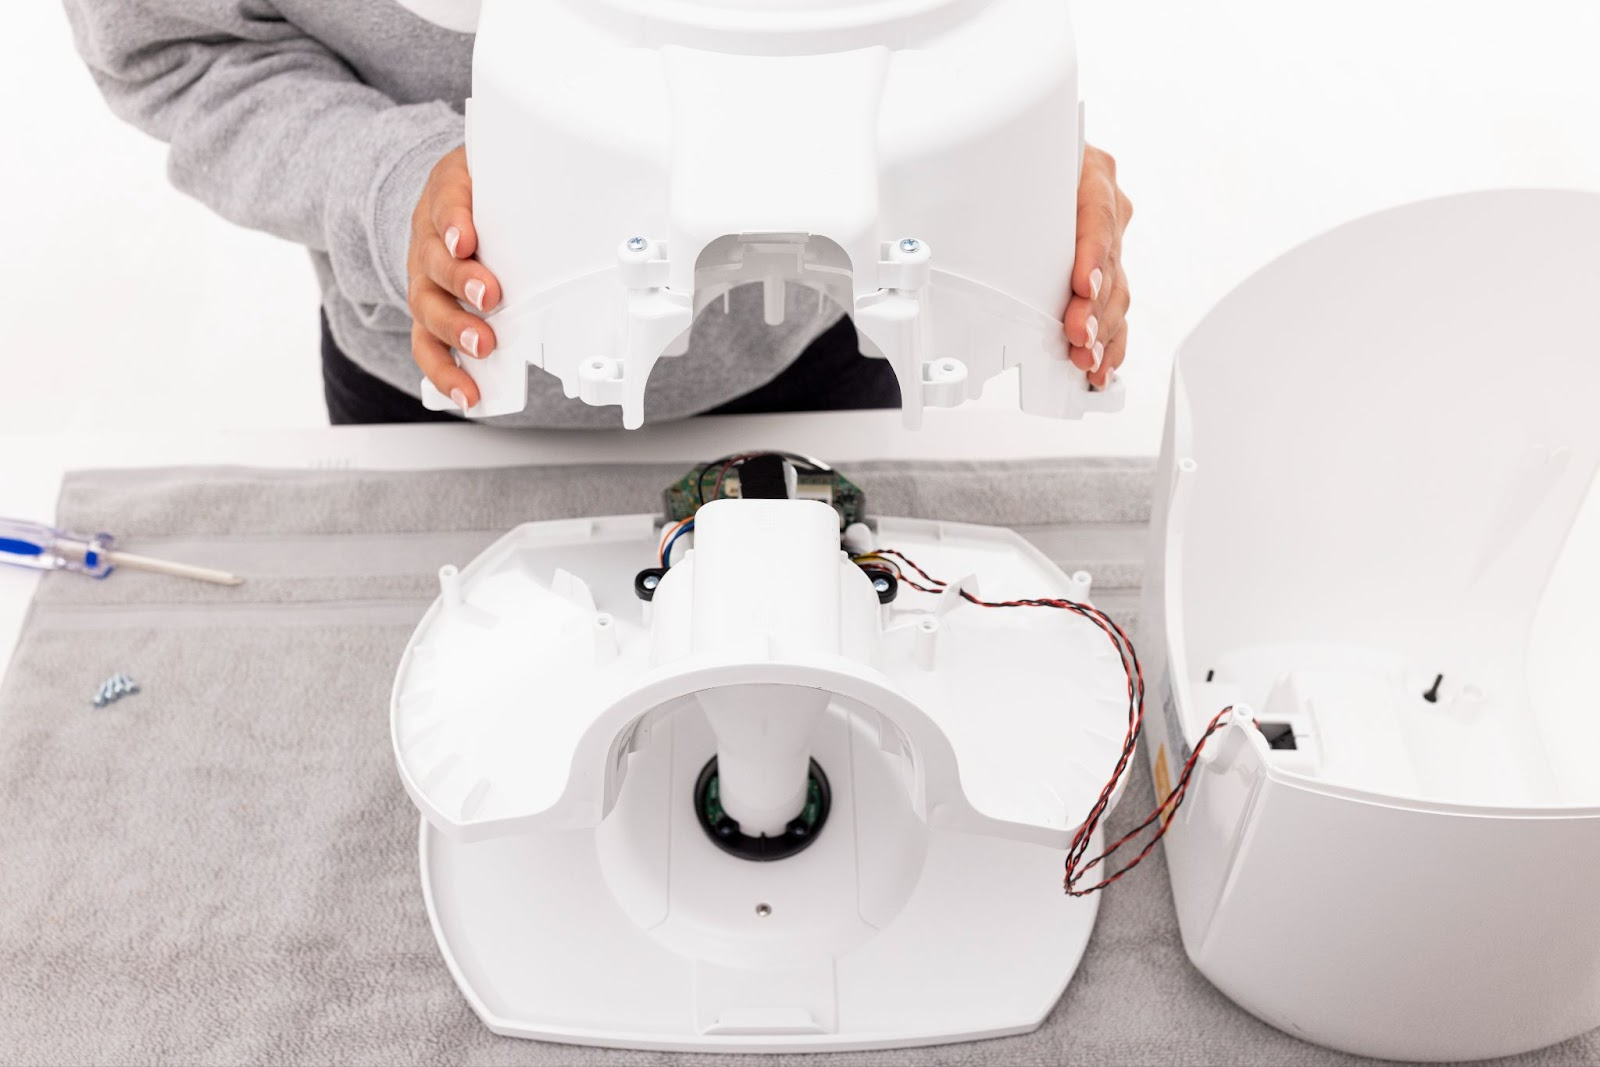
Separate the base from Feeder-Robot and set it aside—be aware that the wire harness is still connected to Feeder-Robot.
![Separating the base from Feeder-Robot and set it aside]()
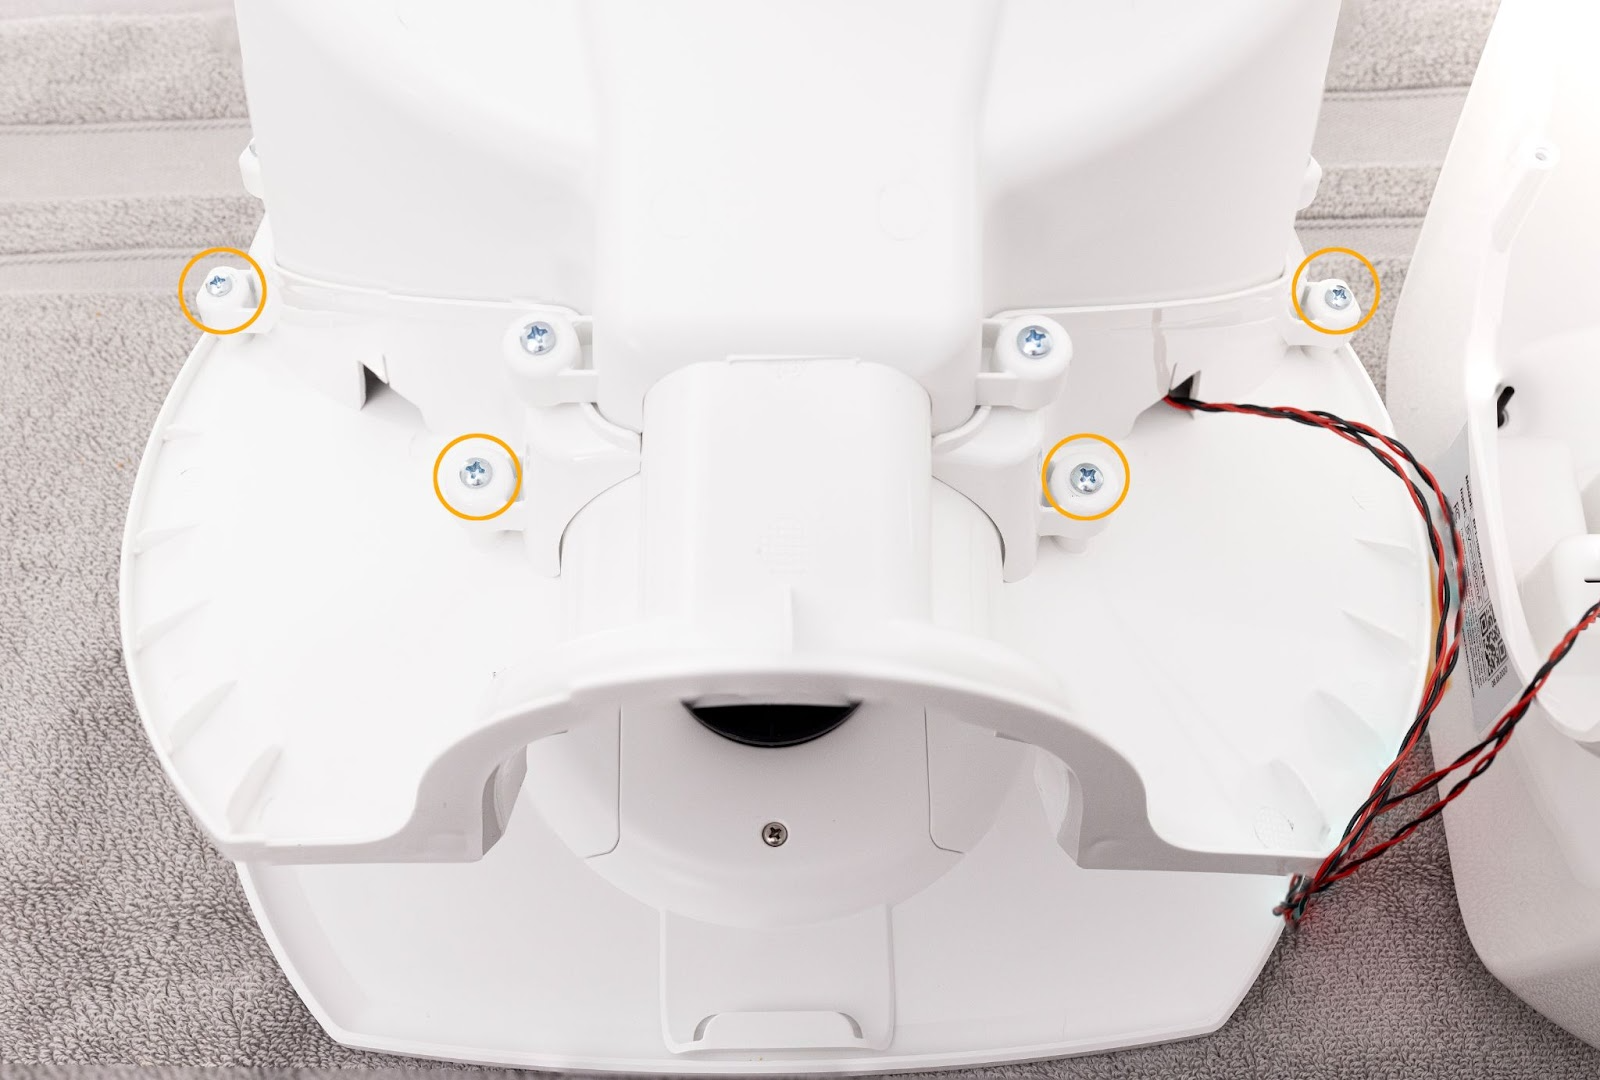
- Remove four screws from the bowl sub-assembly and set aside.
![Removing four screws from the bowl]()
![Setting Feeder-Robot aside]()
Removing the motor
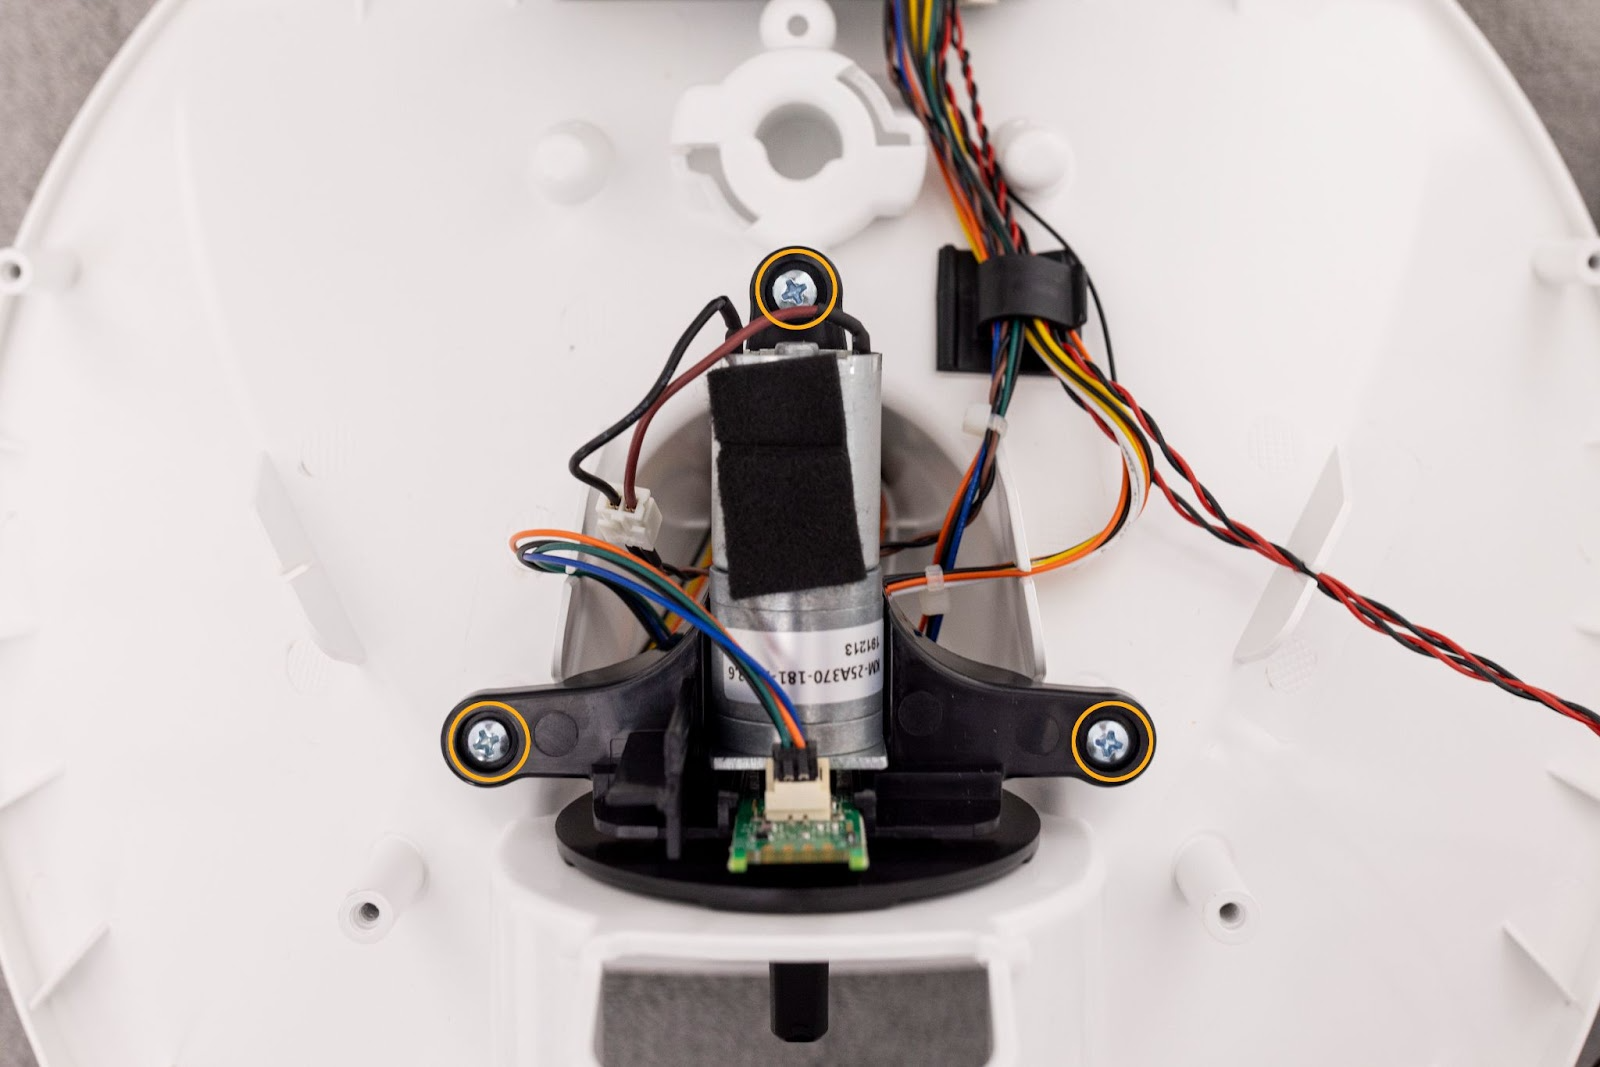
- Remove three screws from the motor bracket. (Note: If you lose any screws, you can purchase #6 x 1/2" Phillips-head screws at a hardware store.)
![Removing three screws from the motor bracket]()
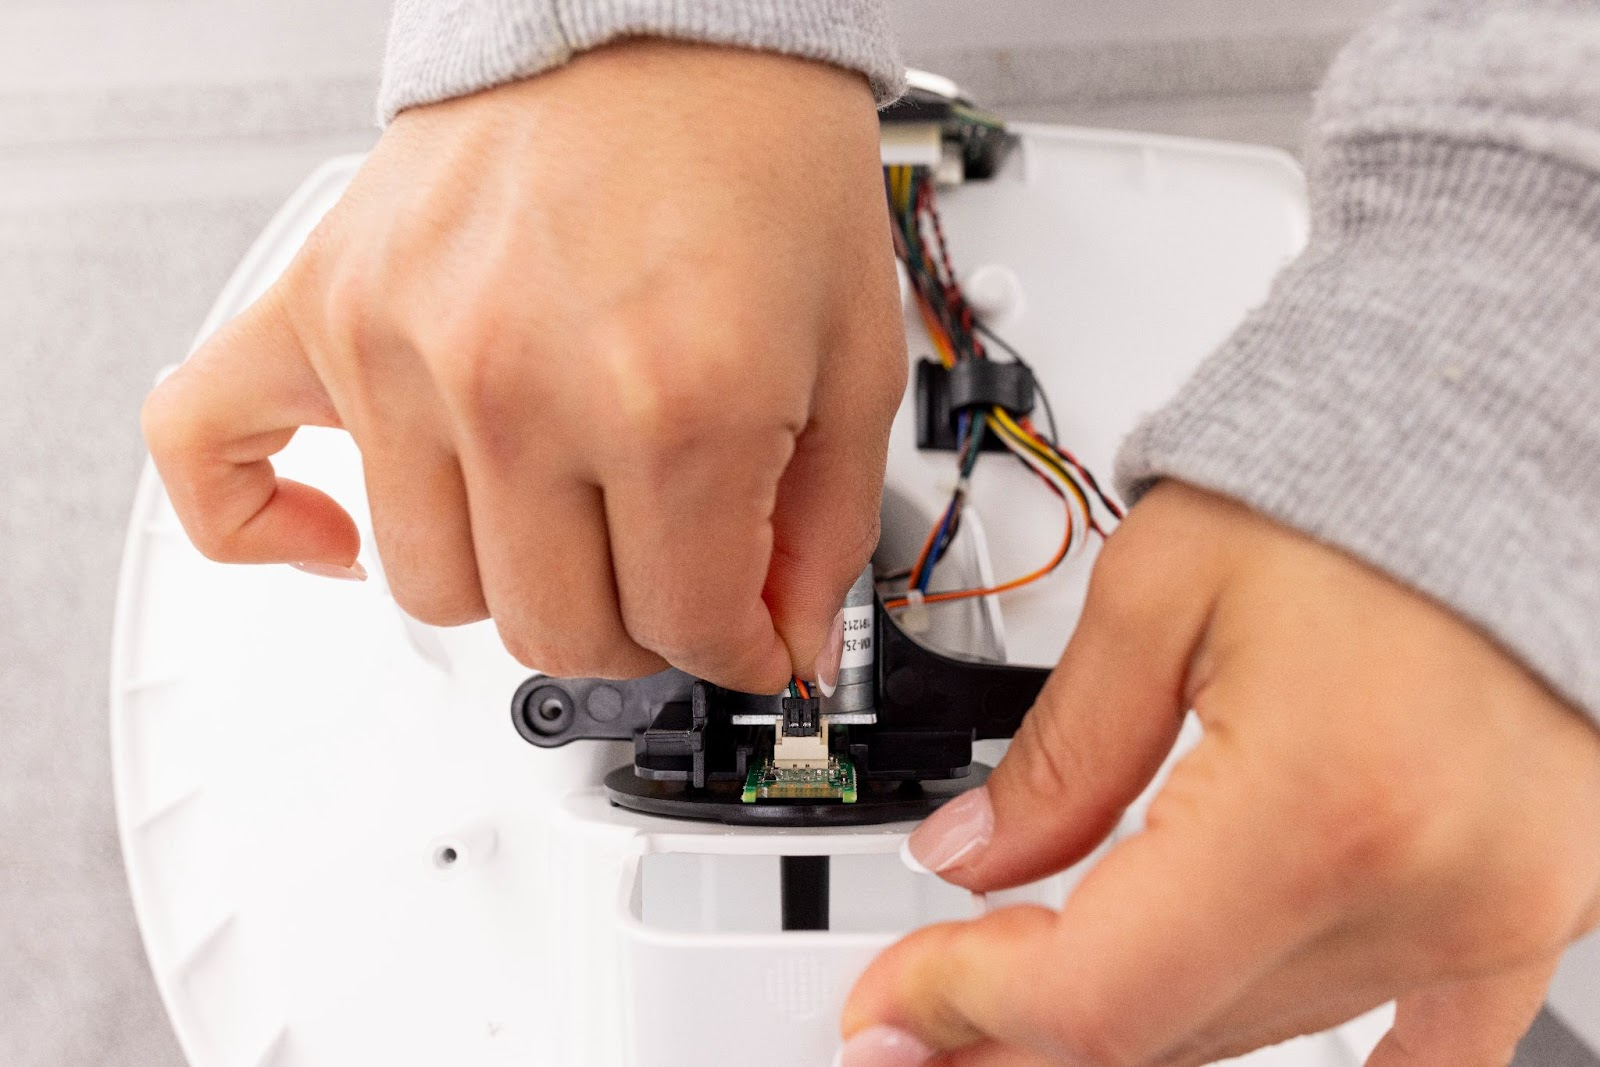
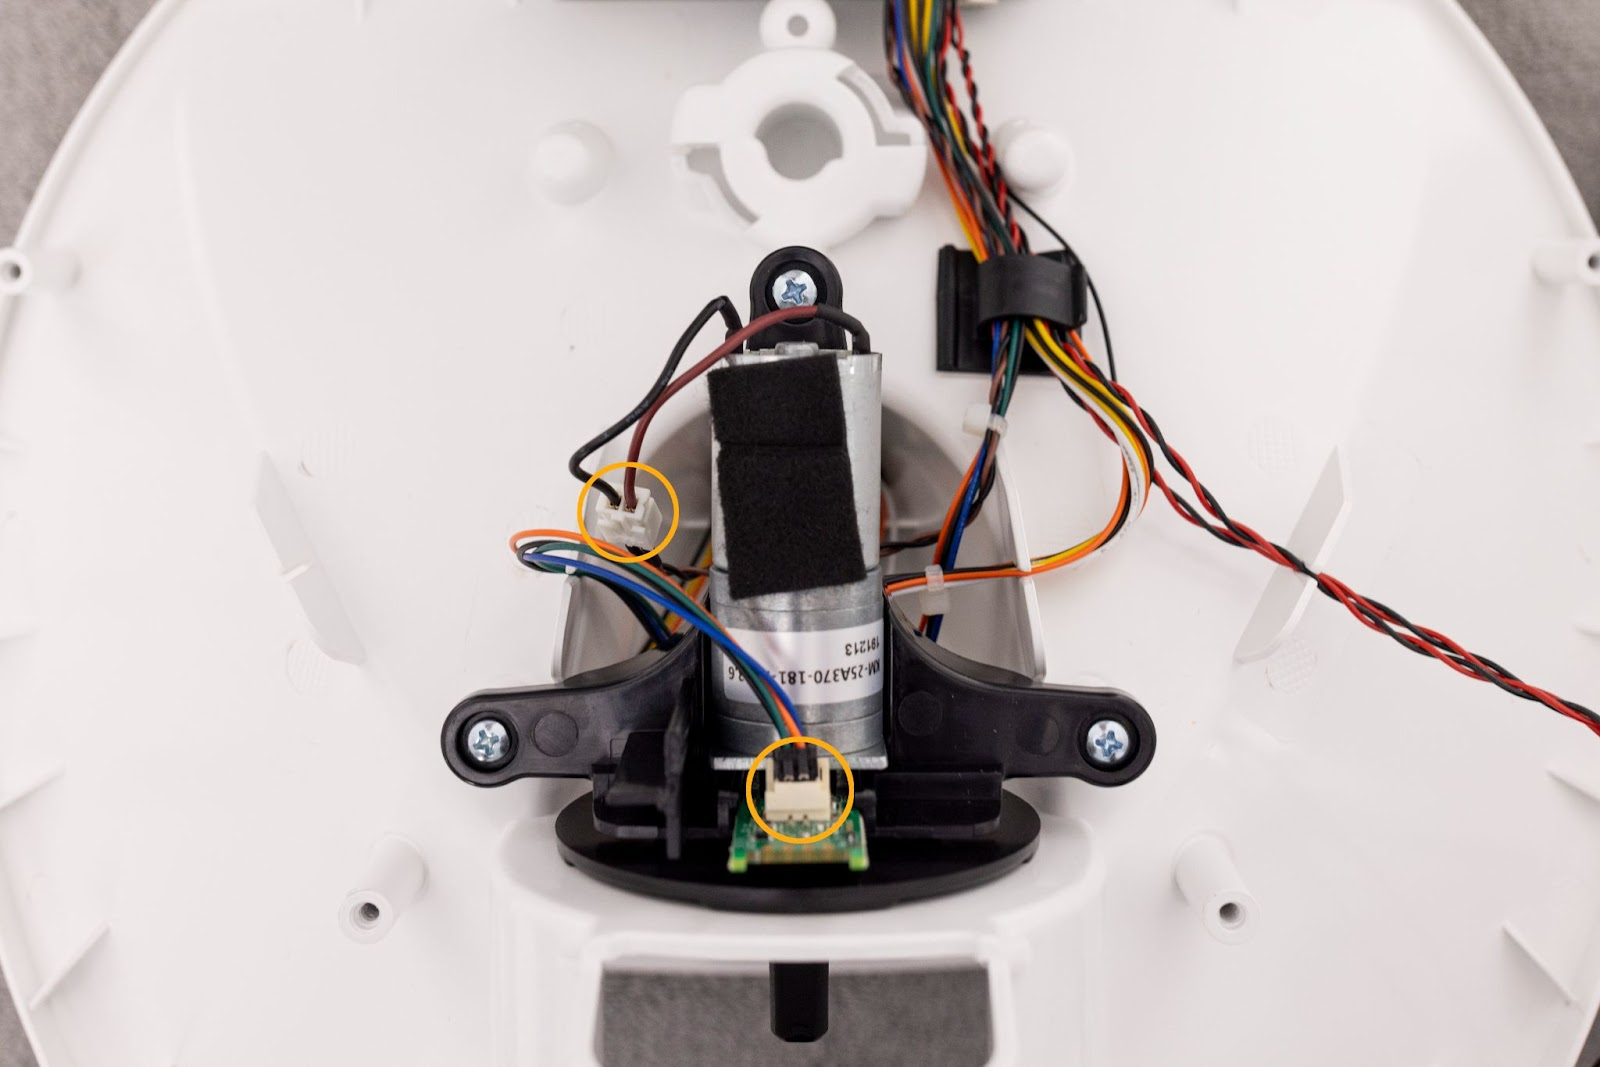
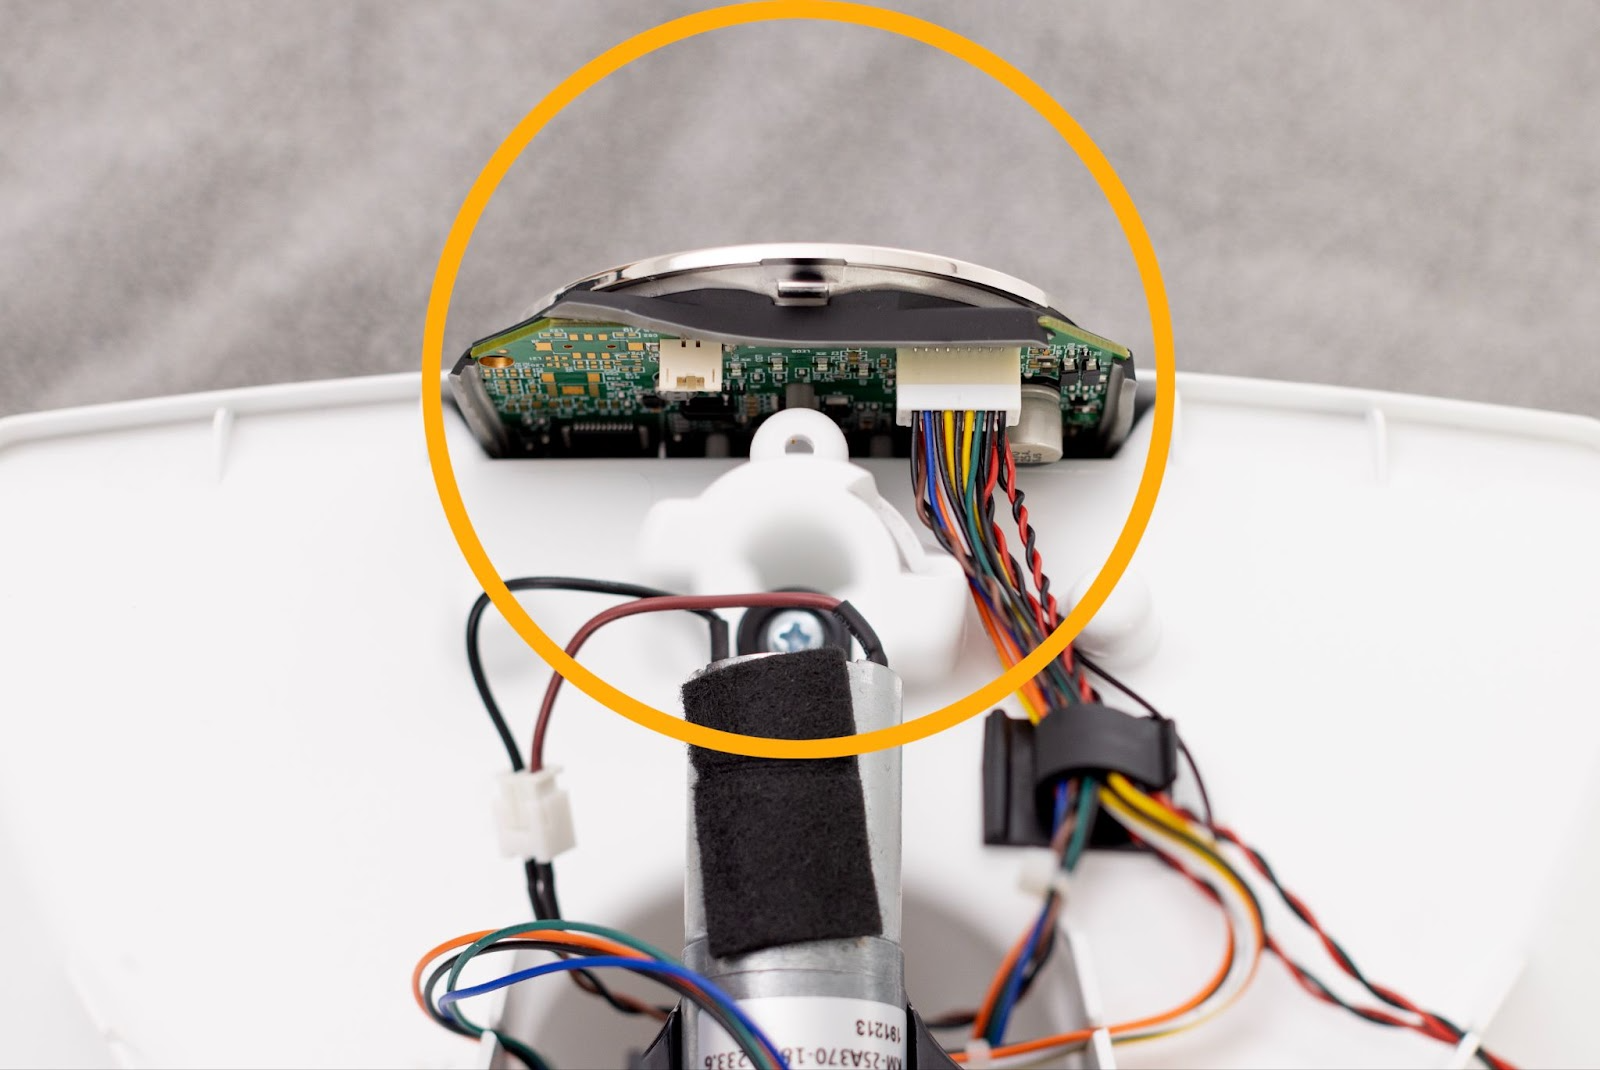
- Disconnect the motor connector and circuit board connector.
![Disconnecting the motor connector and circuit board connector]()
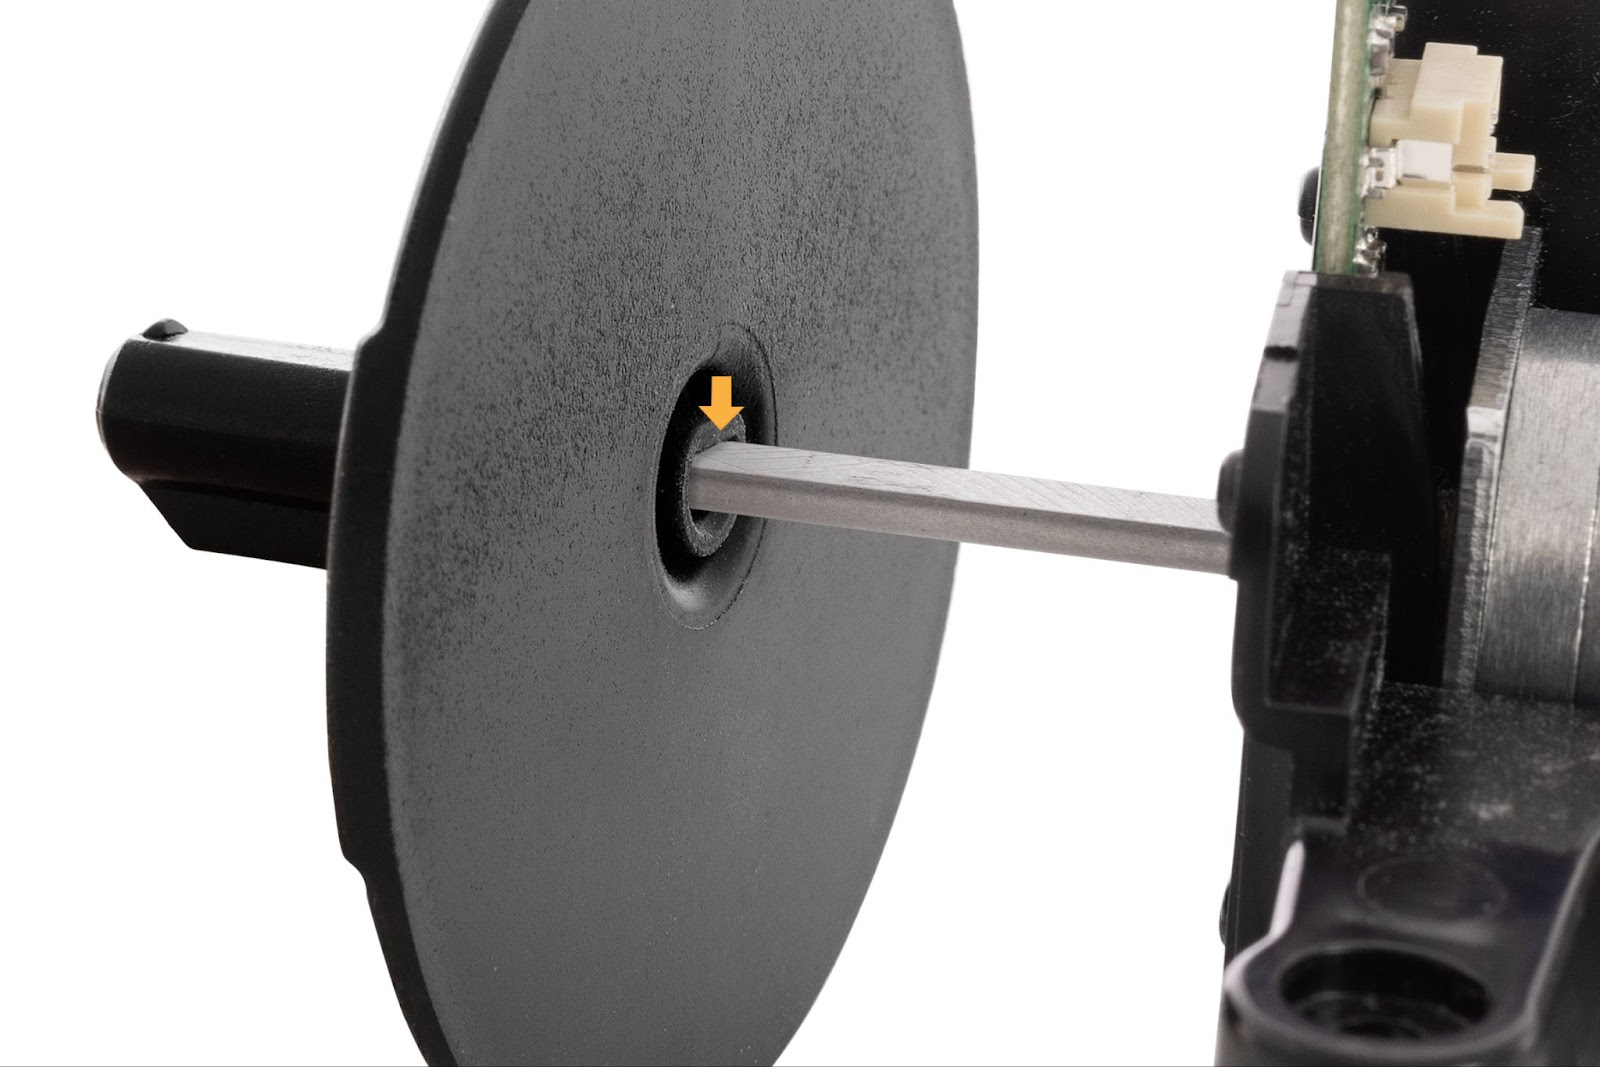
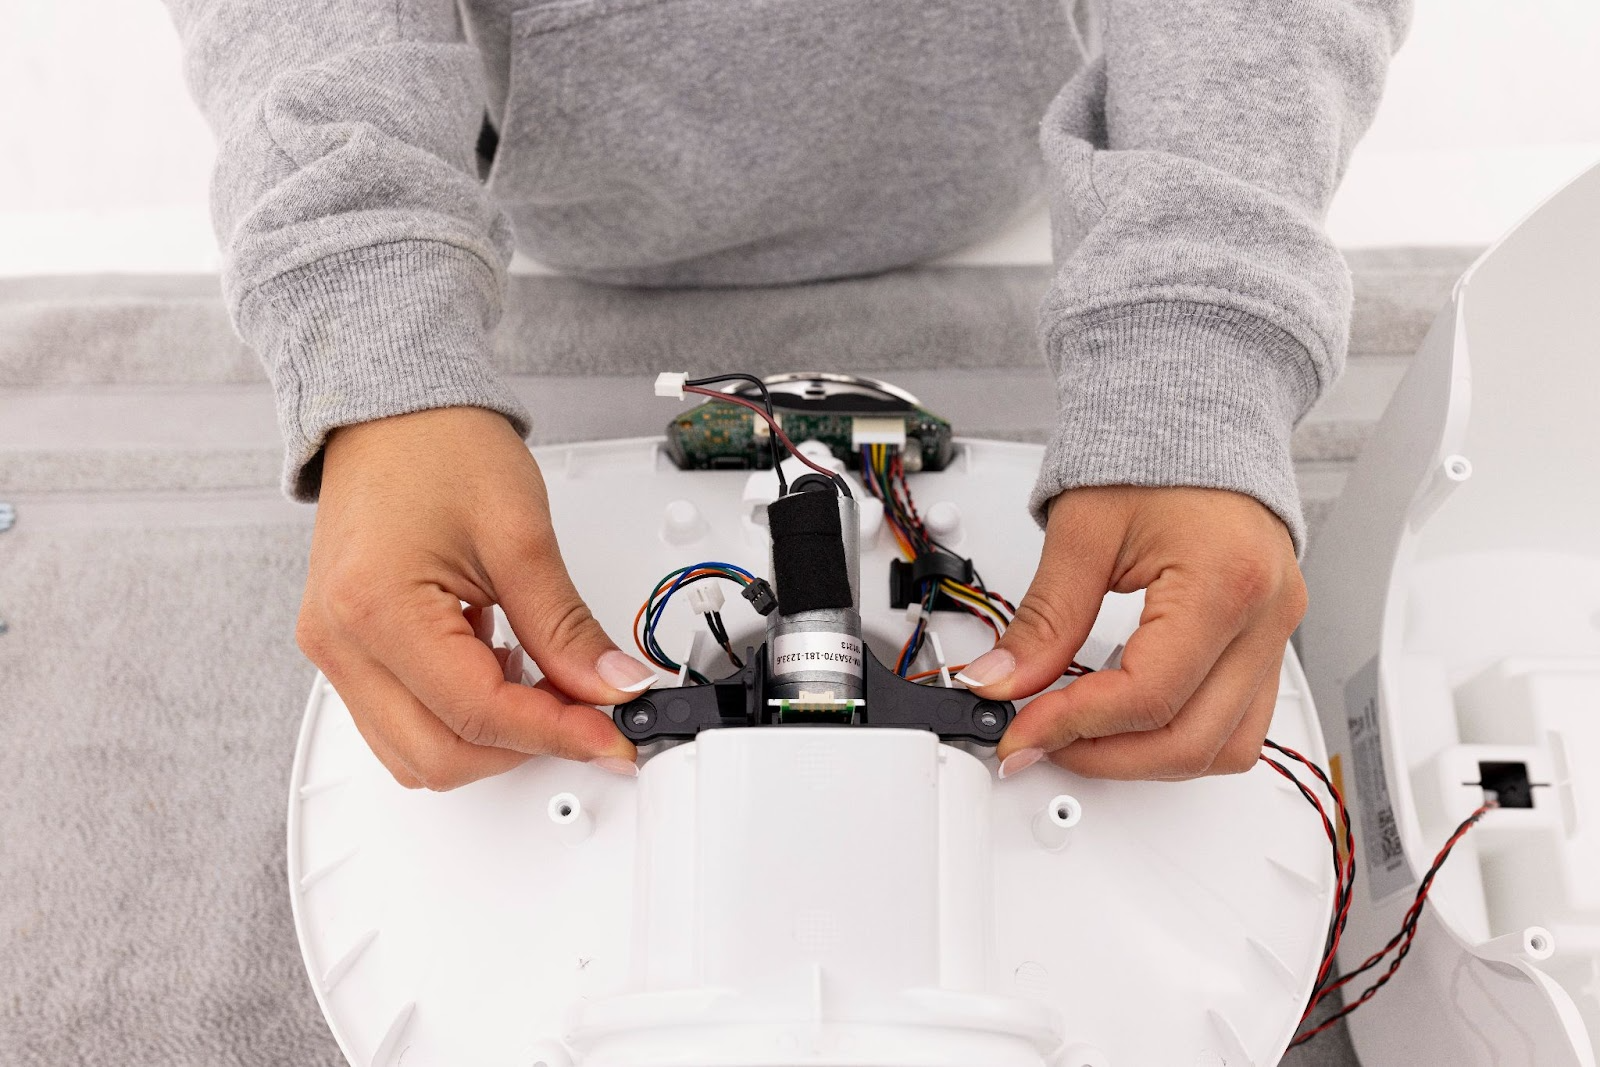
- Remove the motor assembly: Tilt the rear of the motor assembly upward and pull back.
![Removing the motor assembly: Tilting the rear of the motor assembly upward and pull back.]()
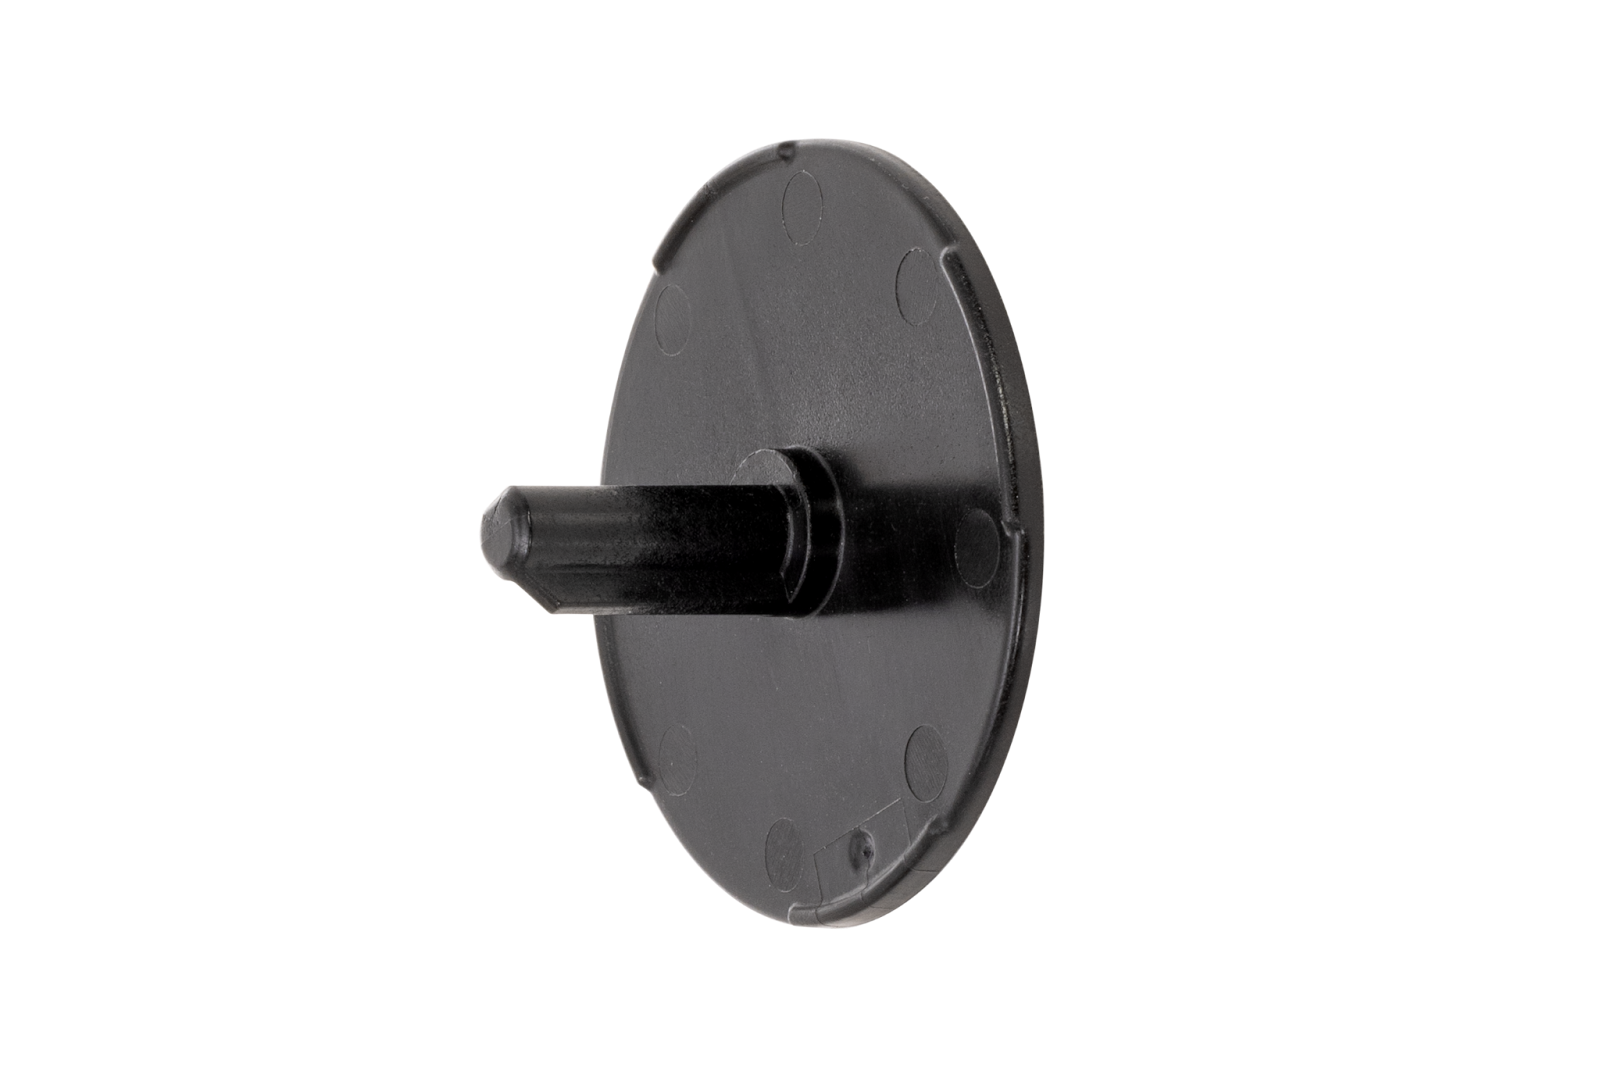
- Remove the black, circular dispenser adapter and set it aside to be used with the new motor assembly.
![Removing the black, circular dispenser adapter and set it aside to be used with the new motor assembly]()
- Dispose of the old motor assembly. (Recycle or throw it away—be sure to follow local regulations.)


Installing the motor
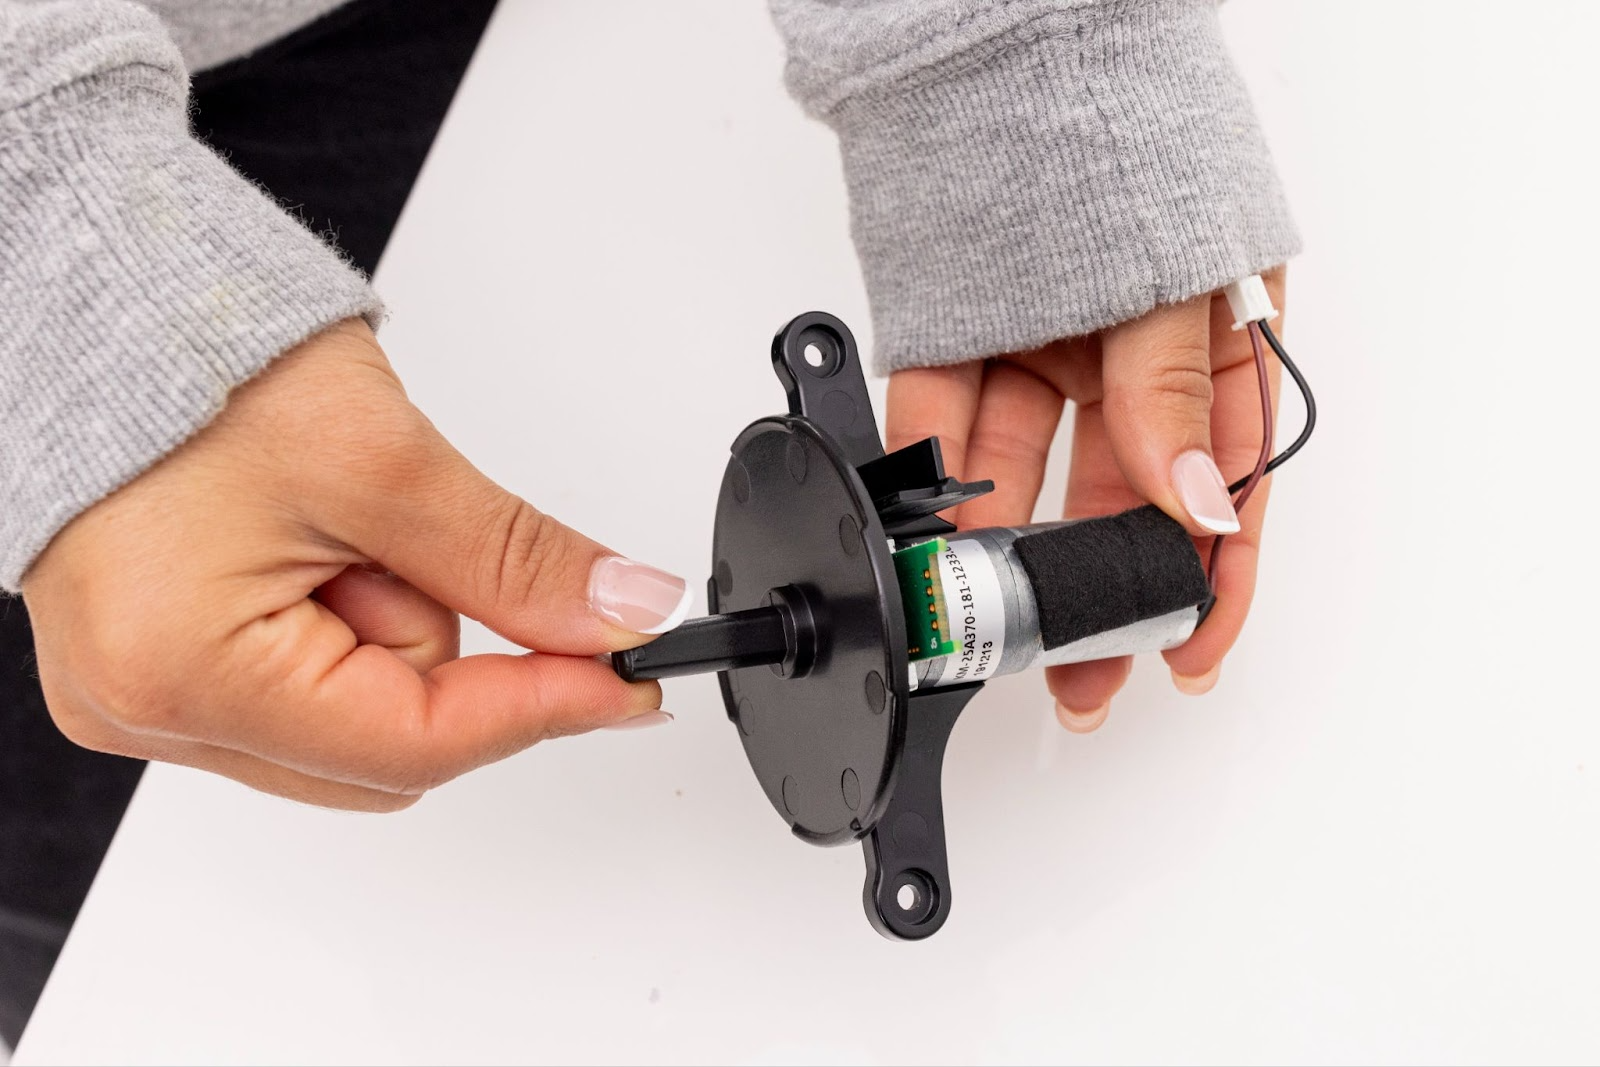
Slide the black, circular dispenser adapter onto the new motor assembly, ensuring the flat side of the dispenser adapter and flat edge of the motor assembly are facing up.
![Sliding the black, circular dispenser adapter onto the new motor assembly]()
![Sliding the black, circular dispenser adapter onto the new motor assembly]()
Reinstall the motor assembly to Feeder-Robot.
![Reinstalling the motor assembly to Feeder-Robot]()
Connect the motor connector and circuit board connector.
![Connecting the Feeder-Robot motor connector and circuit board connector]()
![]()
Install three screws to hold down the motor bracket.
![Installing three screws to hold down the motor bracket]()
Ensure wiring is all connected and wires are not positioned over the felt pad.
![Appropriate wiring and felt pad position]()
Ensure the keypad and mainboard are positioned correctly, so that the bowl subassembly can be installed.
![Appropriate keypad and mainboard position]()

Reassembly
- Reinstall the bowl sub-assembly and four screws.
![]()
- Note: Ensure the keypad and base are positioned correctly.
![Correct keypad positioning]()
- Note: Ensure the keypad and base are positioned correctly.
Reinstall the base to Feeder-Robot and two screws on the bottom of the base.
![Reinstalling the base to Feeder-Robot and two screws on the bottom of the base]()
![Reinstalling the base to Feeder-Robot and two screws on the bottom of the base.]()
Flip Feeder-Robot upright.
![Fliping Feeder-Robot upright.]()
Remove the lid.
![Removing the Feeder-Robot lid.]()
Reinstall three screws to the top of Feeder-Robot.
![Reinstall three screws to the top of Feeder-Robot.]()
![Reinstalling three screws to the top of Feeder-Robot.]()
Reinstall the dispenser, ensuring the text faces out.
![Reinstalling the dispenser, ensuring the text faces out]()
Reinstall the hopper, ensuring the hopper lock knob is vertical.
![Reinstalling the hopper, ensuring the hopper lock knob is vertical]()
Reinstall the hopper insert, ensuring the opening faces toward the back of the unit.
![Reinstalling the hopper insert, ensuring the opening faces toward the back of the unit]()
Place the hopper lid on by squeezing the release in the center of the lid, plug in Feeder-Robot, and power it on.
![Placing the hopper lid on by squeezing the release in the center of the lid]()
![plugging in Feeder-Robot, and powering it on]()
Perform a test dispense by pressing the ‘Feed’ button on the control panel.
![Performing a test dispense by pressing the ‘Feed’ button on the control panel]()
If successful the dispenser will rotate, then return to the home position.
Add food to the hopper or hopper insert if using.
![Food in the hopper]()
Replace the lid and make sure it locks in place with a “click.”
![Replacing the lid]()
If not successful, check that your hopper and/or hopper insert are seated correctly and retrace these steps for troubleshooting.


Light patterns/symptoms will be resolved by a motor replacement:
Feeder-Robot not dispensing meals or snacks:
Perform troubleshooting steps; the motor may need to be replaced if no other cause is identified.
App notification for Sensor Fault:
Perform troubleshooting steps; the motor or potentiometer has failed.
Power Button light:
Flashing Purple (motor disconnected)
Motor may have internal failure or wiring that has gone bad.
Solid Purple (motor fault)
Motor or potentiometer has failed.
![Feeder-Robot with motor or potentiometer failing]()
Status Indicator Light:
Flashing Red (motor jammed)
Clear any items that may be jamming the dispenser. If troubleshooting fails, the motor may need to be replaced.


Didn't find what you're looking for?
Phone and Chat support available Mon-Fri: 9AM-7PM EST and Sat: 9AM-5PM EST, or submit a ticket anytime.