The store will not work correctly in the case when cookies are disabled.

Litter-Robot 4: LitterHopper™ and bonnet installation guide
The LitterHopper is designed to automatically maintain the optimal litter bed level within the globe of your Litter-Robot 4. The 'default' optimal litter bed level is just below the MAX fill line inside the globe. Litter-Robot 4 uses sensors to measure the height of the litter bed level at the end of each clean cycle. If the sensors determine that the litter bed level is below the optimal level, then the LitterHopper will dispense litter into the globe during the NEXT clean cycle. When dispensing, the globe may momentarily pause rotation.
Tools Required: None
Parts Included:
LitterHopper
Holds approximately 13 cups (3.25 liters) of litter that is automatically dispensed as needed to maintain the optimal litter level in the Litter-Robot 4.
LitterHopper Bonnet
Replaces the standard Litter-Robot 4 Bonnet and provides features to attach the LitterHopper.
Anti-Tip Guard
Attaches to the bottom of the Litter-Robot 4 to provide support in the event of accidental tipping.
LitterHopper Key
Device used to direct litter from the LitterHopper into the Litter-Robot 4.
LitterHopper™ features
![Infographic of LitterHopper showing the Lid, Lid Button, Lifting Tab, Fill Line, and Lifting Tab]()
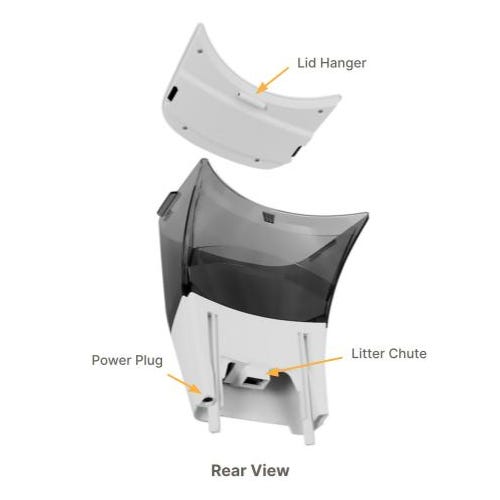
![Infographic of LitterHopper showing the Lid Hanger, Power Plug, and Litter Chute.]()

- Lid buttons: Squeeze together to release and remove the lid from the LitterHopper.
- Lifting tabs: Used to lift the LitterHopper during installation and removal from Litter-Robot 4.
- MAX fill line: Maximum fill level of litter in the LitterHopper.
- Lid hanger: Hook feature for hanging the lid on the edge of the hopper when refilling with litter.
- Litter chute: Opening where litter enters Litter-Robot 4.
- Power plug: Connection where the LitterHopper receives electrical power from Litter-Robot 4.
Step 1: Check your firmware version
- Open the Whisker app on your mobile device. (See how to onboard your unit if you have not done so already.)
- Check your Litter-Robot 4 settings to verify you are updated to the latest firmware version. (Note: Screens may vary as the app gets updated.)
Step 2: Prepare your Litter-Robot 4® (Disassembly)
- Make sure the unit is in the Home/Ready position. Press the Power button to turn the unit off. Move the unit away from any walls or furniture so you have room to disassemble. It may be necessary to unplug the power supply from the wall in order to do so.
- Remove the fence and camera mount from the bezel if either is installed.
![Image removing the Litter-Robot 4 Fence.]()
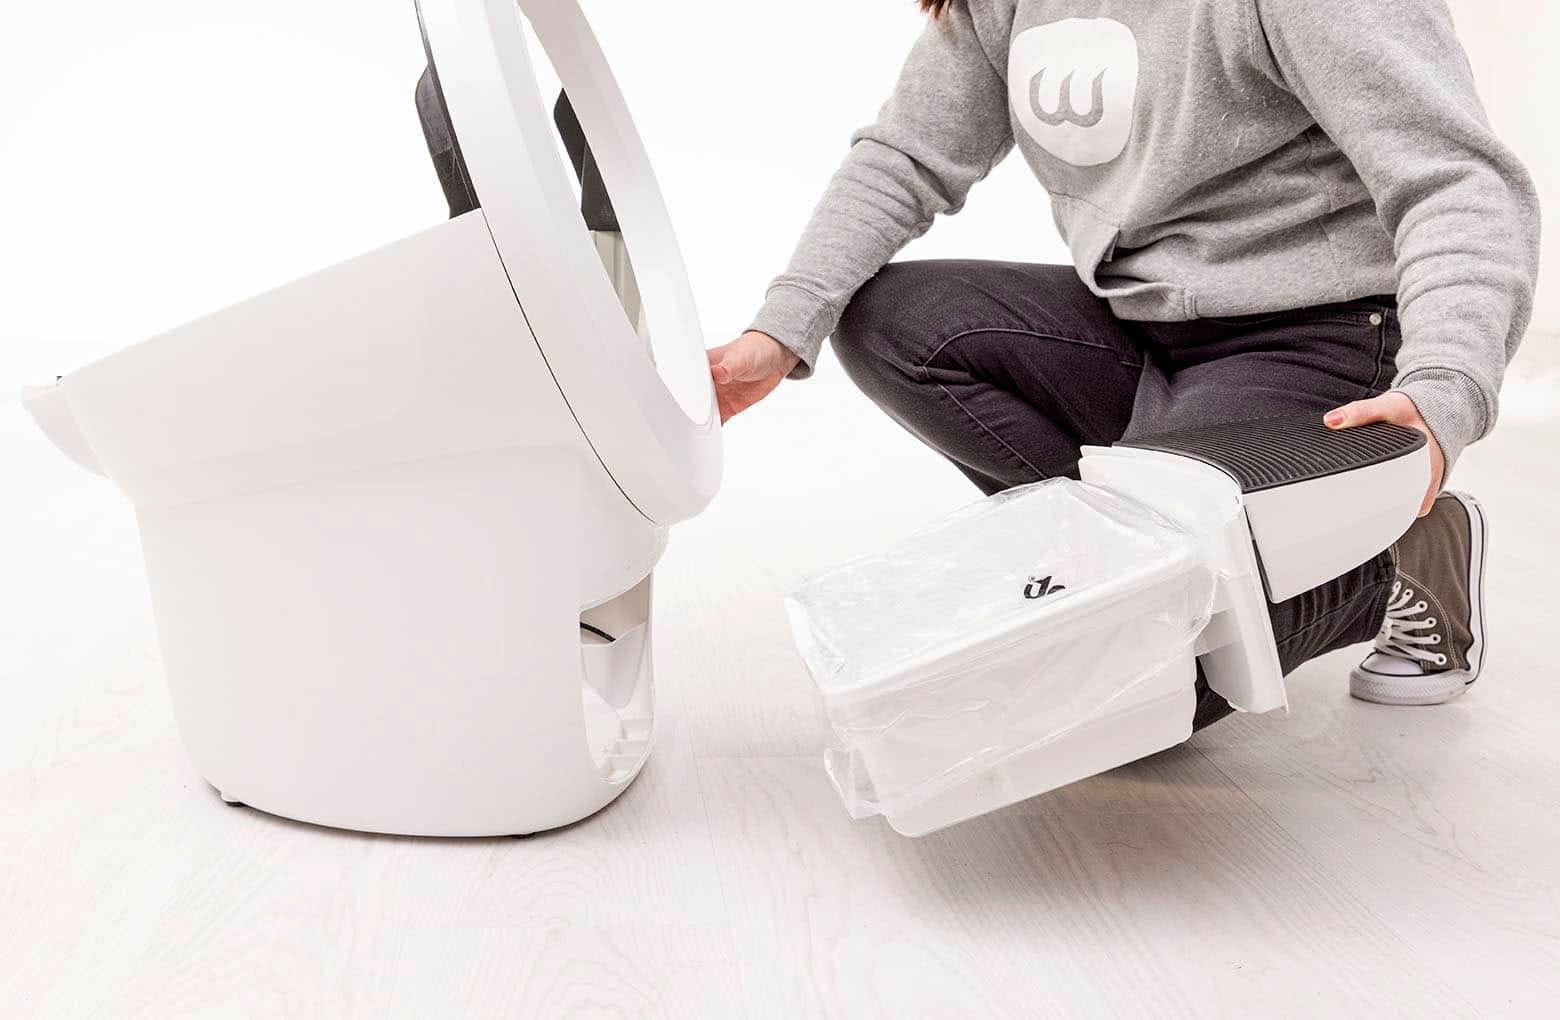
- Remove the waste drawer.
![Image of removing the waste drawer from the Litter-Robot 4.]()
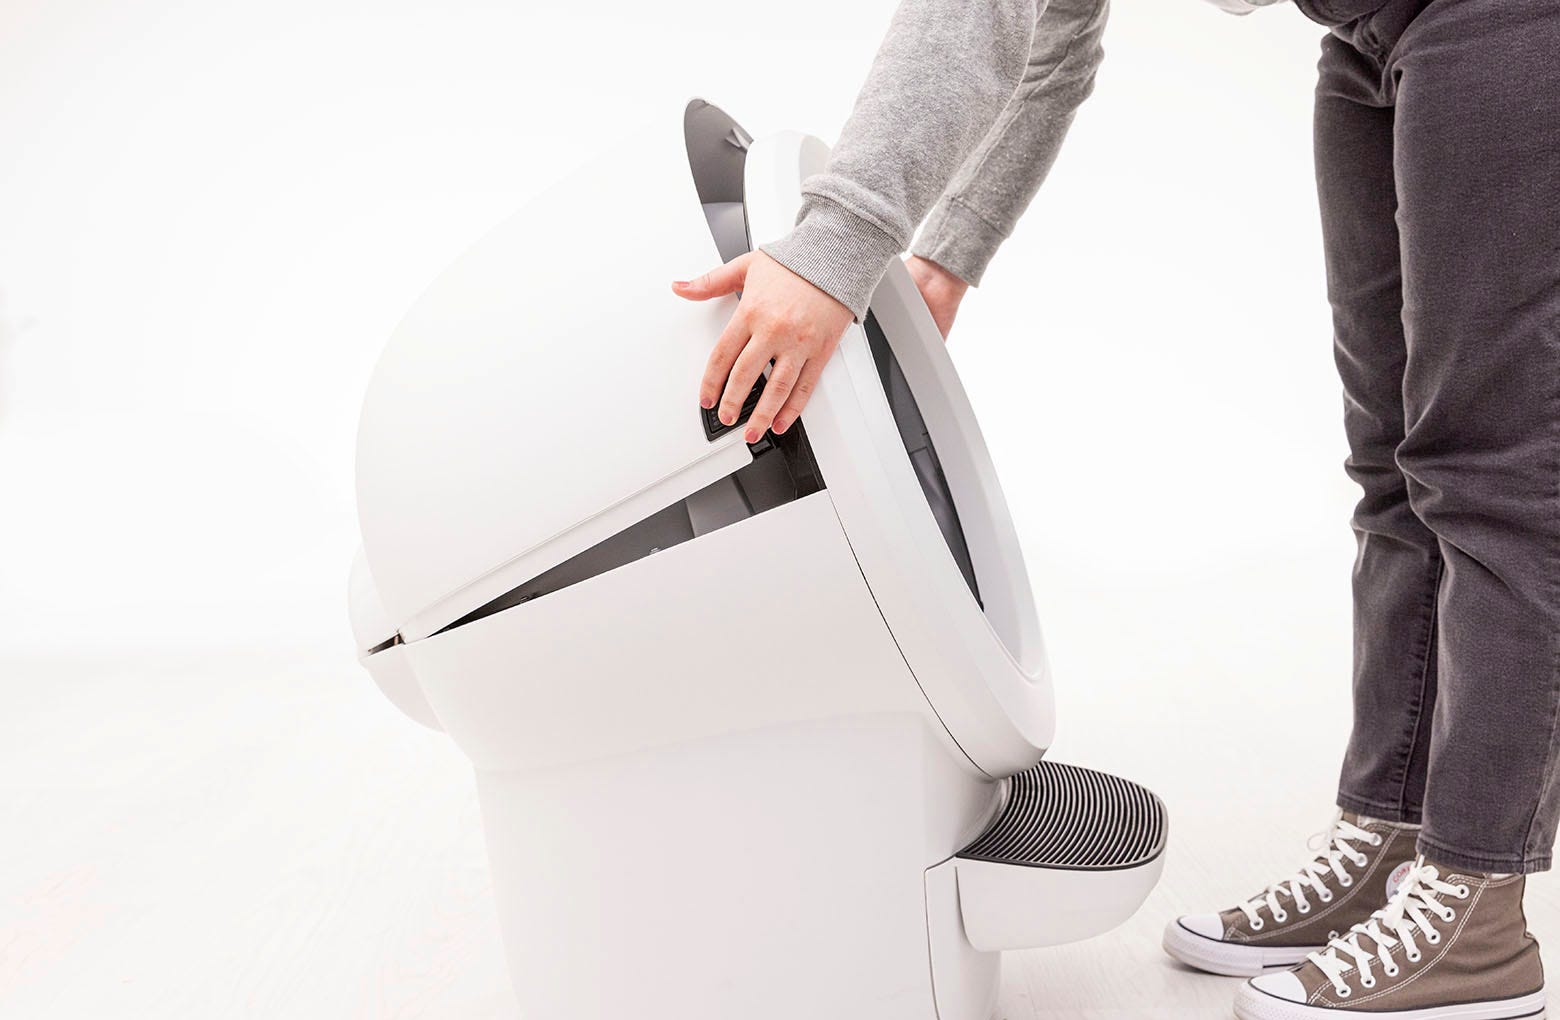
- Remove the bonnet:
Press and hold the latches on both sides of the bonnet, then lift and rotate the bonnet to its open position.
![Image removing the Litter-Robot 4 bonnet]()
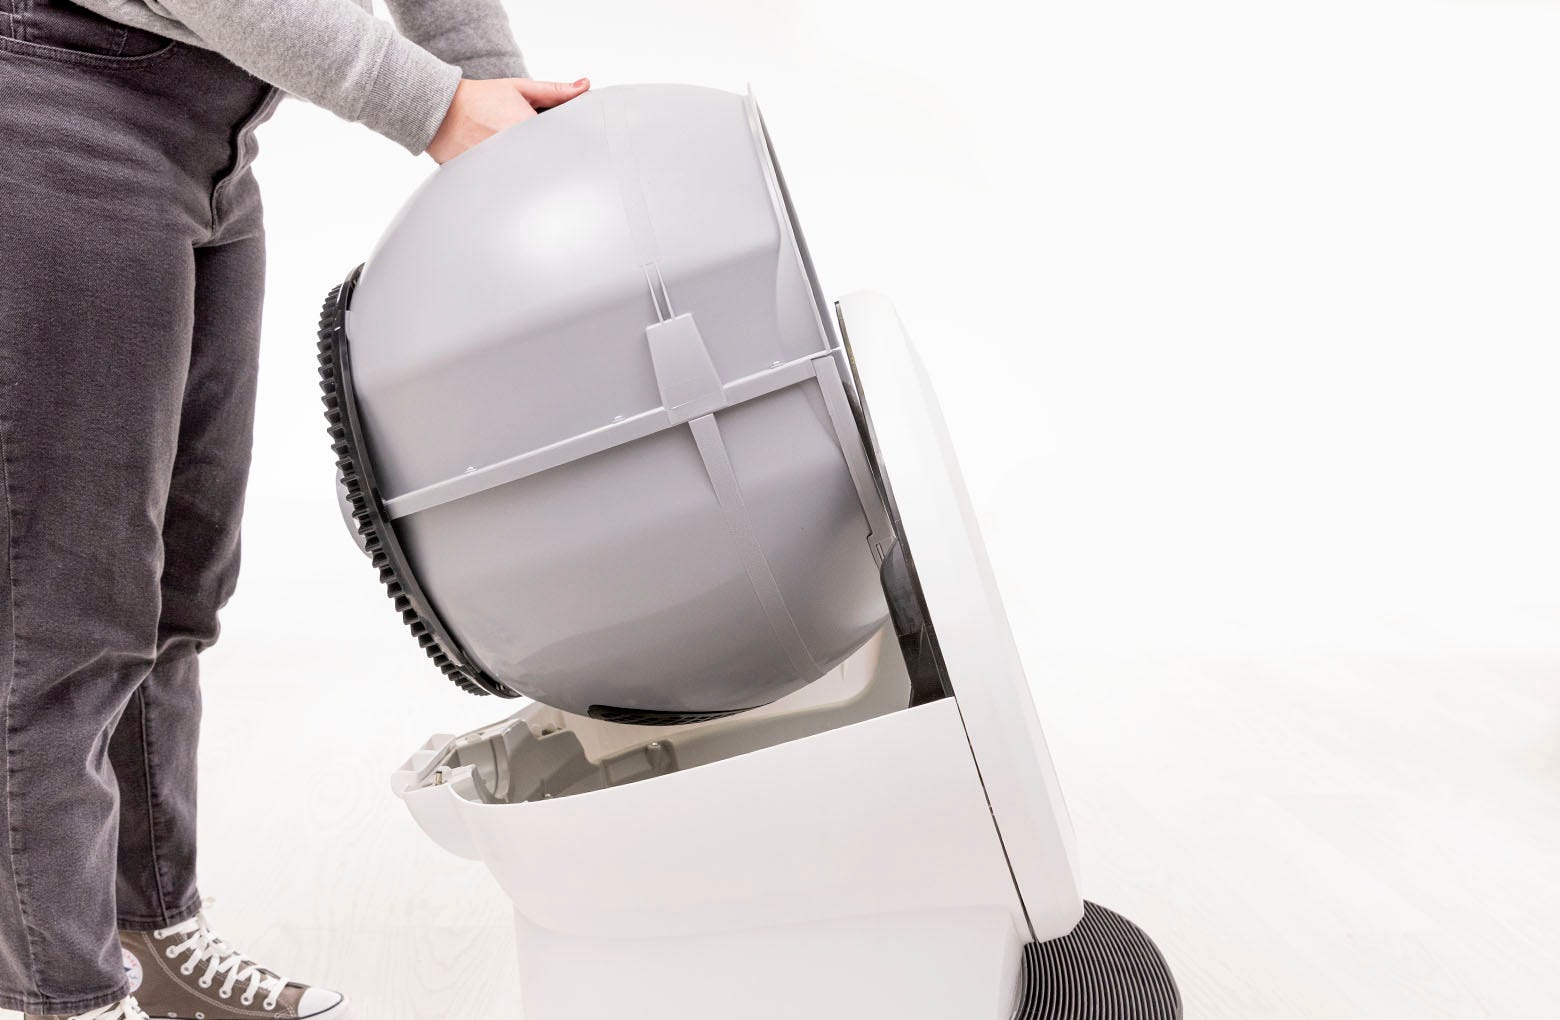
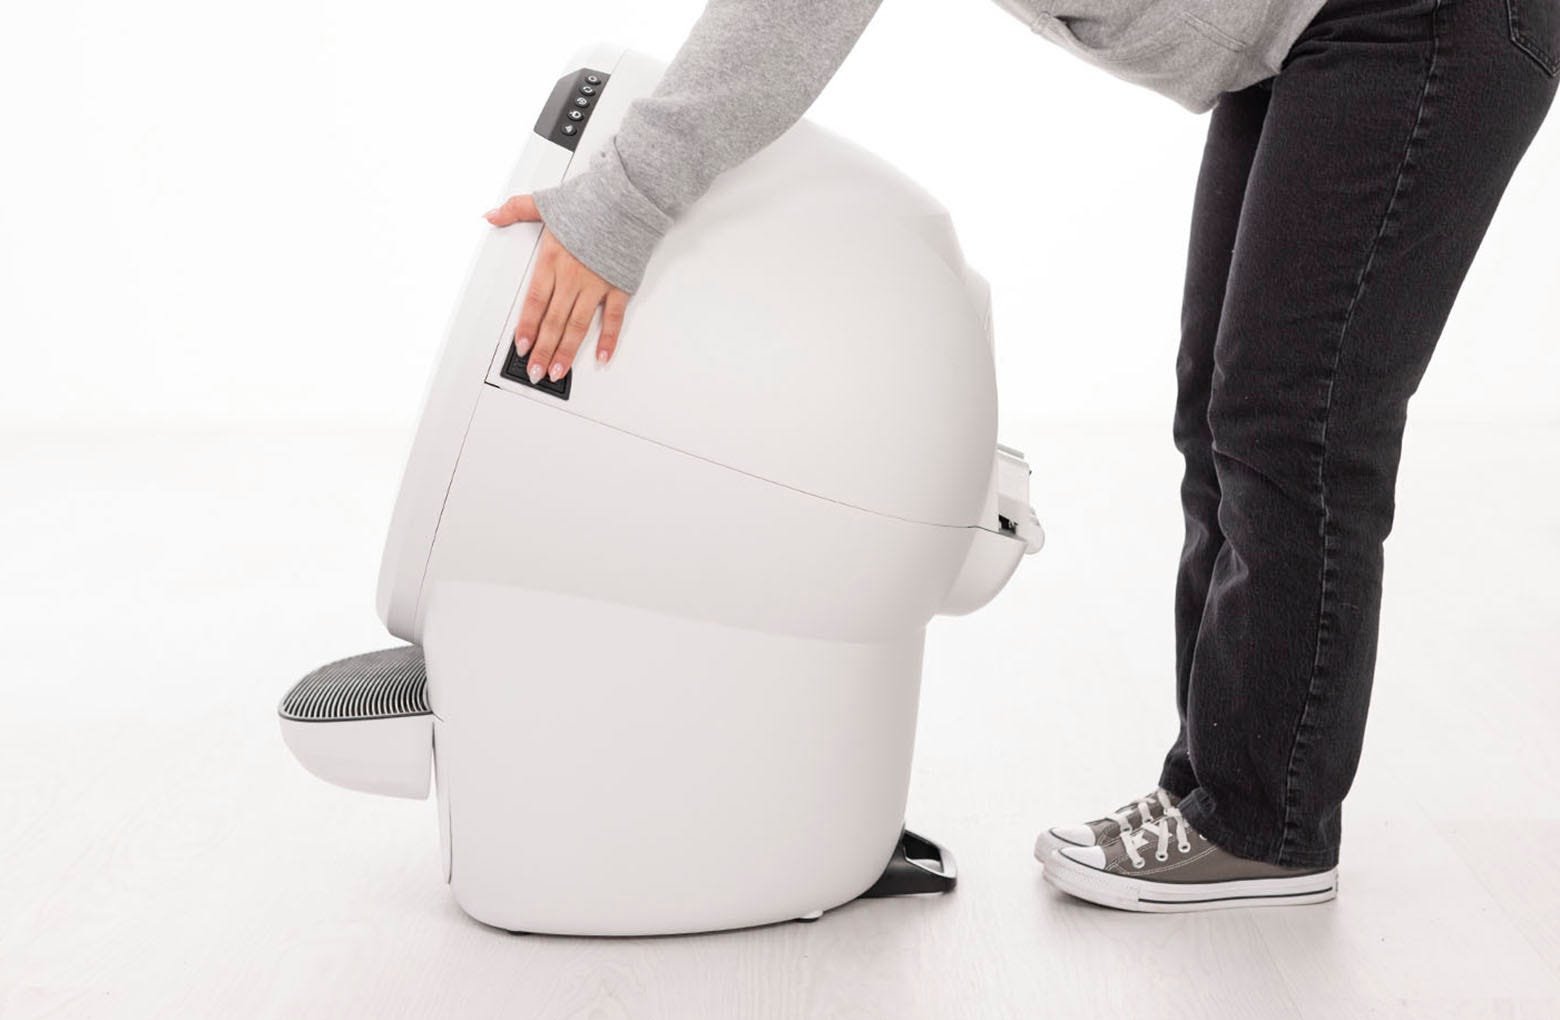
- Remove the globe: Grab the black handle located on top of the globe, lift the globe up and out of the base, and set it aside.
![Image removing the Litter-Robot 4 globe]()
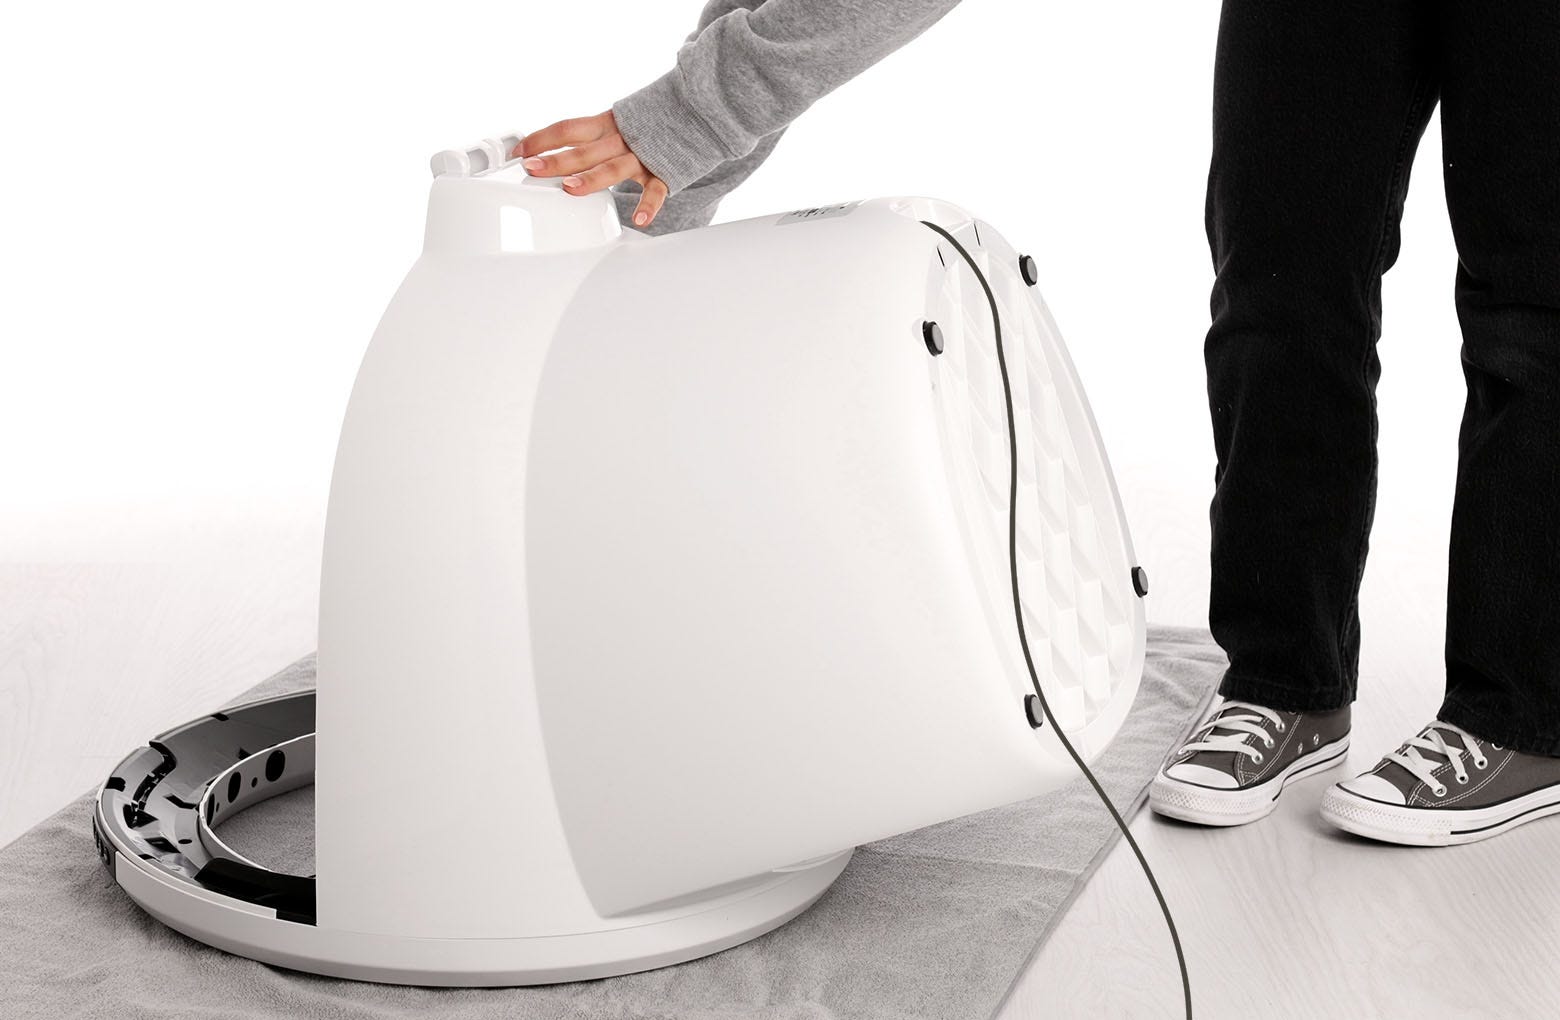
- Place the unit facedown (bezel down) on a solid, flat surface. Use a towel or blanket to protect the bezel from scratching, if on a hard surface.
![]()
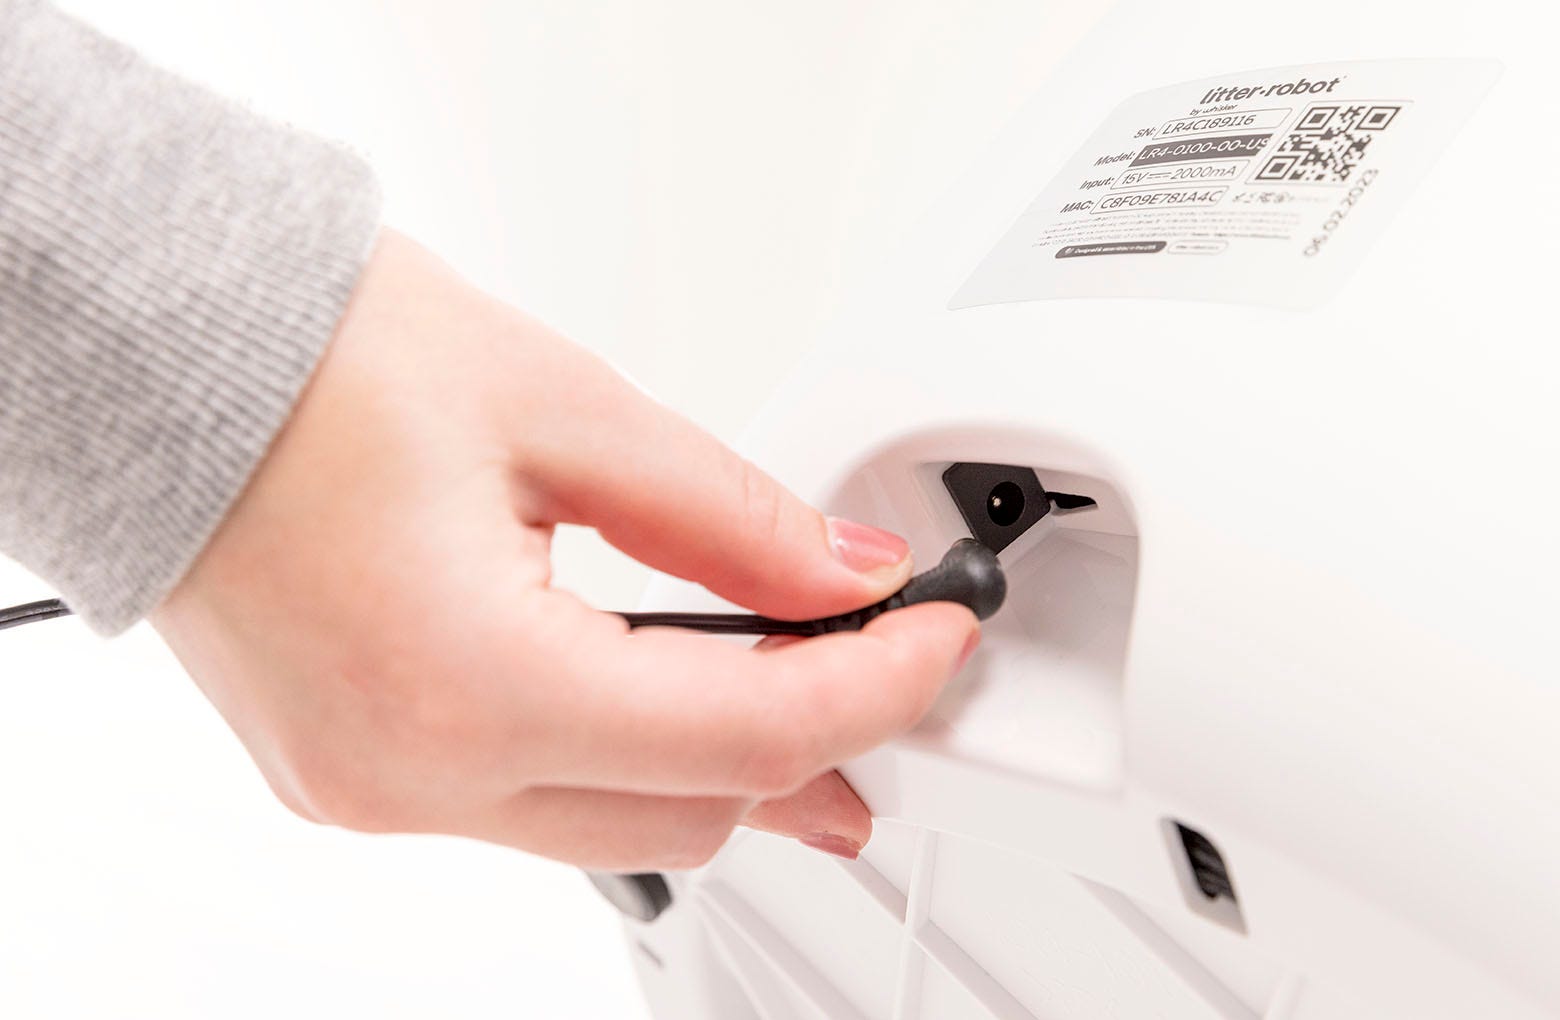
- Unplug the power plug from the unit.
![Image unplugging the power plug from the unit]()

Step 3: Install the LitterHopper™ anti-tip guard
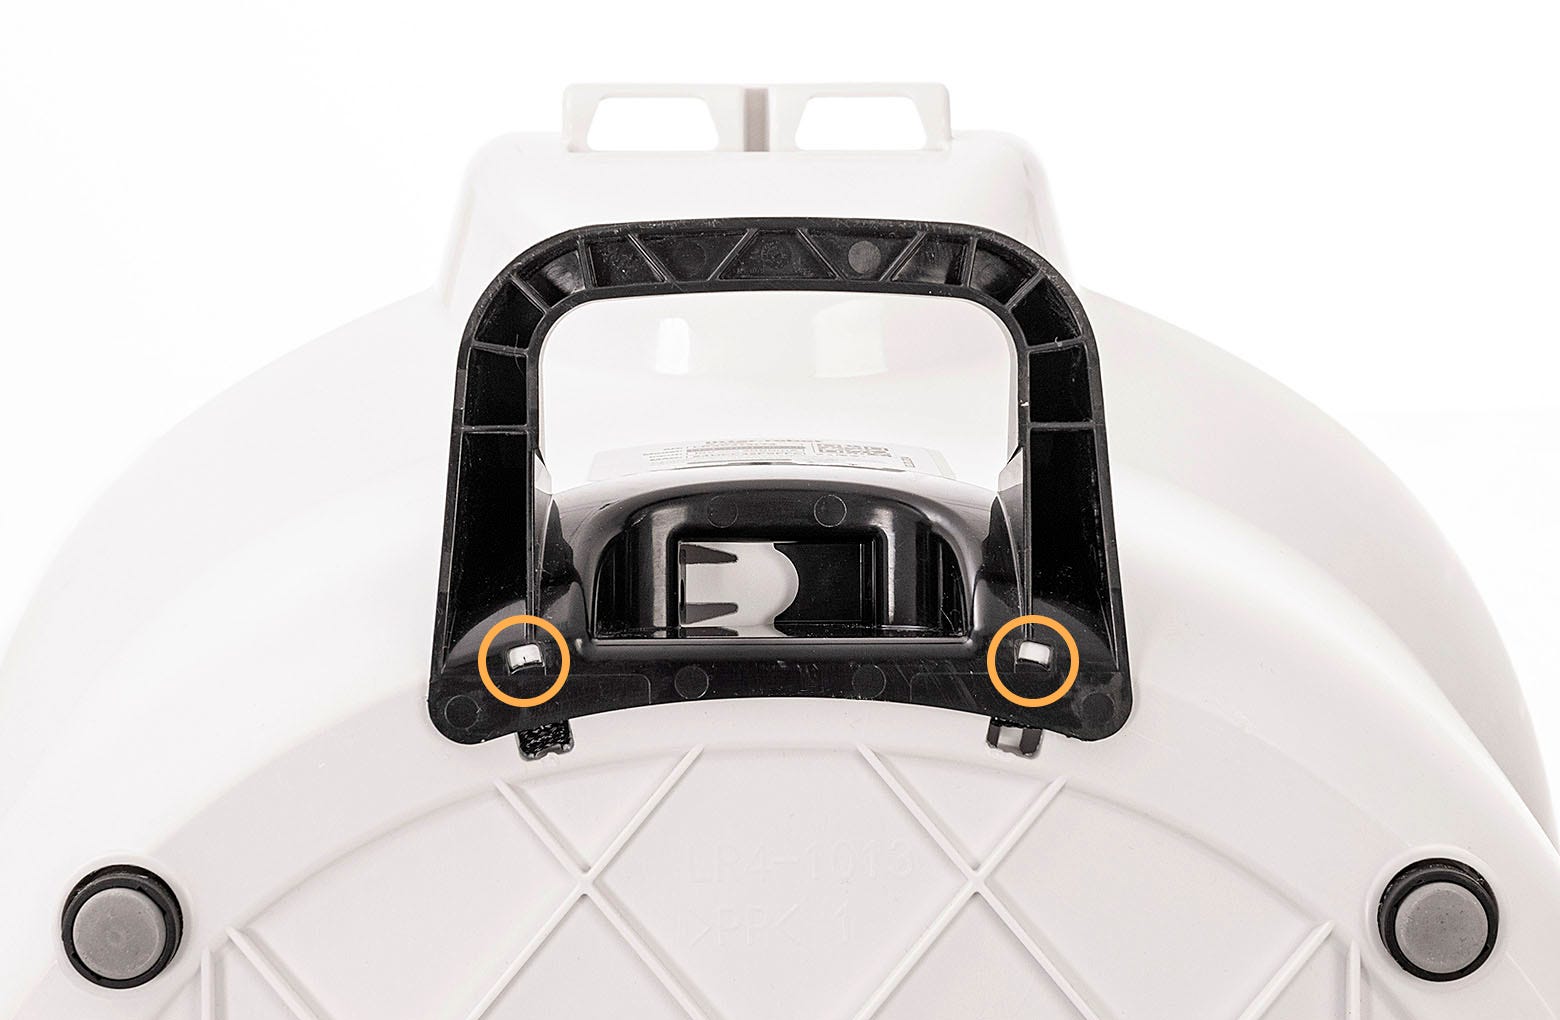
The two hooks on the anti-tip guard were designed to snap into the two holes on the bottom rear of the Litter-Robot 4 Base. Note that a wire runs through the two holes. Gently pull down the wiring to the lower end of the holes and leave enough room at the top for the anti-tip guard hooks to insert completely.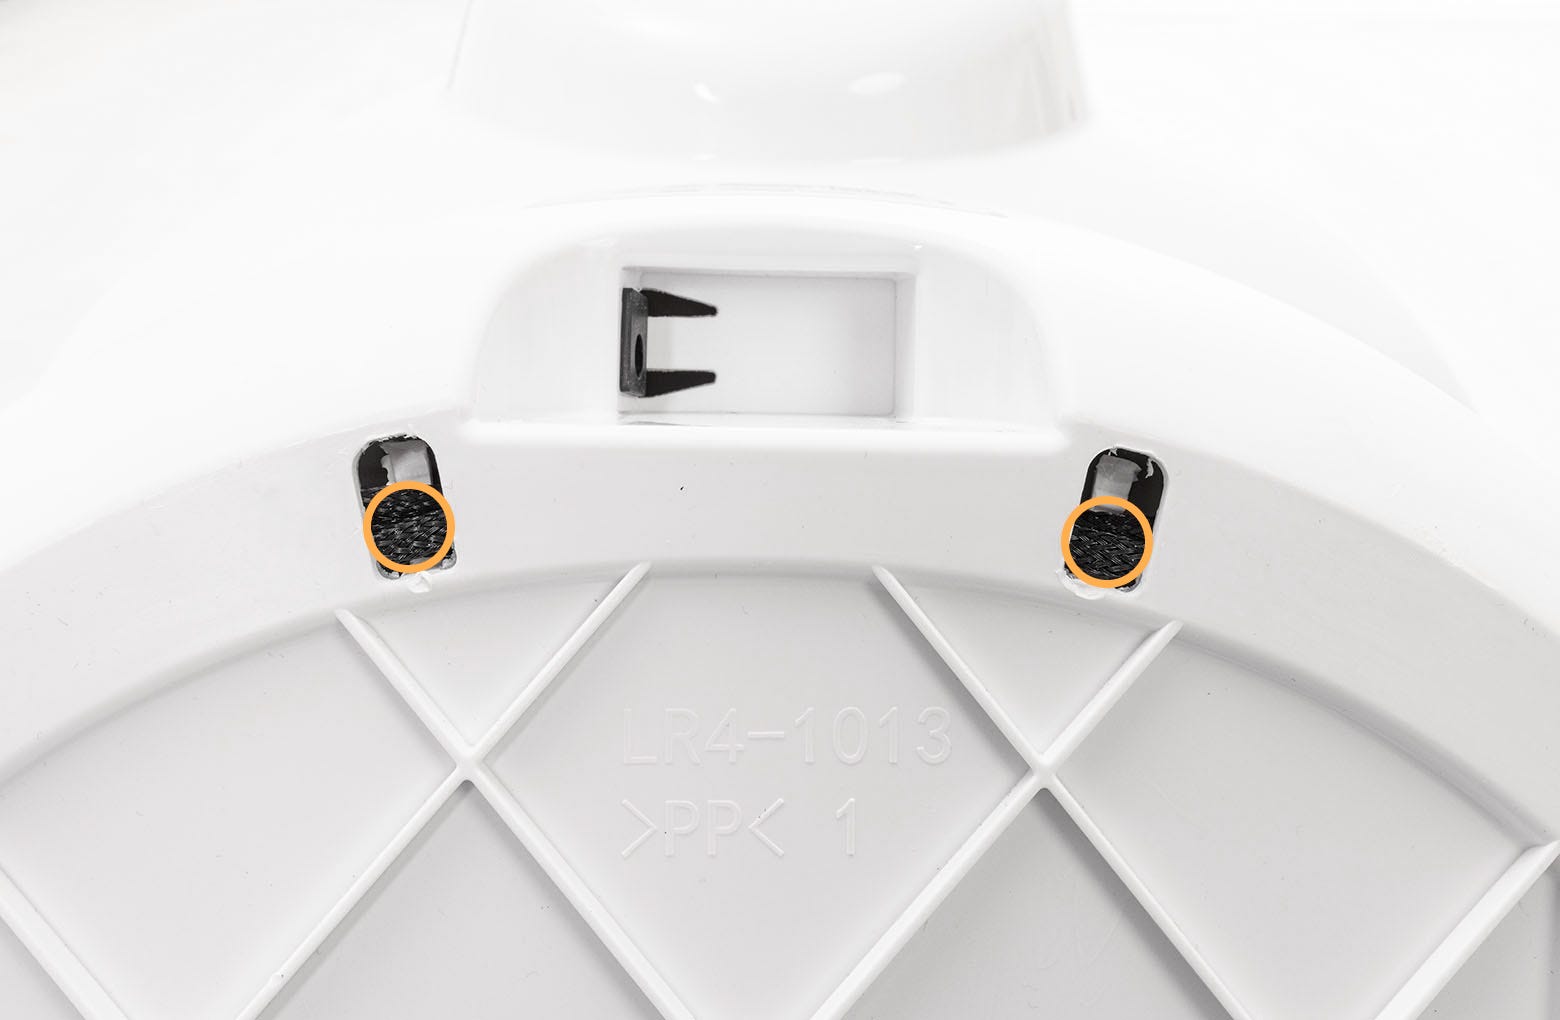
- While the unit is still facedown, lay the anti-tip guard into the power jack pocket on the base.
![Image of unit laying face down laying the anti-tip guard into the power jack]()
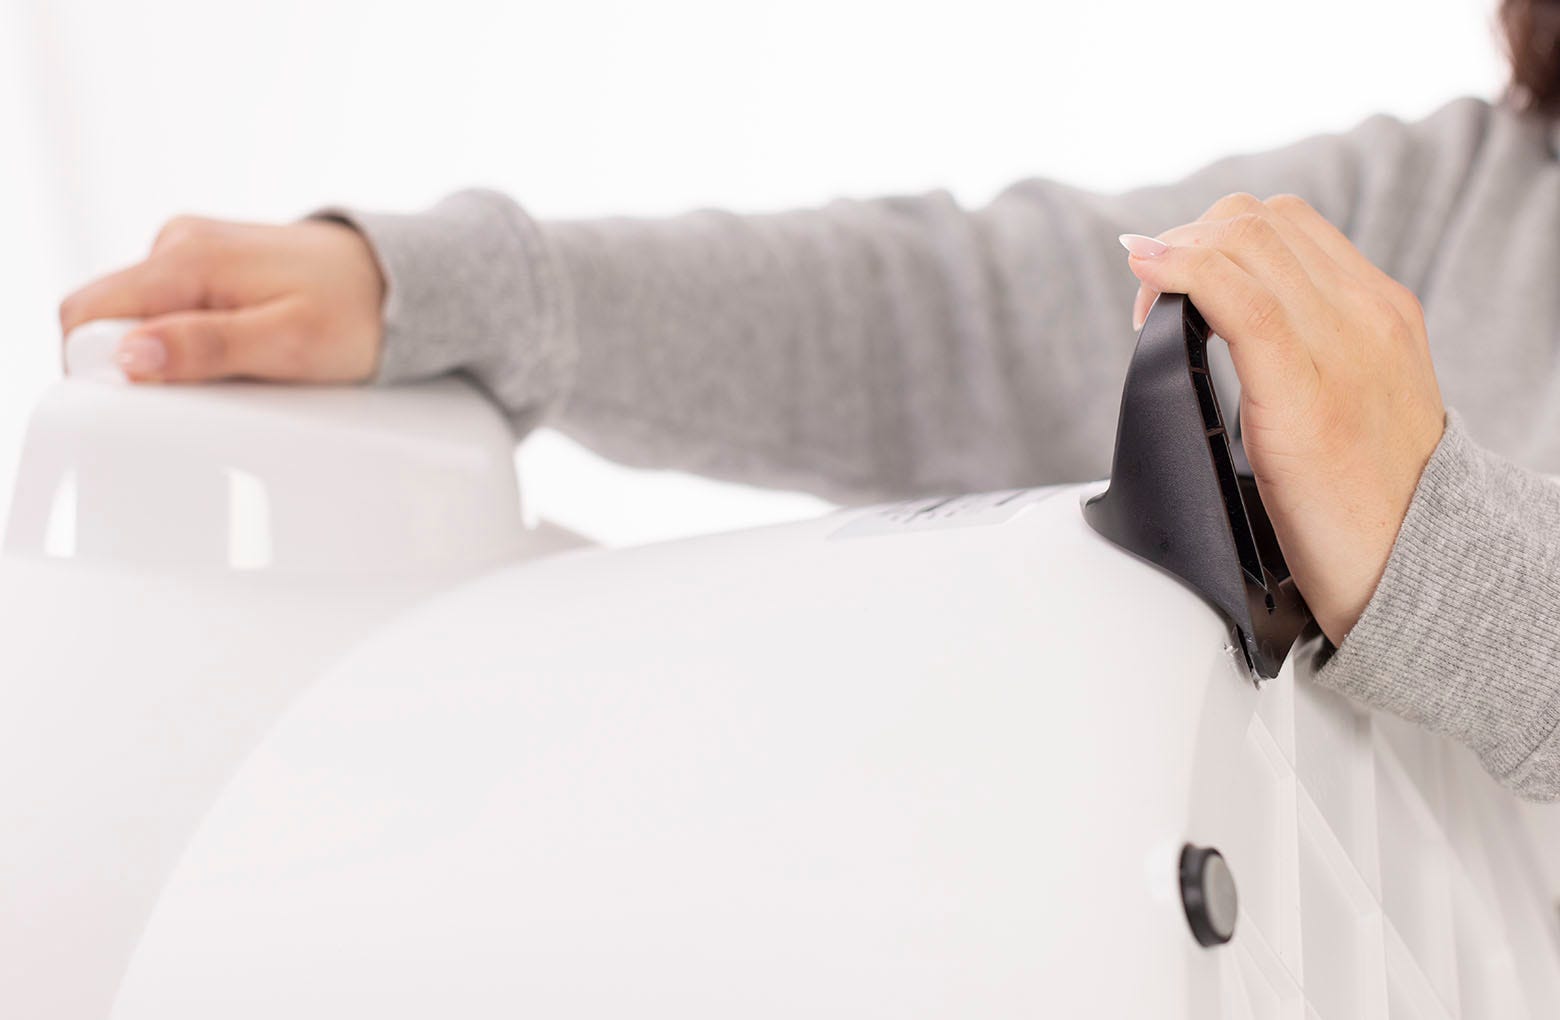
- With one hand, grab the bonnet hinge on the base.
![Image of one hand grabbing the bonnet hinge]()
- With the other hand, press on the anti-tip guard near the small holes until each side snaps into place. This may require some amount of force.
![Image of where to snap in the anti-tip guard]()
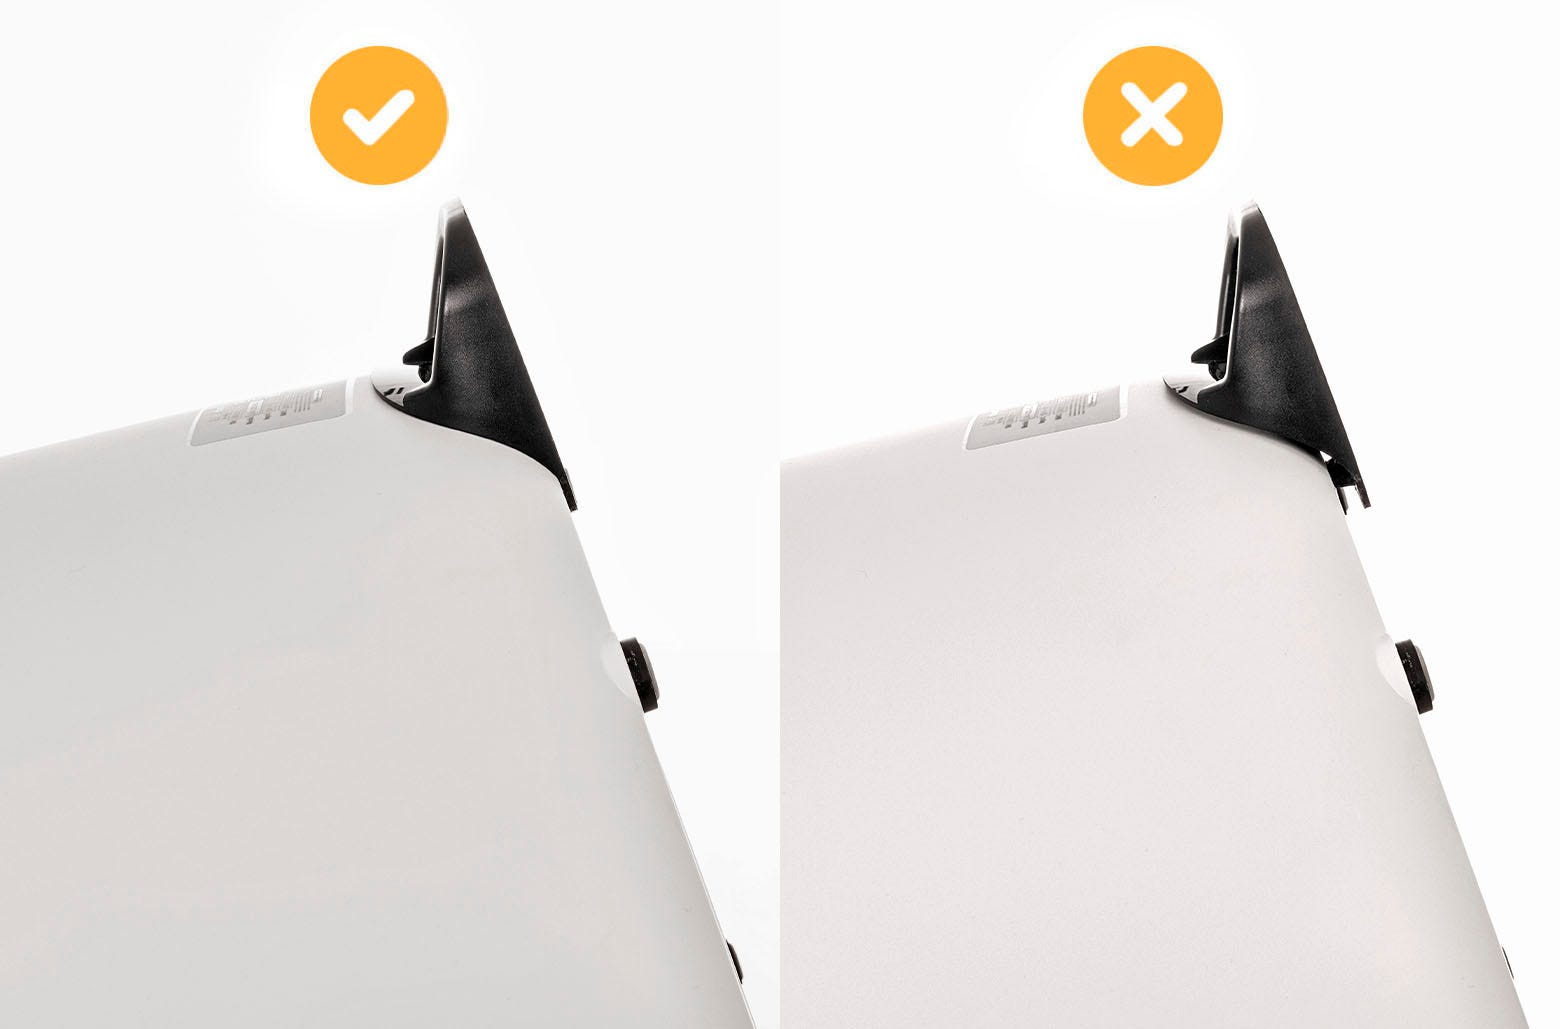
- Once installed, the anti-tip guard should feel rigid with no movement and be flush with the base.
![Infographic showing the correct positioning of the anti-tip guard.]()
- Once installed, the anti-tip guard should feel rigid with no movement and be flush with the base.
Step 4: Plug the power plug back into Litter-Robot 4®
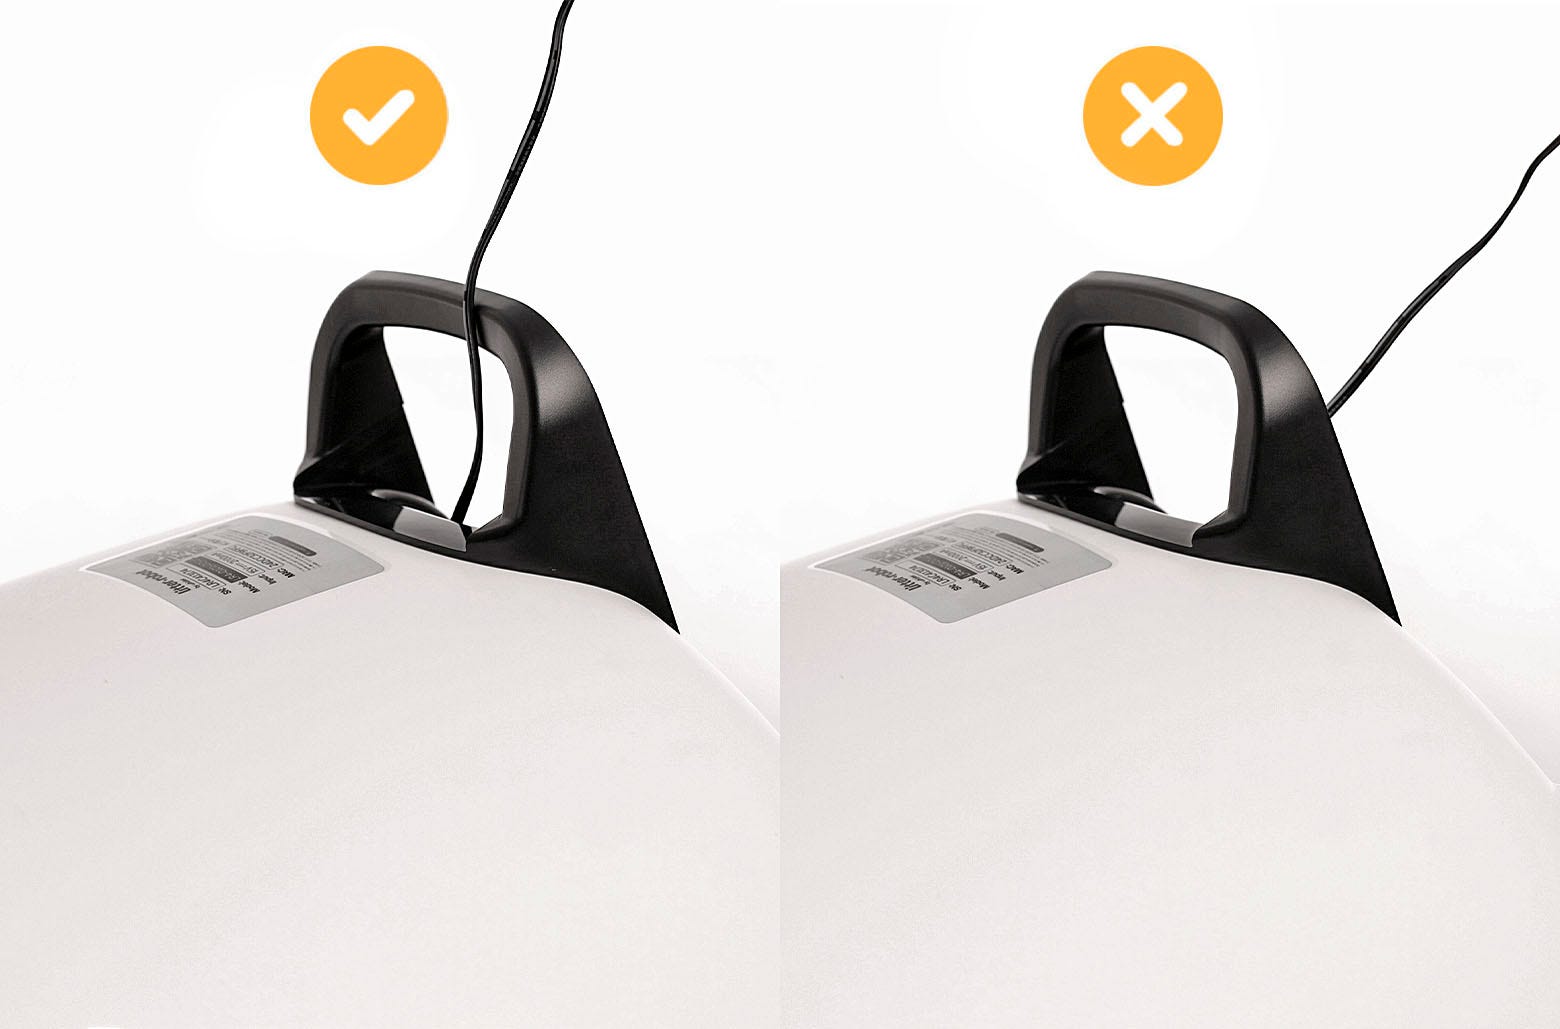
- Route the power cord over the anti-tip guard – NOT under – then connect the power plug back into the unit.
![Infographic showing the correct positioning of the power cord over the anti-tip guard.]()
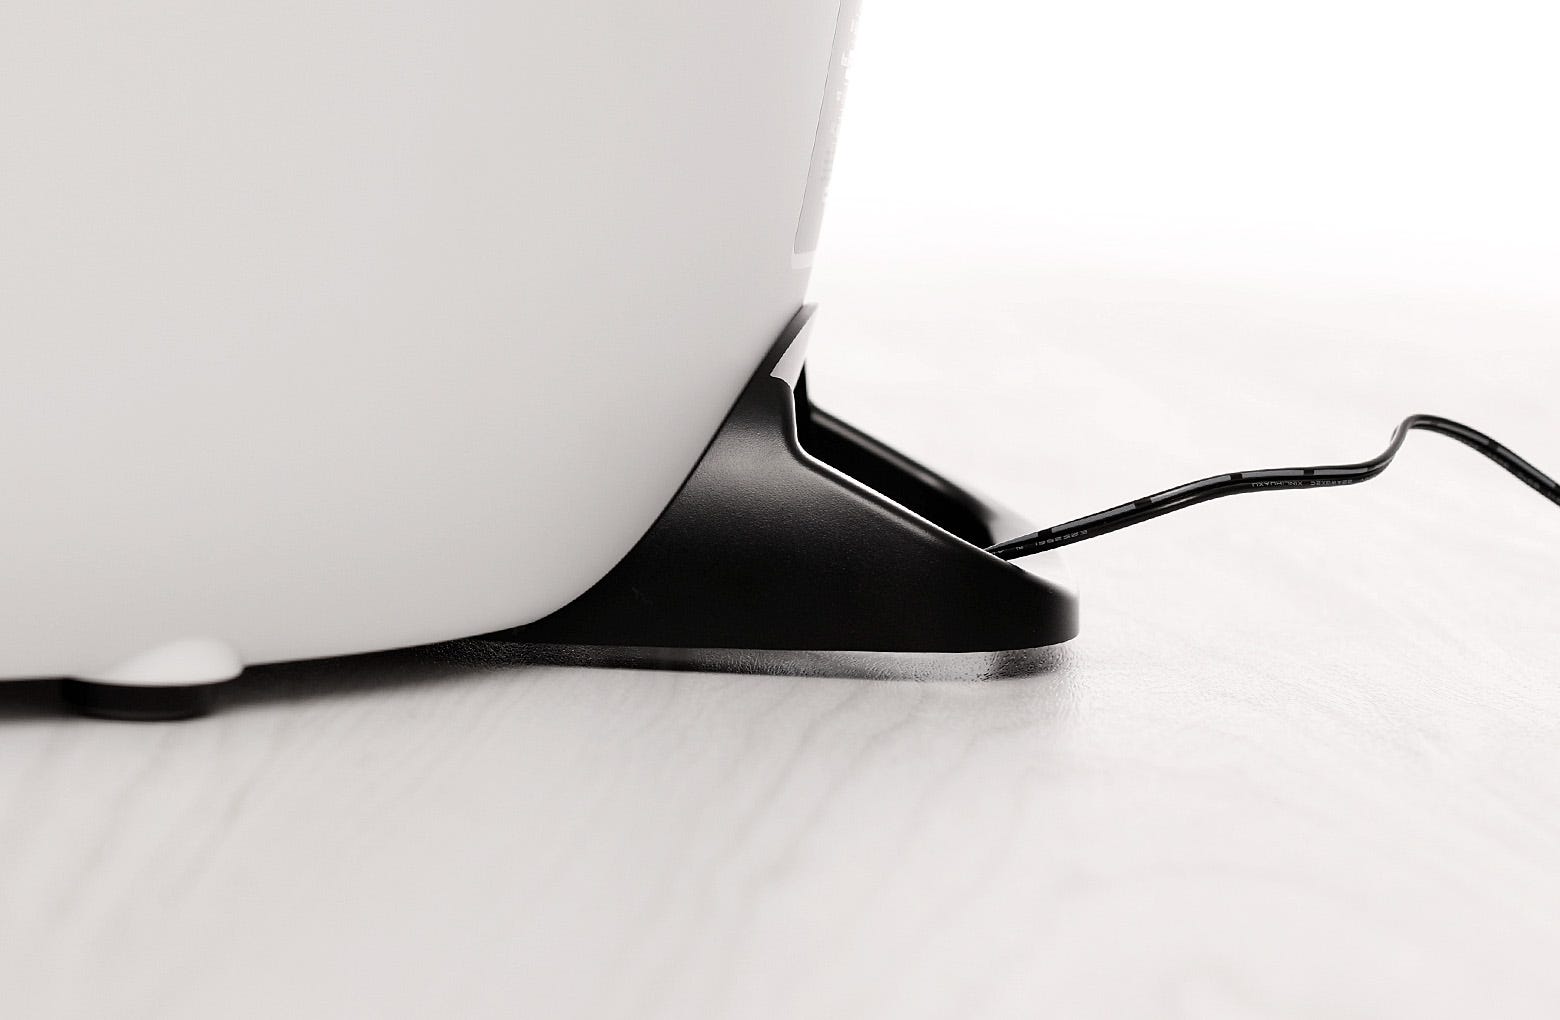
- Tip the unit upright onto its feet. Verify the power cord is NOT trapped under the anti-tip guard. Verify that the anti-tip guard is NOT contacting the floor. There must always be a small gap between the bottom of the anti-tip guard and the floor. Slide paper under the foot to ensure it does not touch the floor. If there is no gap, you may need to place your Litter-Robot 4 on a different floor surface or purchase the carpet tray accessory.
![Image of how the power cord laying over the anti-tip guard.]()
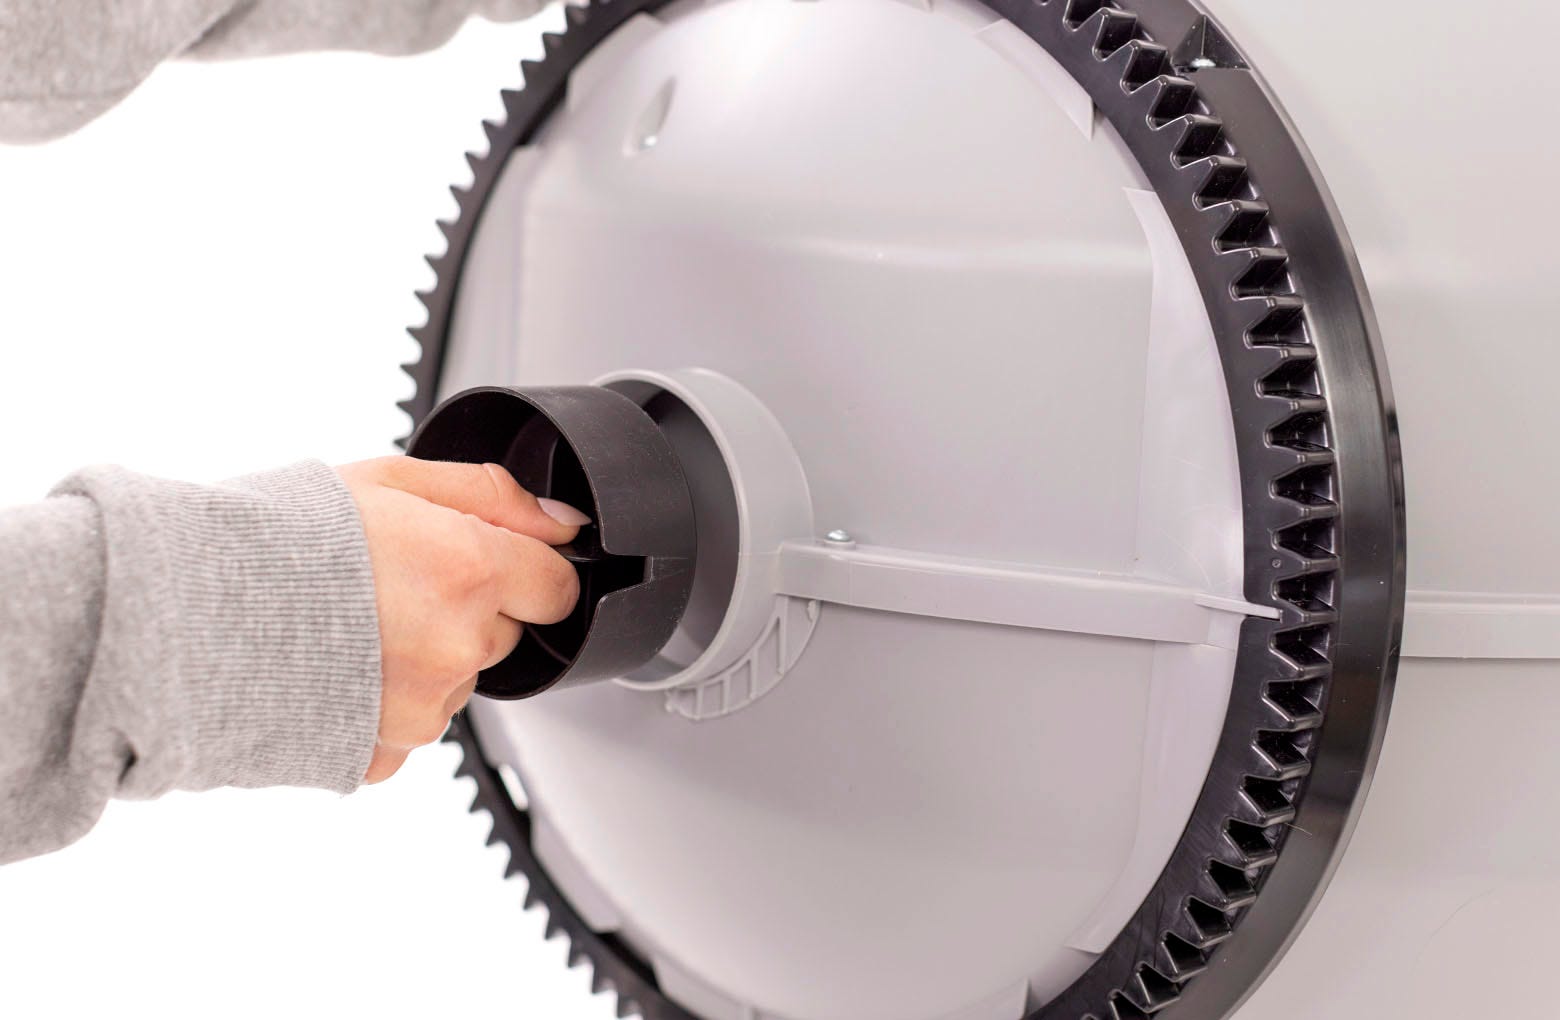
Step 5: Install the LitterHopper™ key
- Remove the cap from the rear of the globe by grabbing the tab and pulling.
![Image showing how to remove the cap from the globe]()
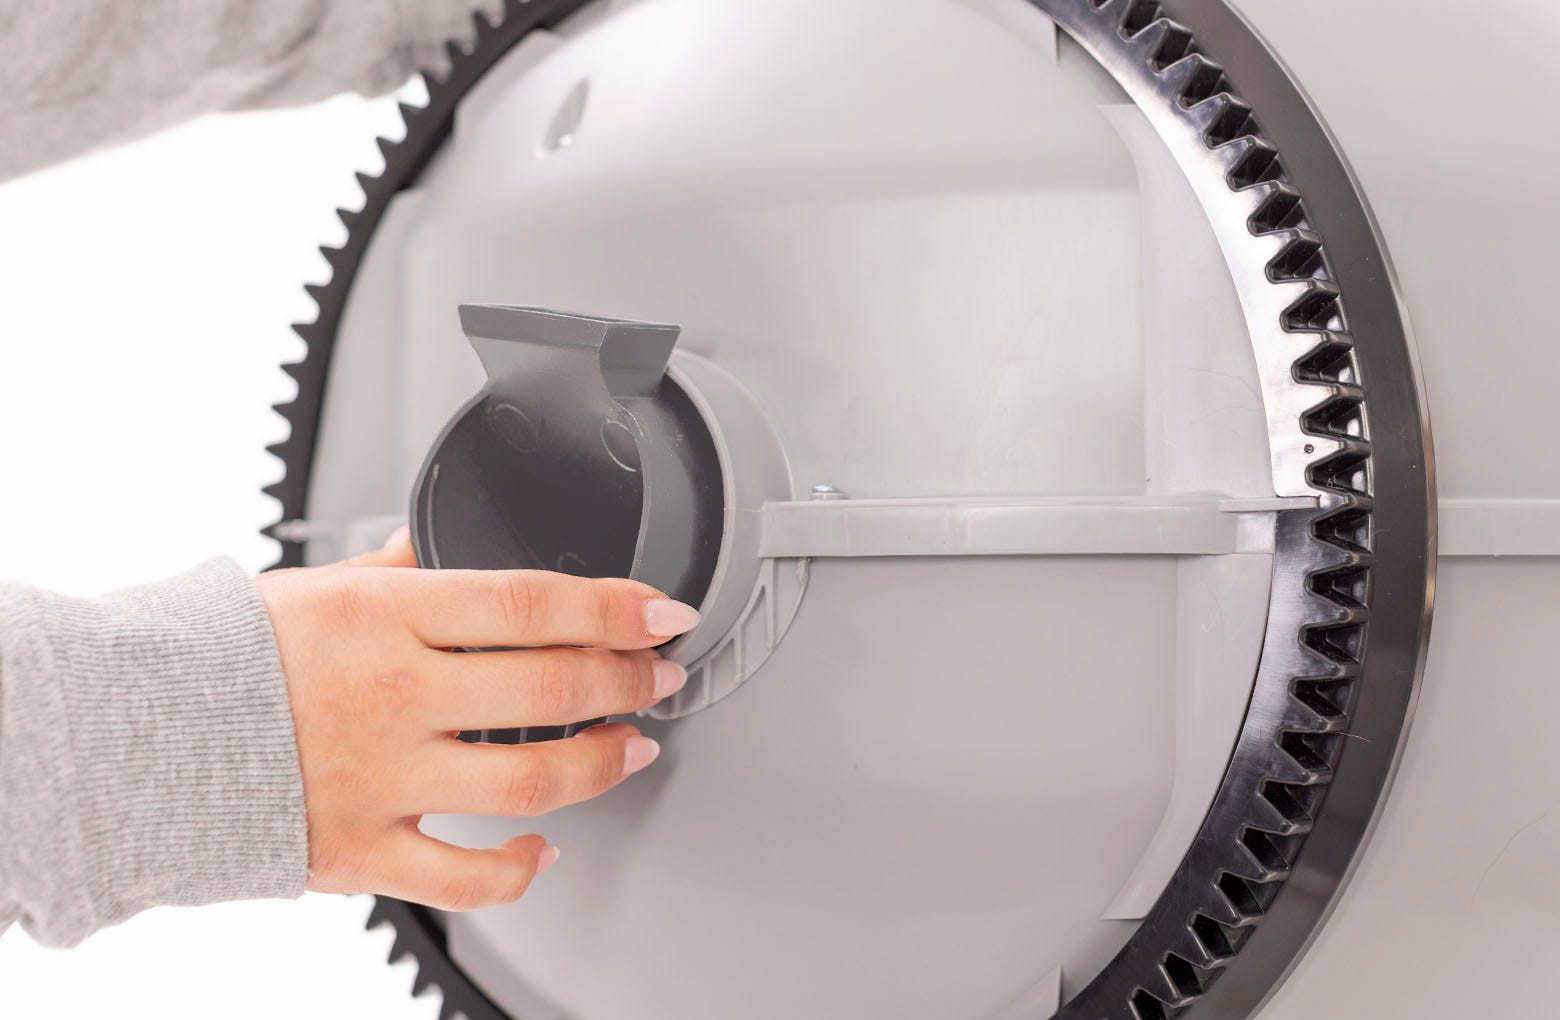
- Place the new key into the rear of the globe with the rectangular opening facing up. Unlike the cap, the key was designed to fit loosely in the globe, thus allowing the globe to rotate freely around it.
![Image placing the new key into the globe]()
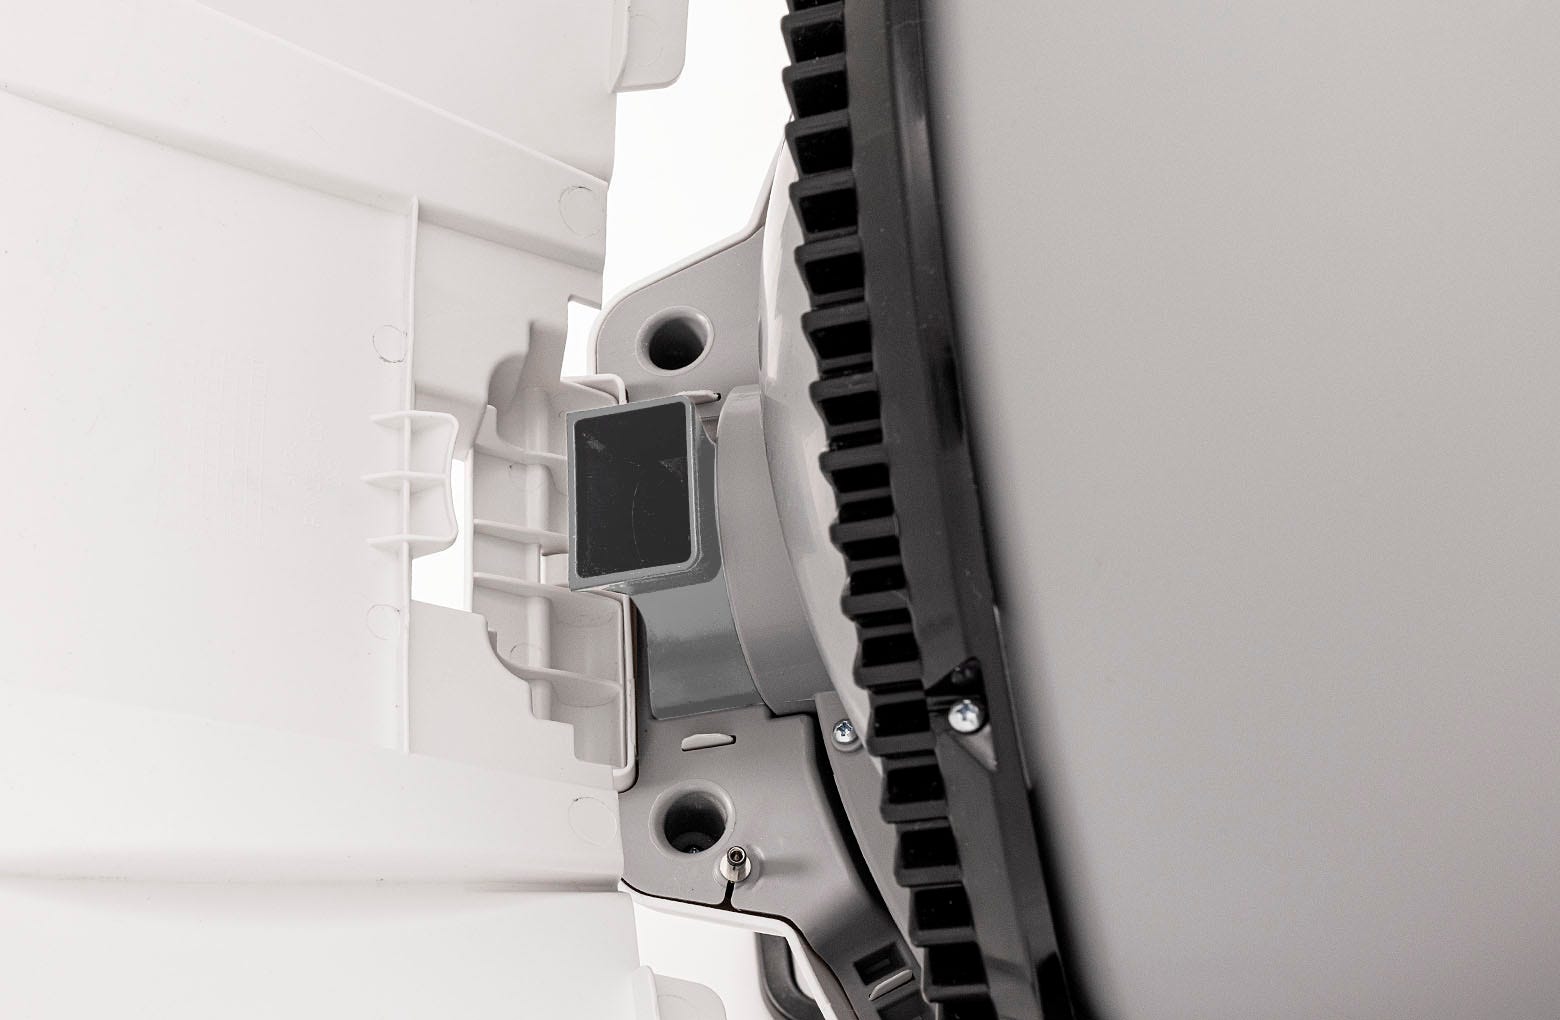
- While holding the key in place, lift the globe and place it back into the base. The key must drop down into the pocket completely.
![Image showing the key in place]()
Step 6: Install the LitterHopper™ bonnet
- Place the new LitterHopper bonnet into the hinge on the base. The bonnet should then stay upright on its own.
![Image showing the bonnet sitting upright]()
- Rotate the bonnet downward over the globe and push down on the bonnet from the top to make sure it is latched and secure. The key must protrude through the opening in the back of the bonnet.
![Image latching the Litter-Robot 4 bonnet to the base]()
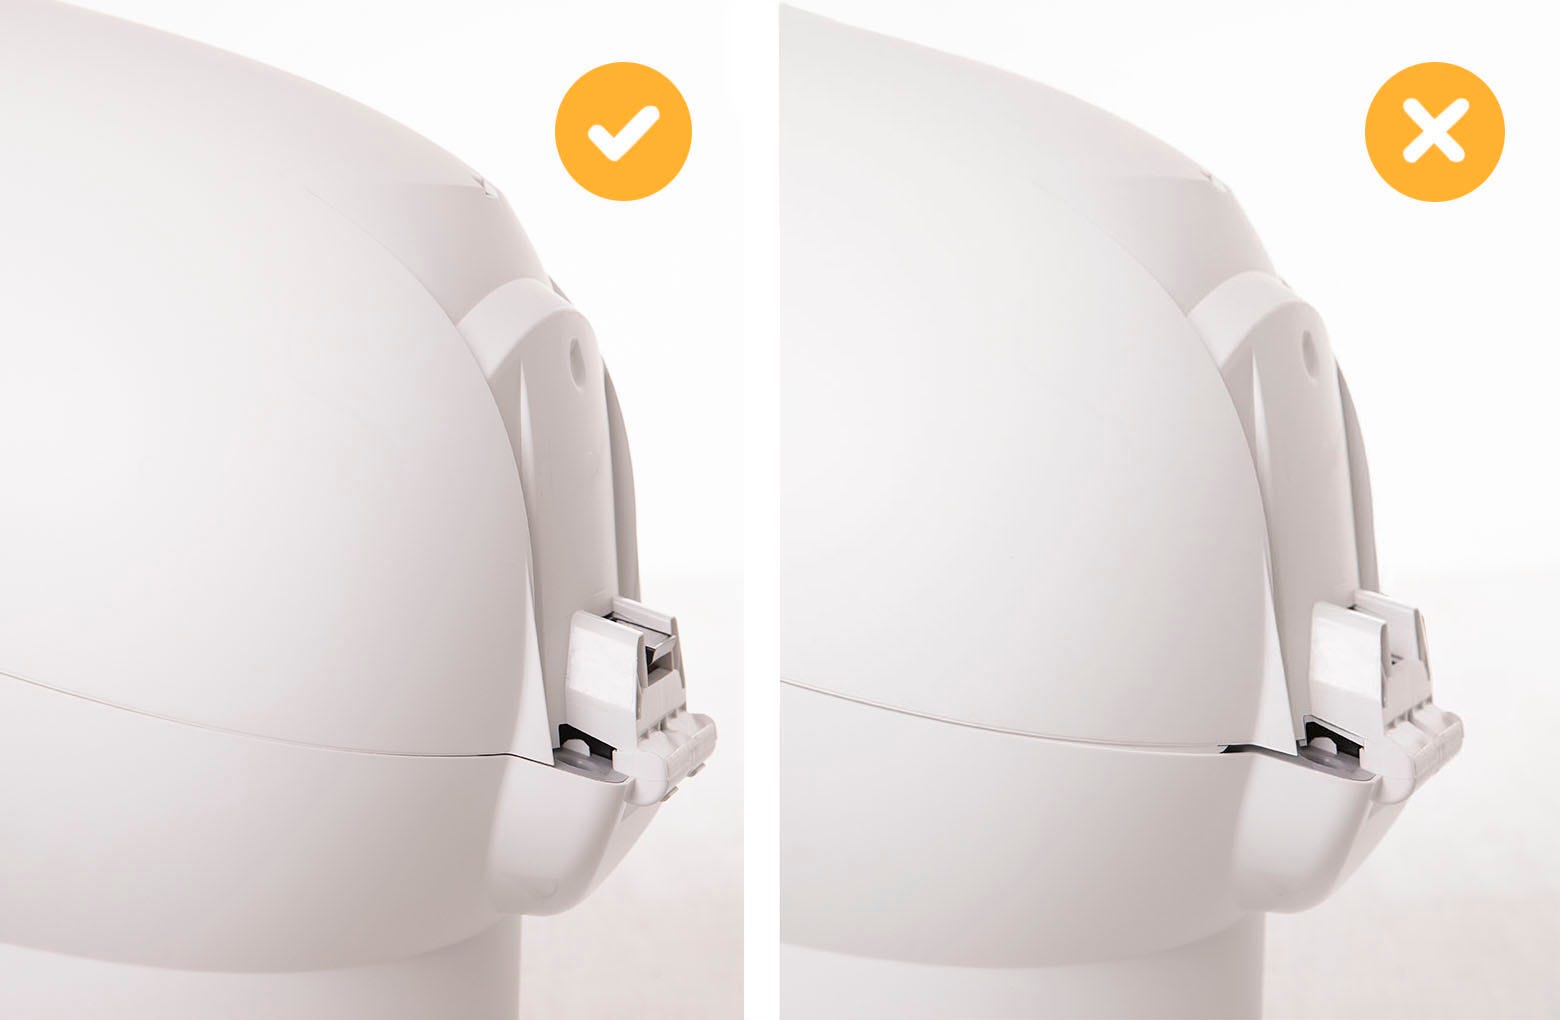
- Verify the bonnet and base are installed correctly.
- The bonnet hooks must be under the base hinge feature.
![Image showing the correct way to latch bonnet]()
- The bonnet and base should align with no gap between them.
![Image showing the correct alignment of the bonnet]()
- The bonnet hooks must be under the base hinge feature.

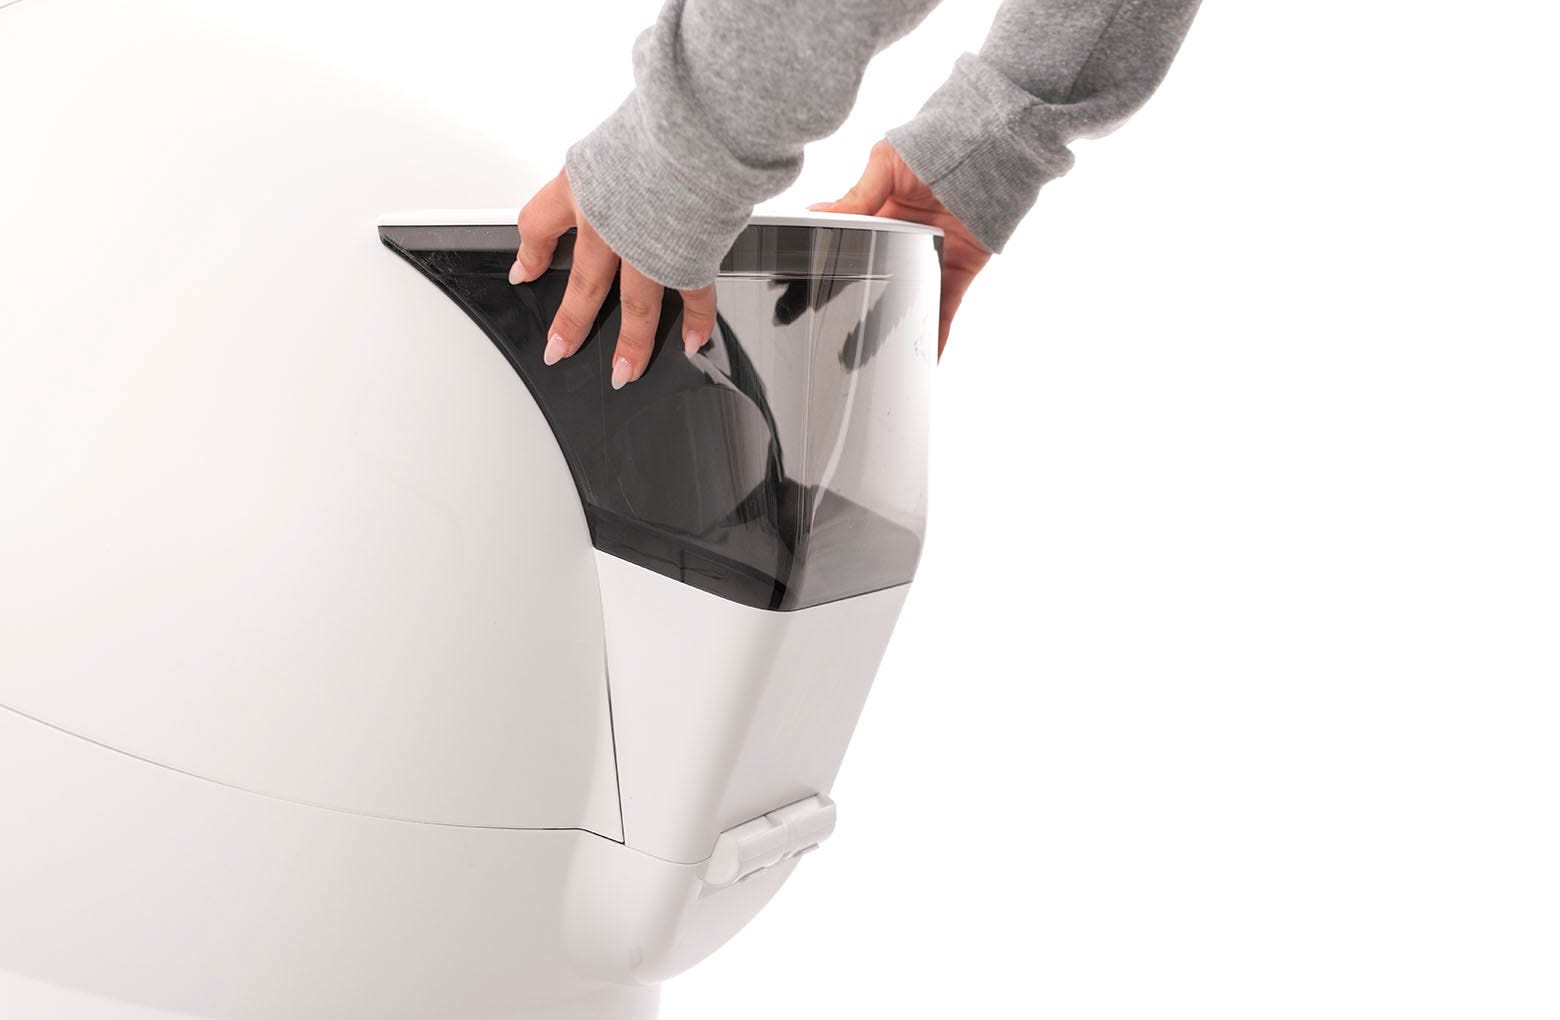
Step 7: Attach the LitterHopper™ to Litter-Robot 4®
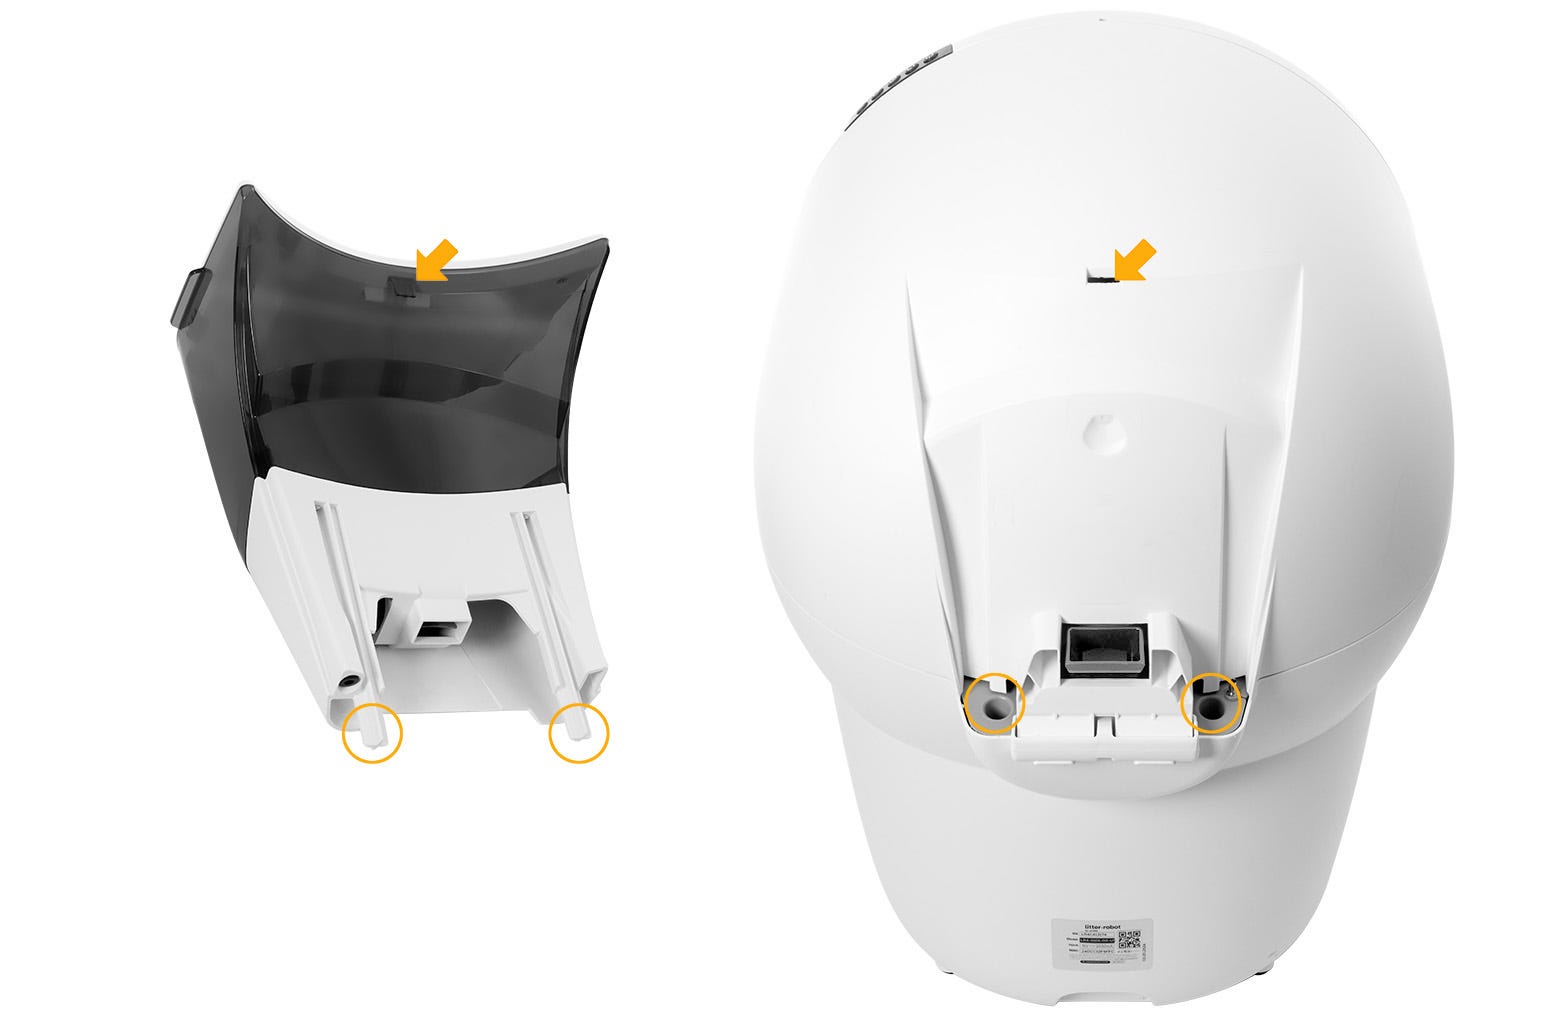
- The LitterHopper attaches to the back of Litter-Robot 4 using two posts at the bottom of the LitterHopper and a hook tab at the top.
![Image showing where the LitterHopper and bonnet attatch]()
- Litter-Robot 4 has two circular pockets on each side of the hinge at the back of the base and a slot at the back of in the bonnet for the LitterHopper hook tab.
![Image showing LitterHopper attaching to the bonnet]()
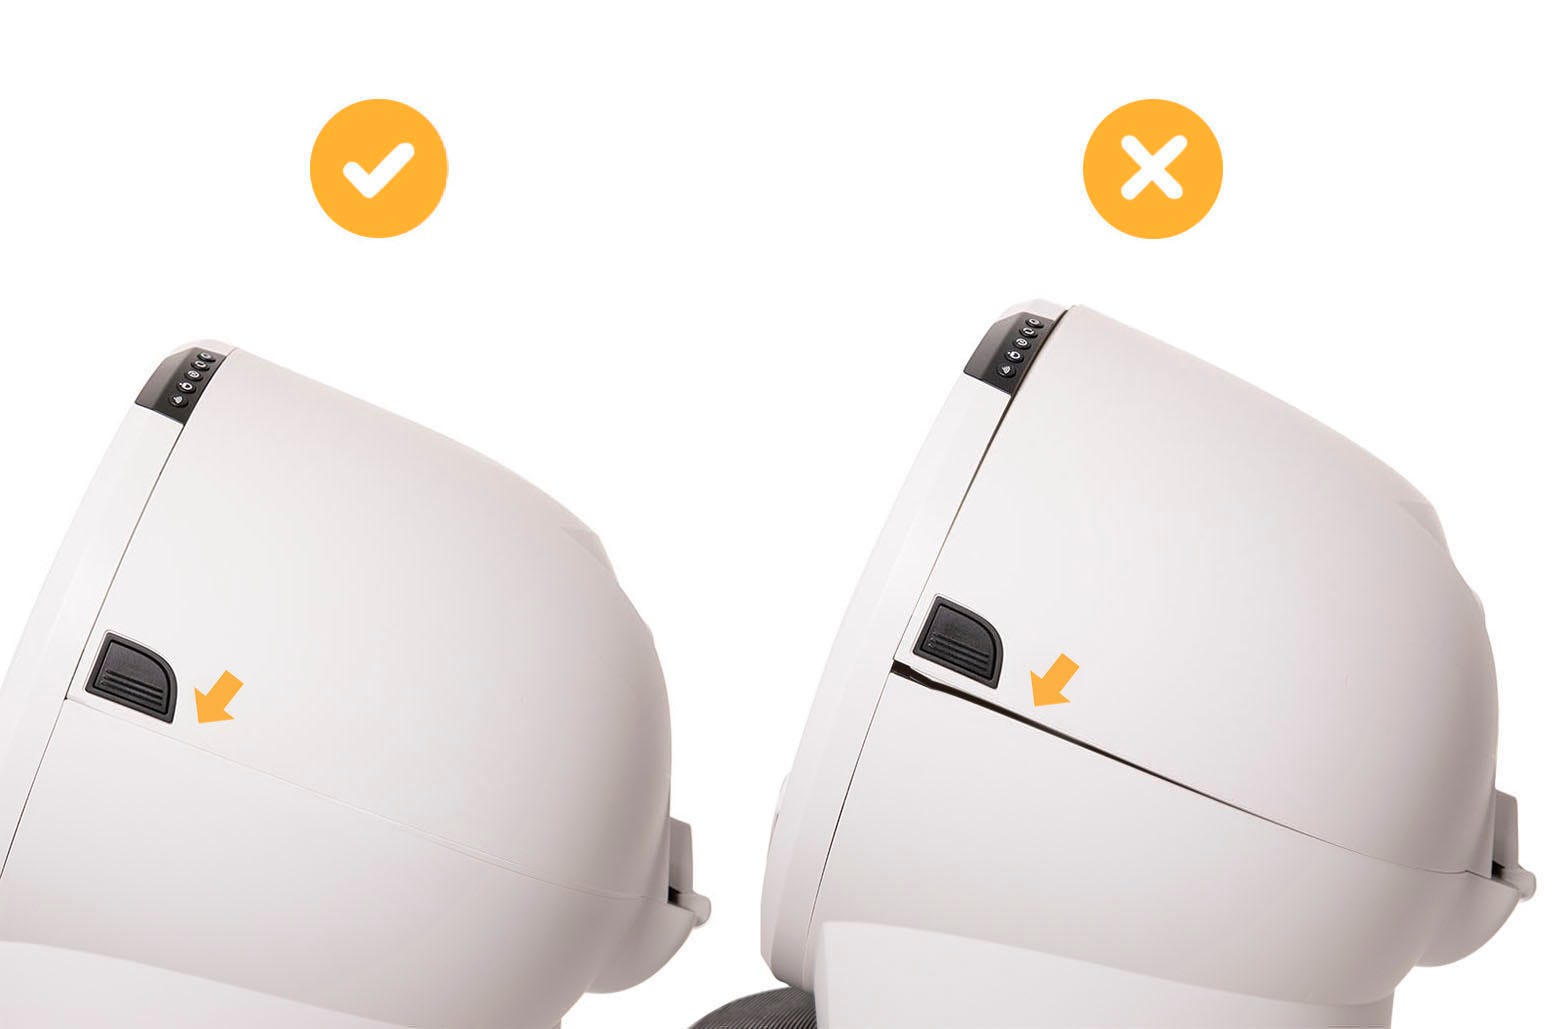
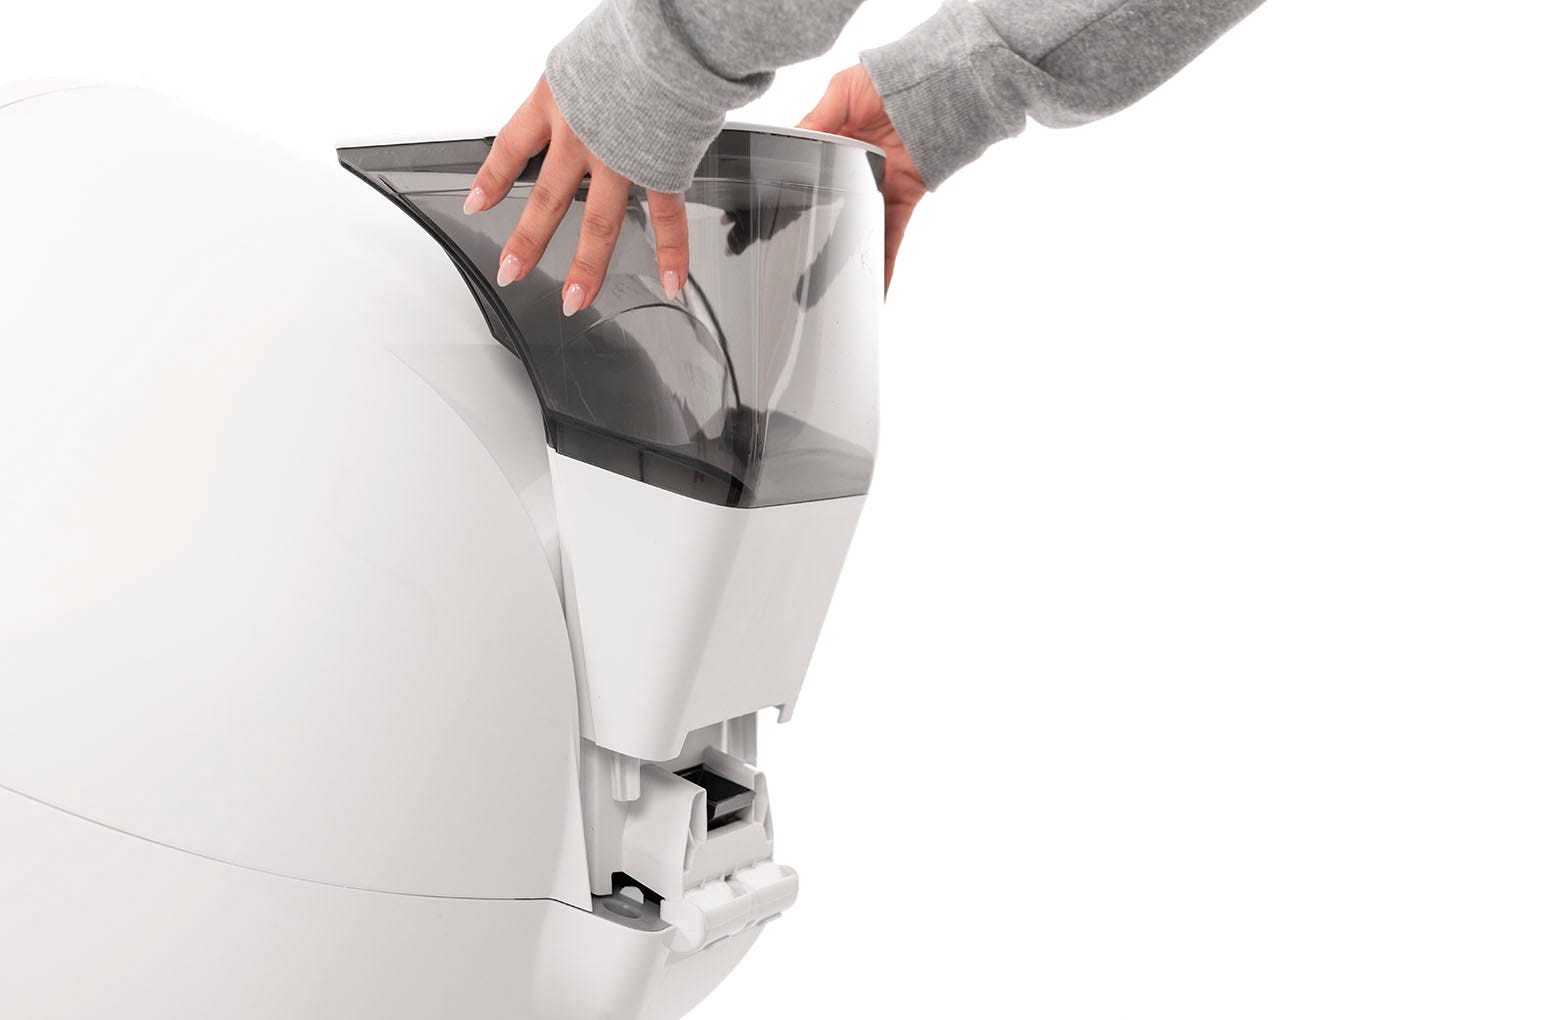
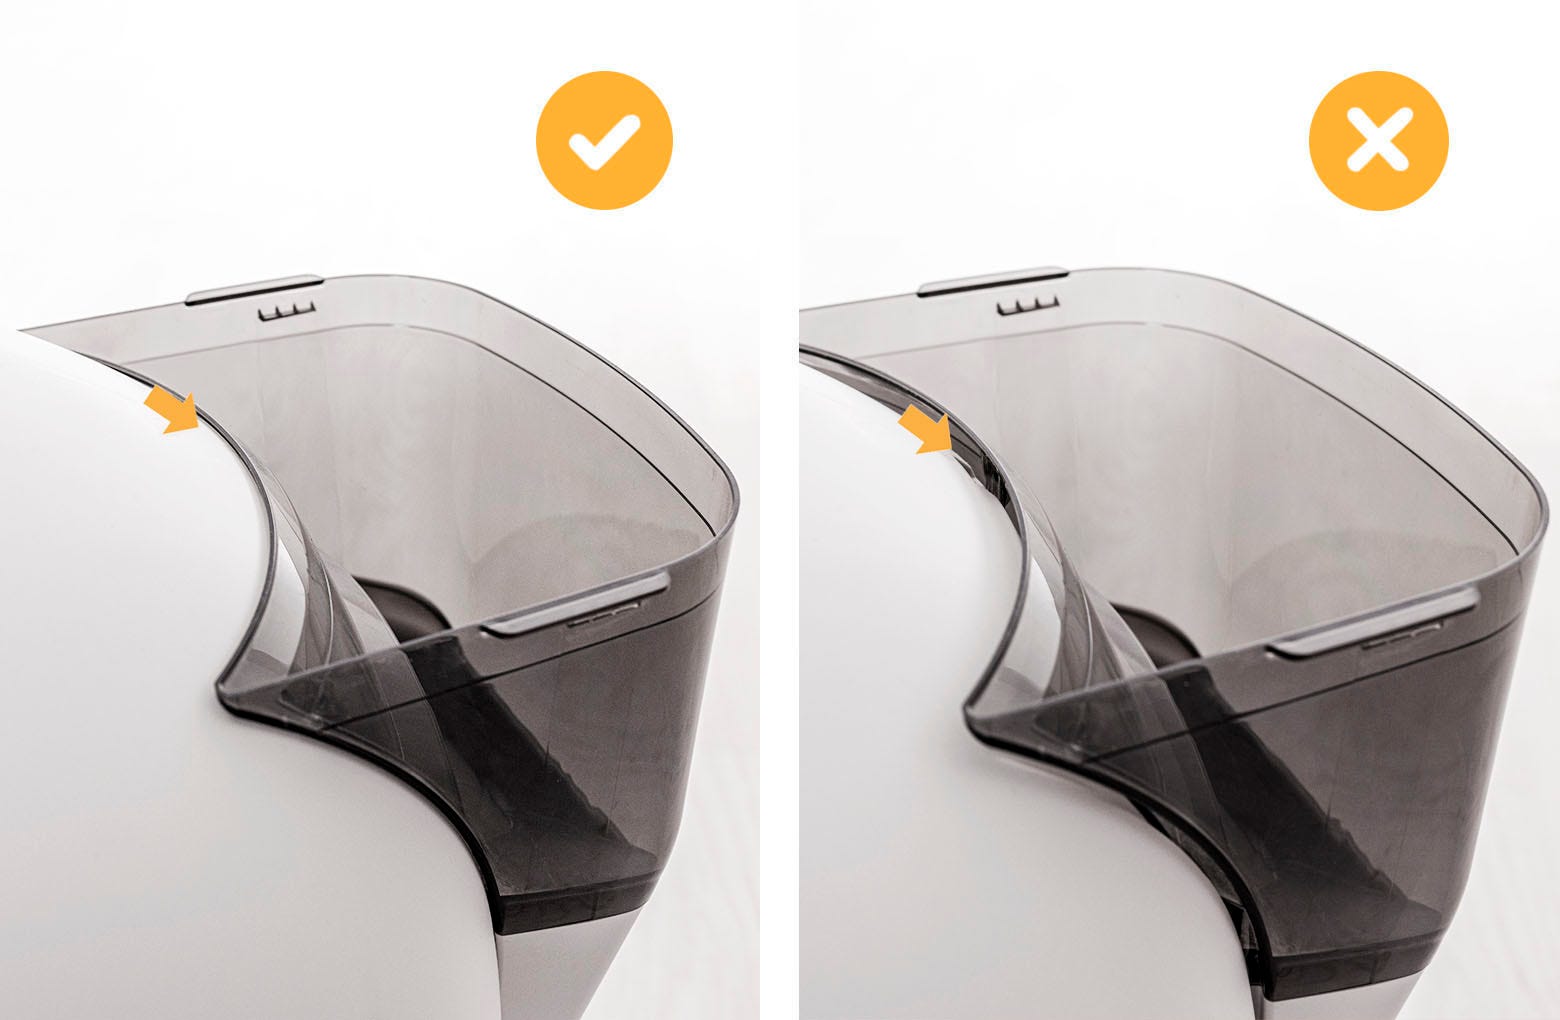
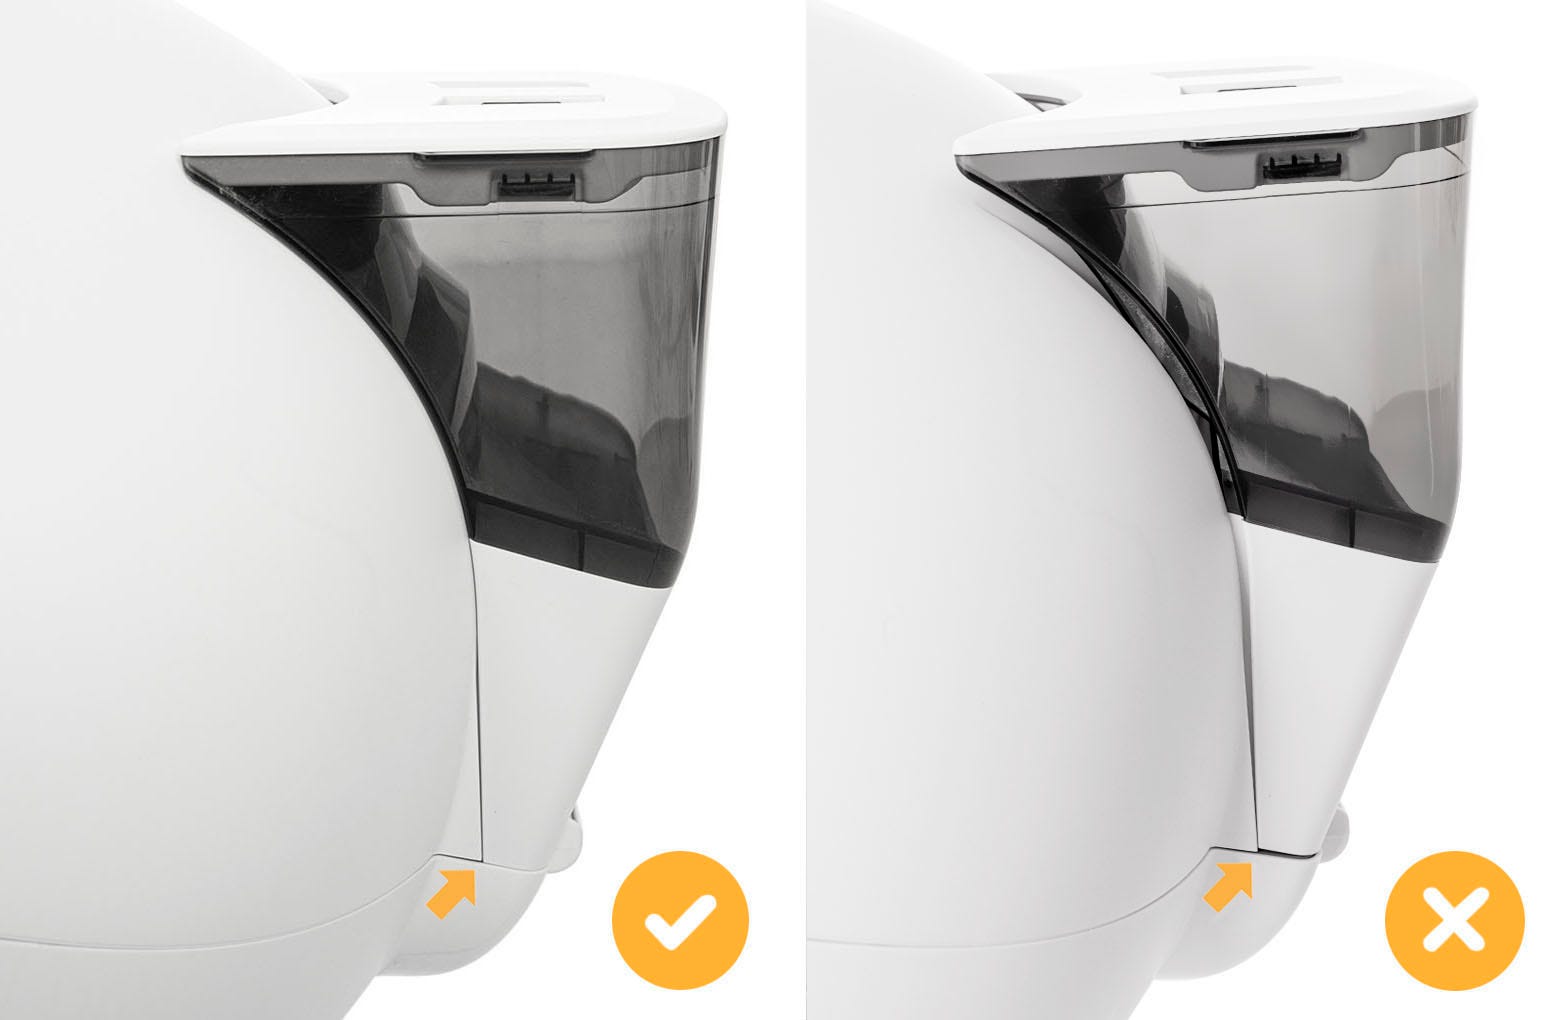
- Align the posts on the LitterHopper with the circular pockets and lower it into place. Make sure the hook tab engages with the slot in the bonnet. To ensure a good electrical connection between the power plug and the power jack, verify your installation with the photos below.
![Image showing Litter-Hopper attached to the bonnet]()
![Image showing correct way to hook LitterHopper onto the bonnet]()
![Image showing the correct way to align LitterHopper]()
Step 8: Final assembly
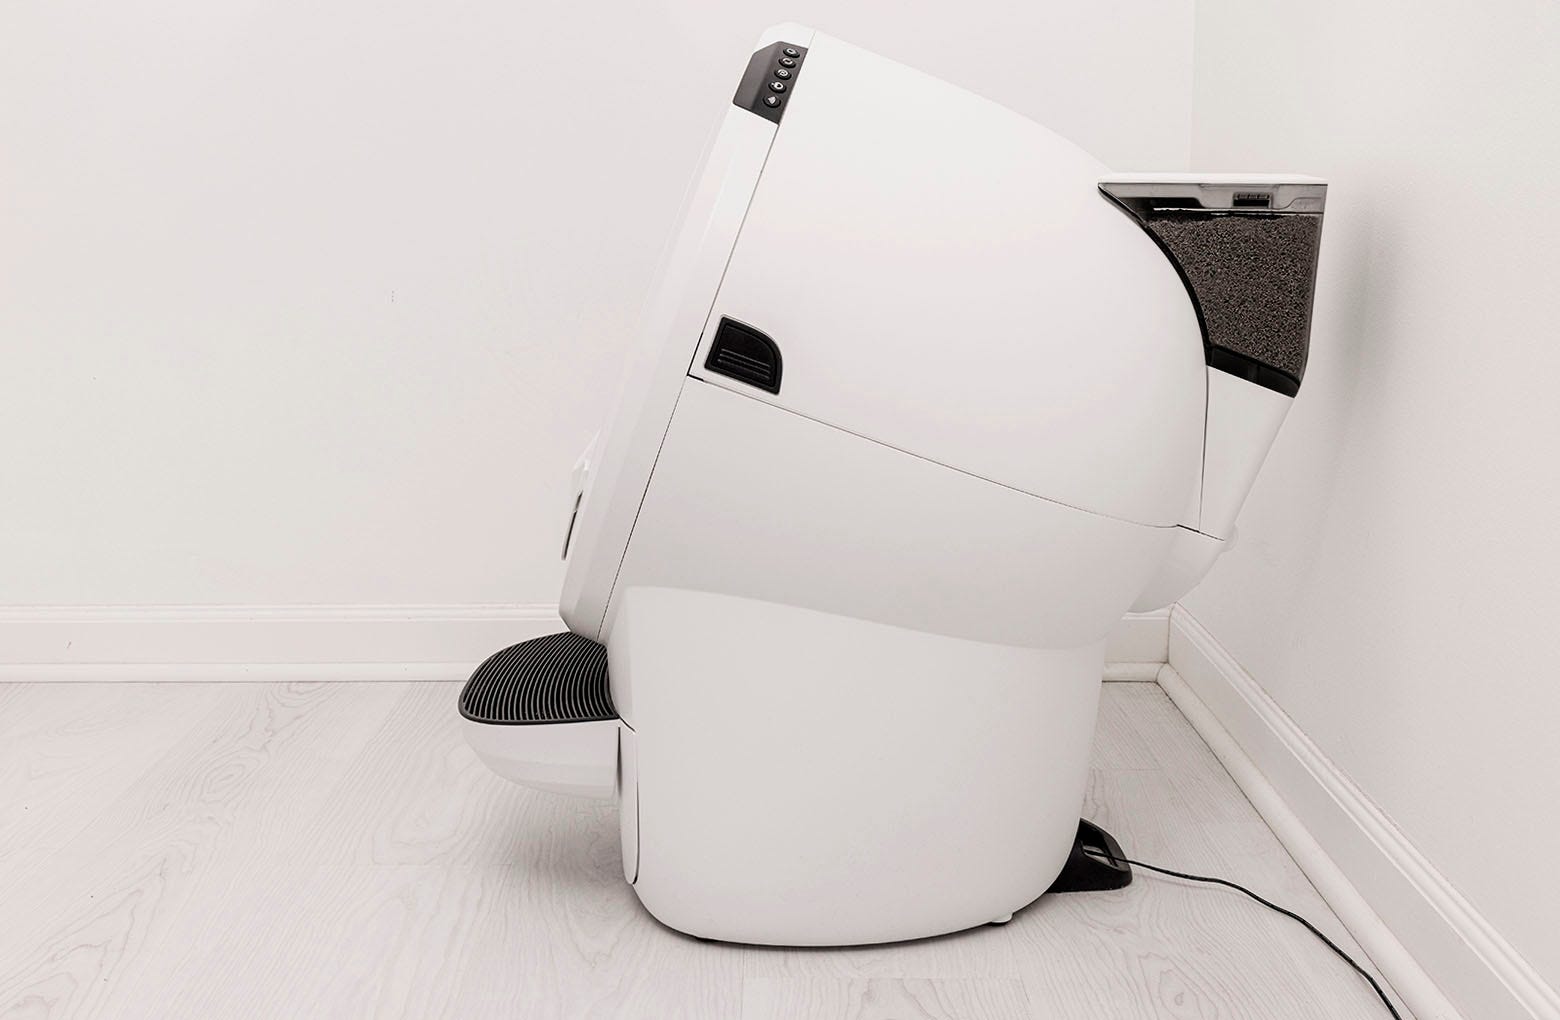
- Slide the waste drawer back into the base and reattach the fence and camera mount if desired. Move Litter-Robot 4 to its original location, making sure it doesn’t sit on any cords and that the LitterHopper does not touch the wall.
![Image showing LitterHopper not touching the wall]()
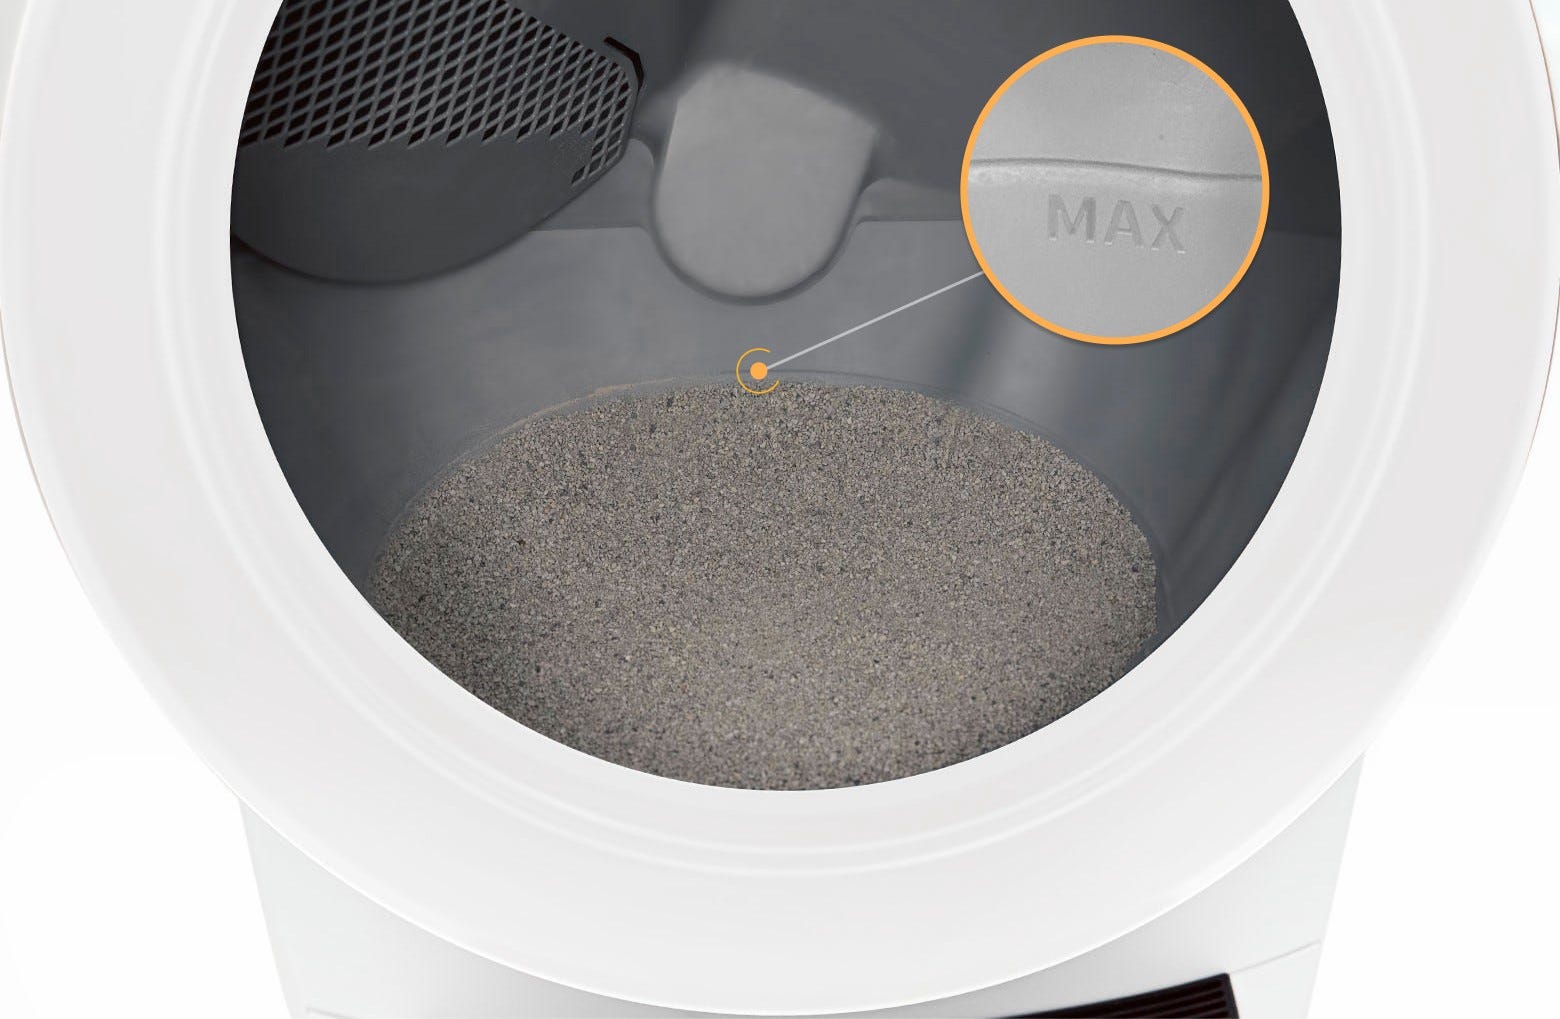
- Ensure the litter level inside the globe is just below the MAX fill line. Add some litter if needed. The LitterHopper is designed to maintain the litter at the optimum level.
![Image of the optimum litter level]()
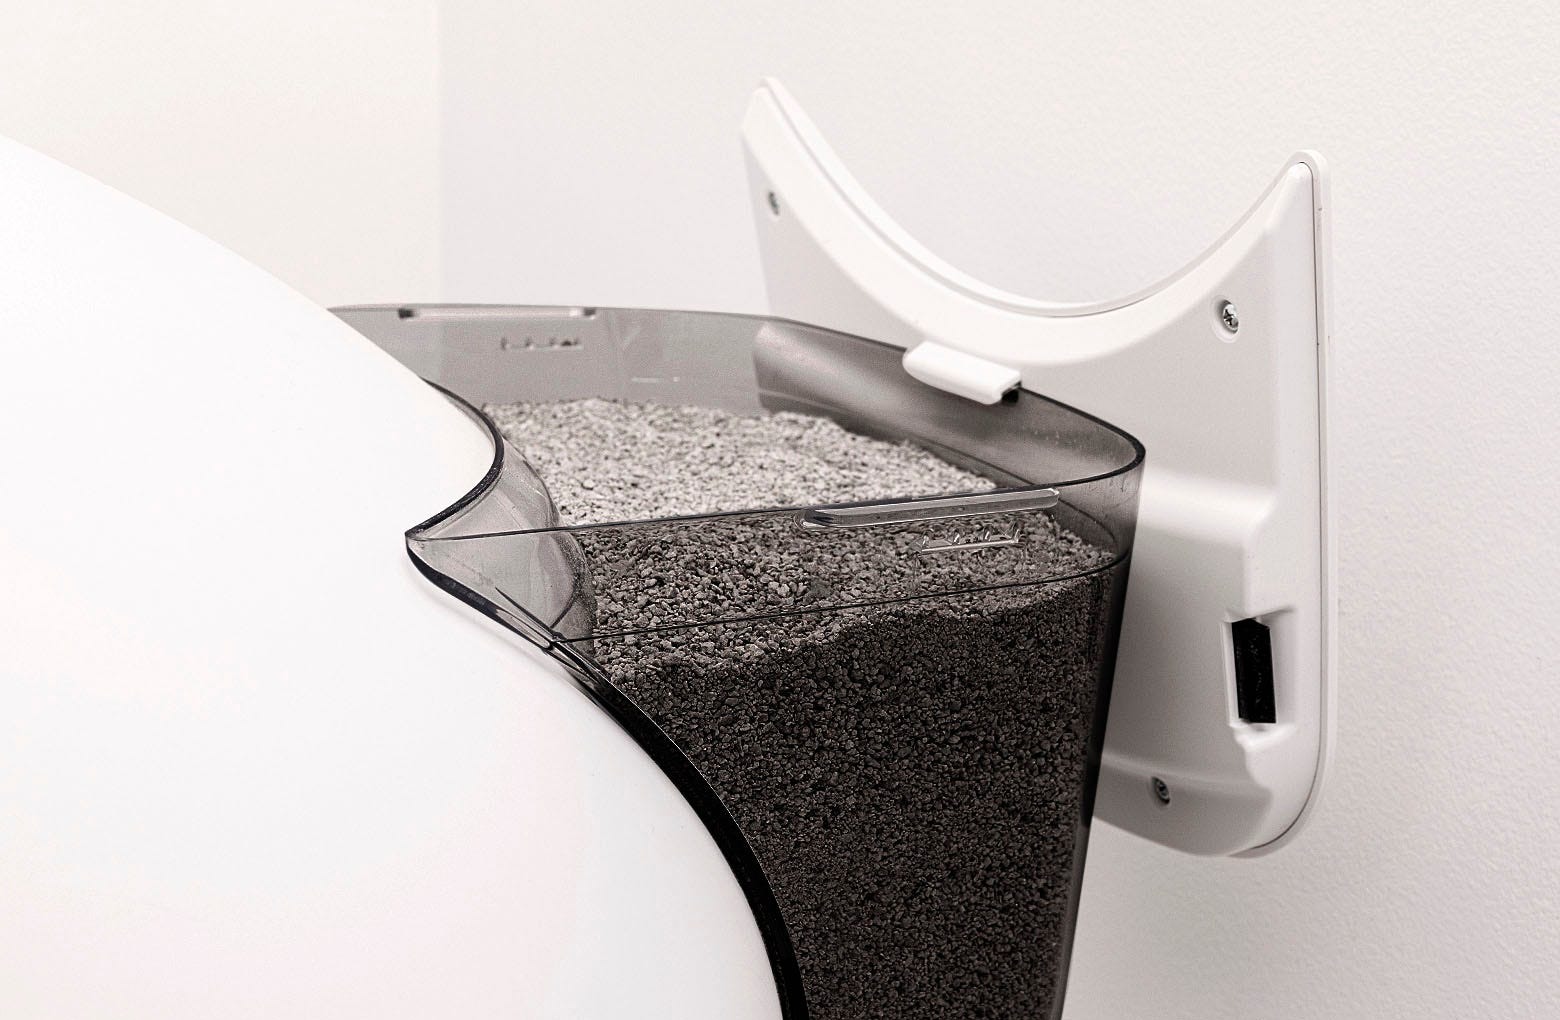
- Remove the lid from the LitterHopper and fill the LitterHopper with litter up to the fill line. Install the lid and make sure it is securely attached to the LitterHopper.
![Image of LitterHopper lid attached to the LitterHopper]()
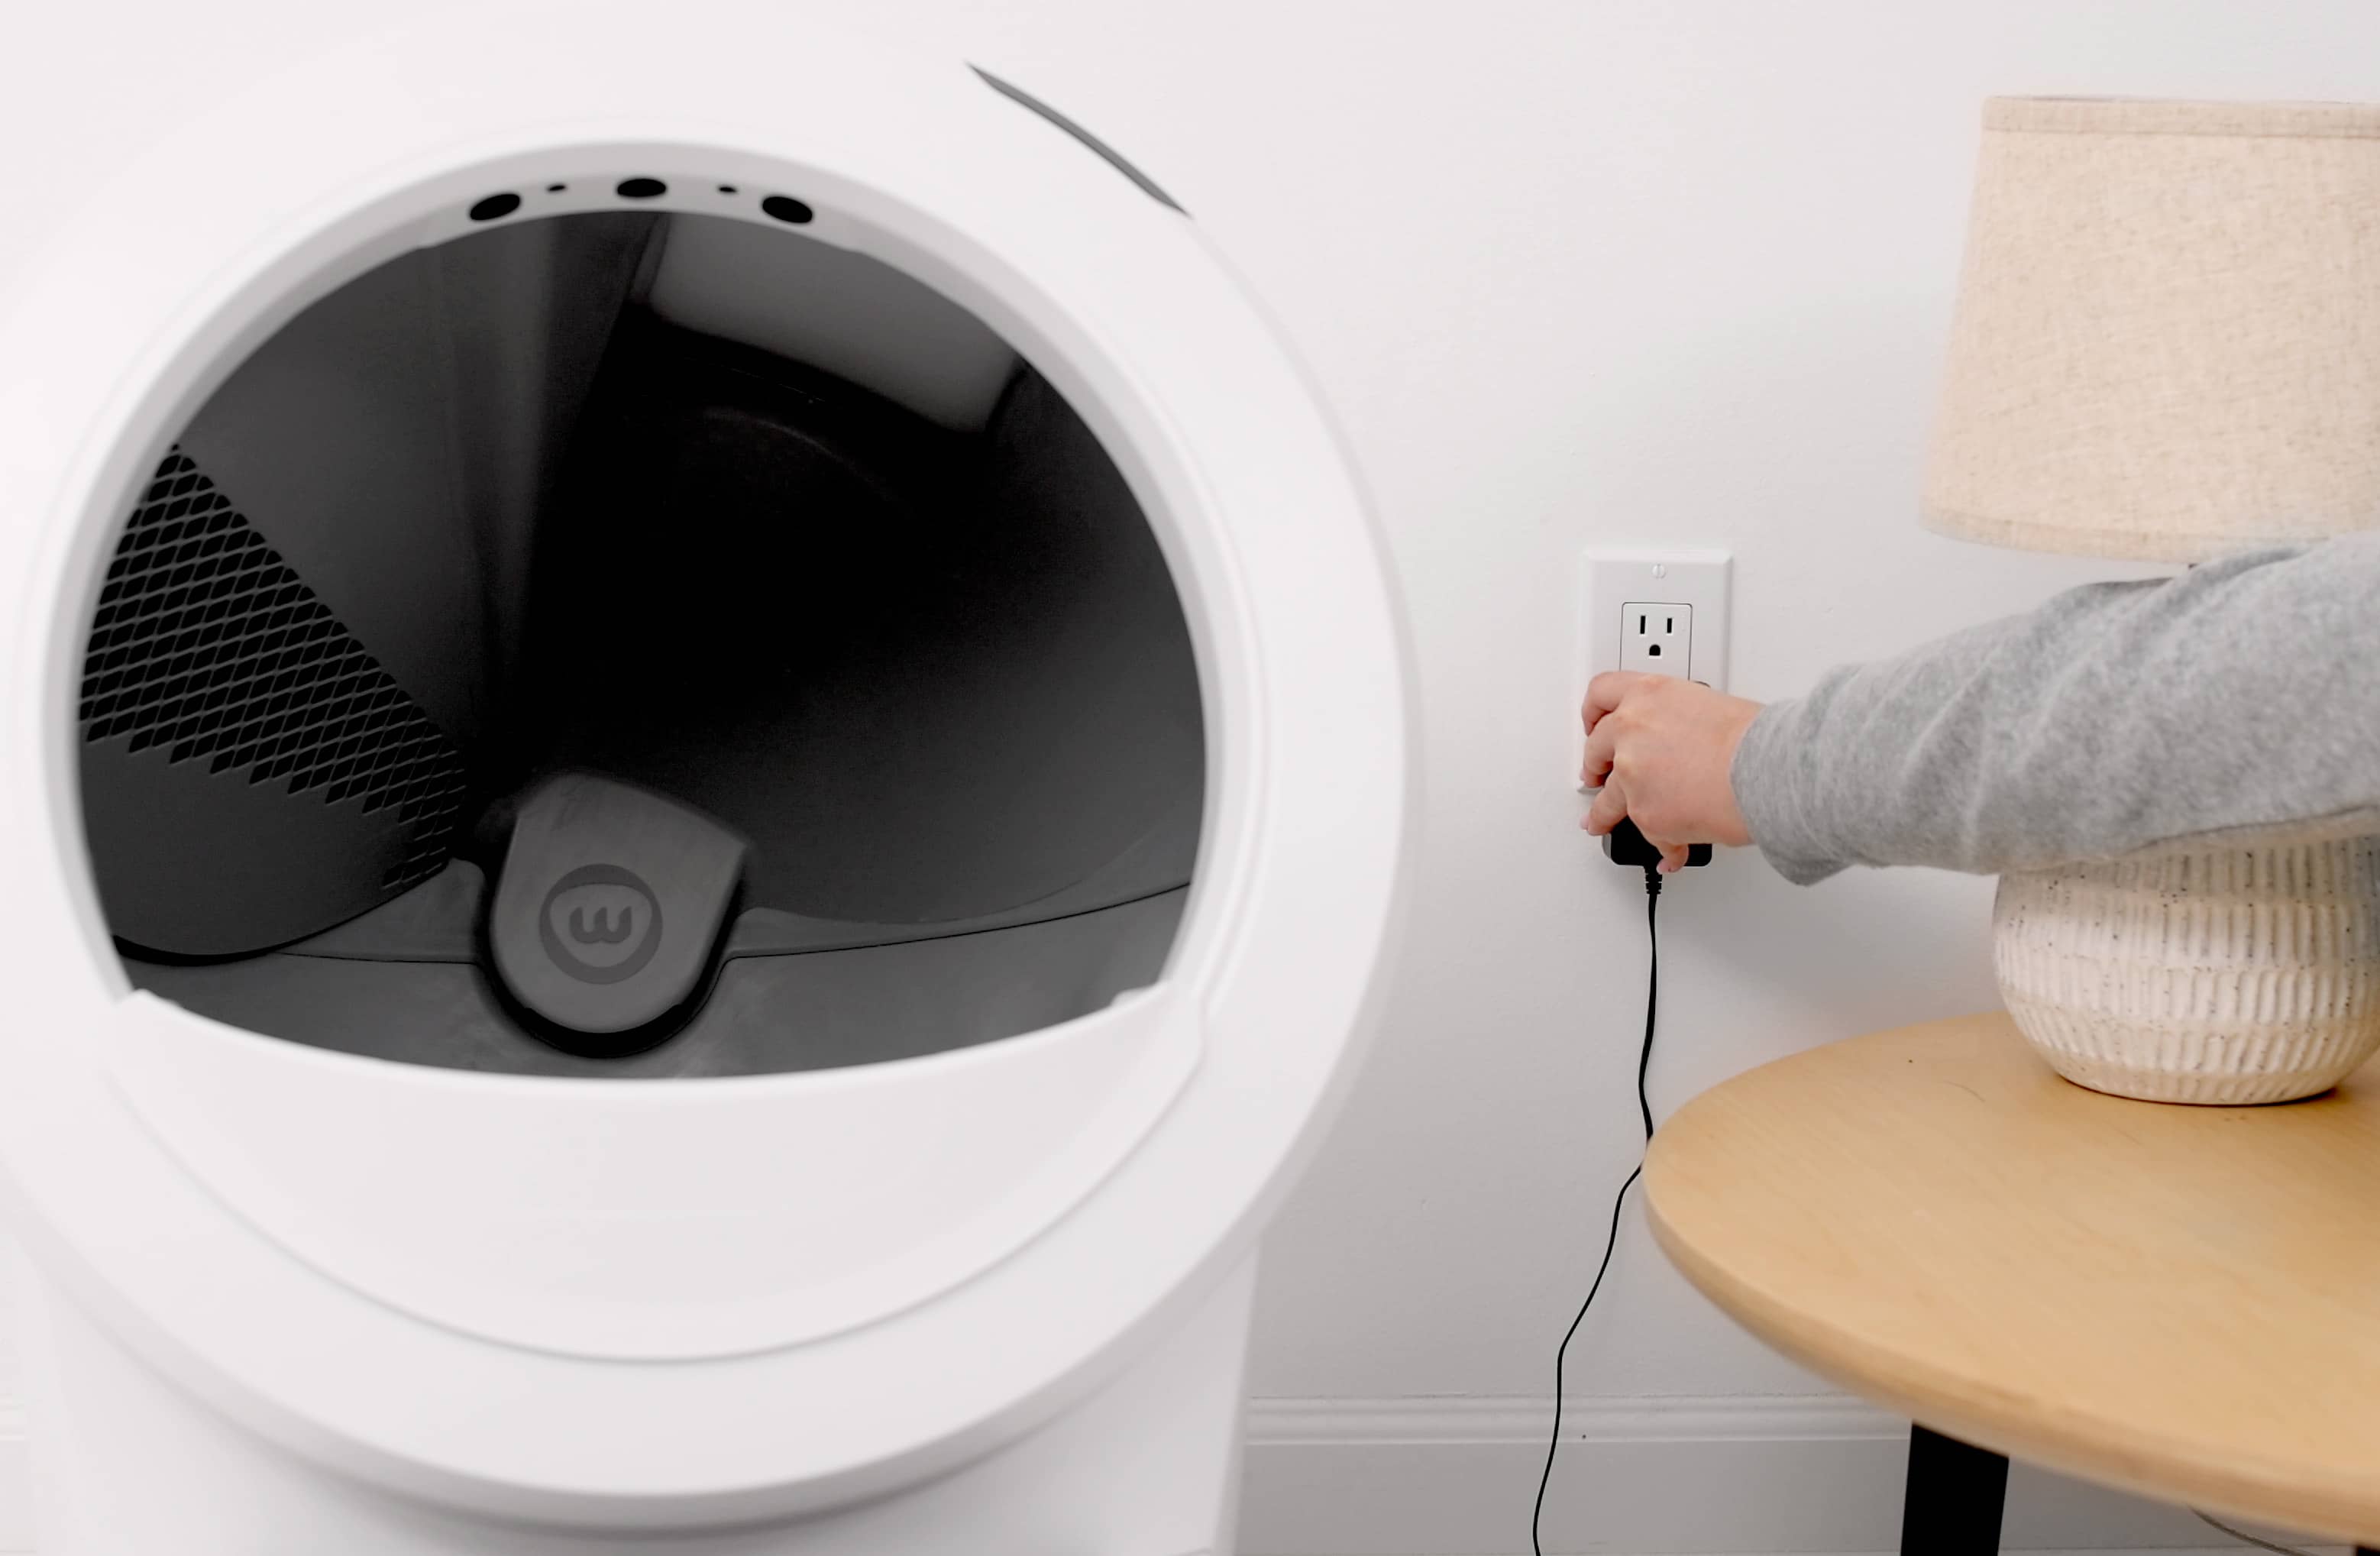
- Plug the power supply back into the wall if removed and press the Power button.
![Image plugging the power supply into the wall]()
![Image of turning on the Litter-Robot]()
- Any time you add litter to the globe or the LitterHopper, you will need to press the Reset button to ensure the weight sensors will detect your cat and cycle properly
![Image of reseting the Litter-Robot]()
- Now that the LitterHopper is installed, it must be enabled before it can operate.
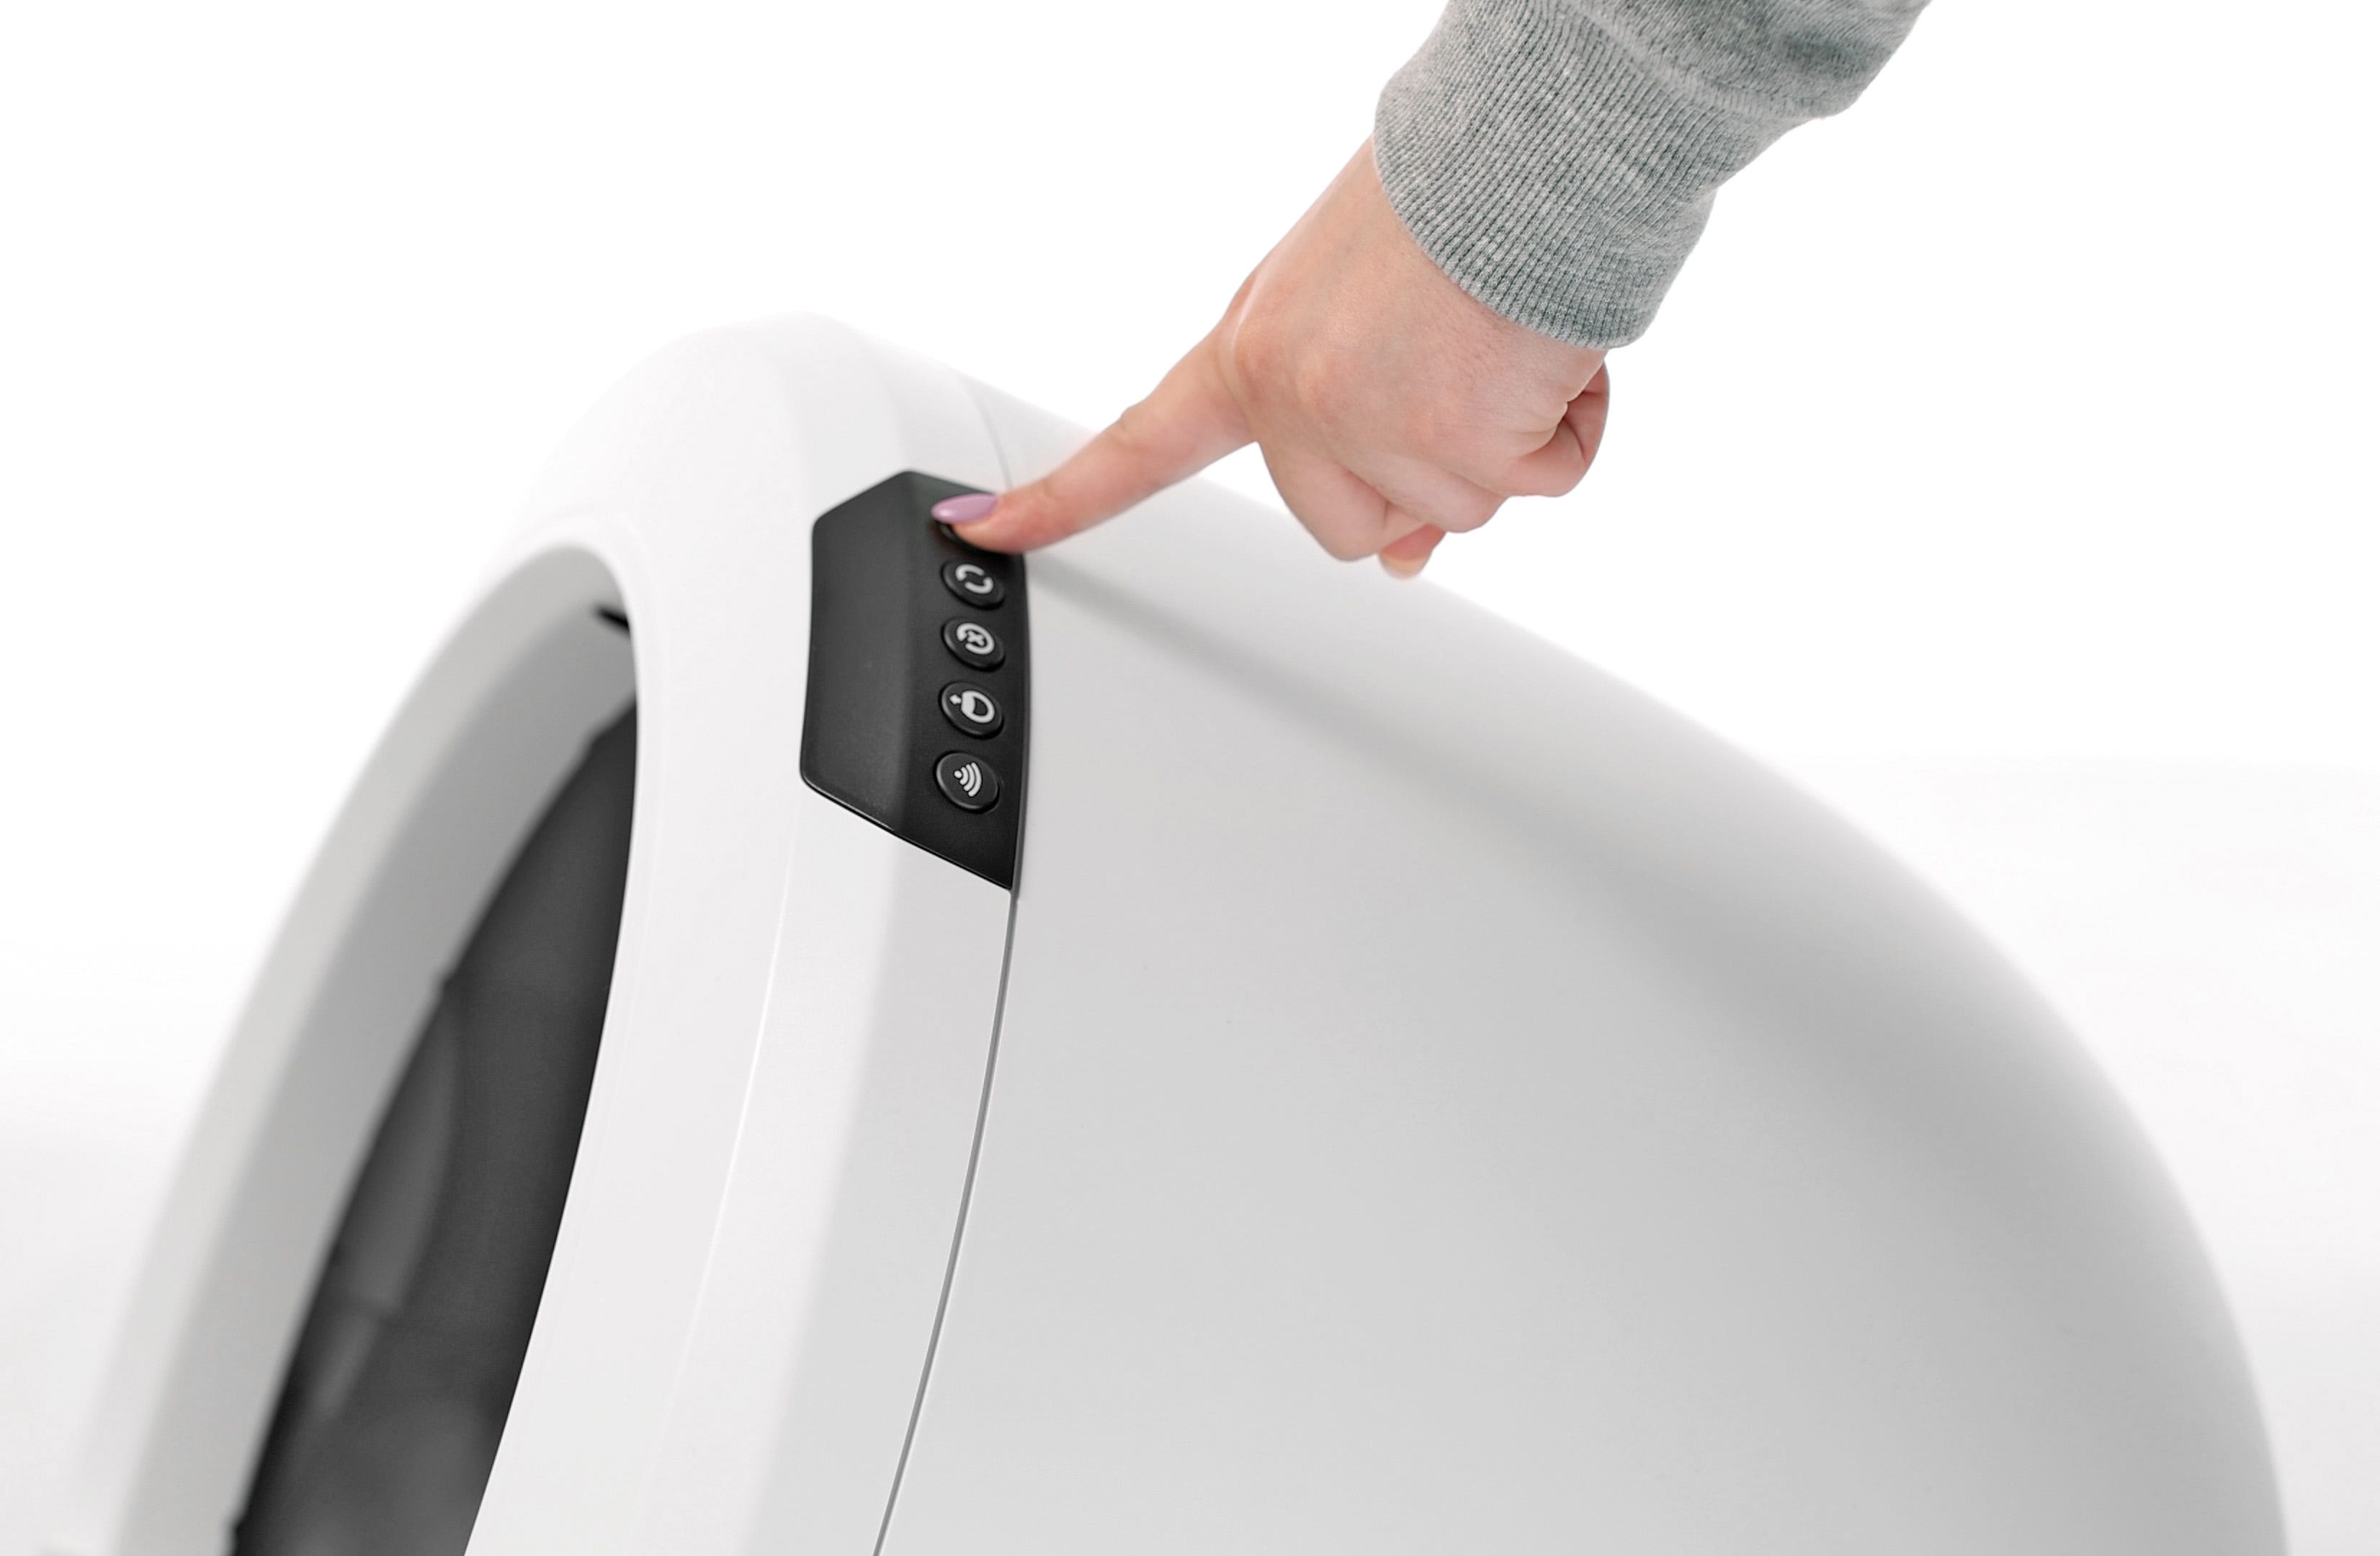

To ENABLE via the Litter-Robot 4 control panel:
Press and hold the Cycle and Connect buttons for 3 seconds. The control panel will flash WHITE and the LitterHopper motor will rotate for 1 second, indicating the LitterHopper is enabled. At this point, your setup is complete! You can check the status of your LitterHopper in the Whisker app any time.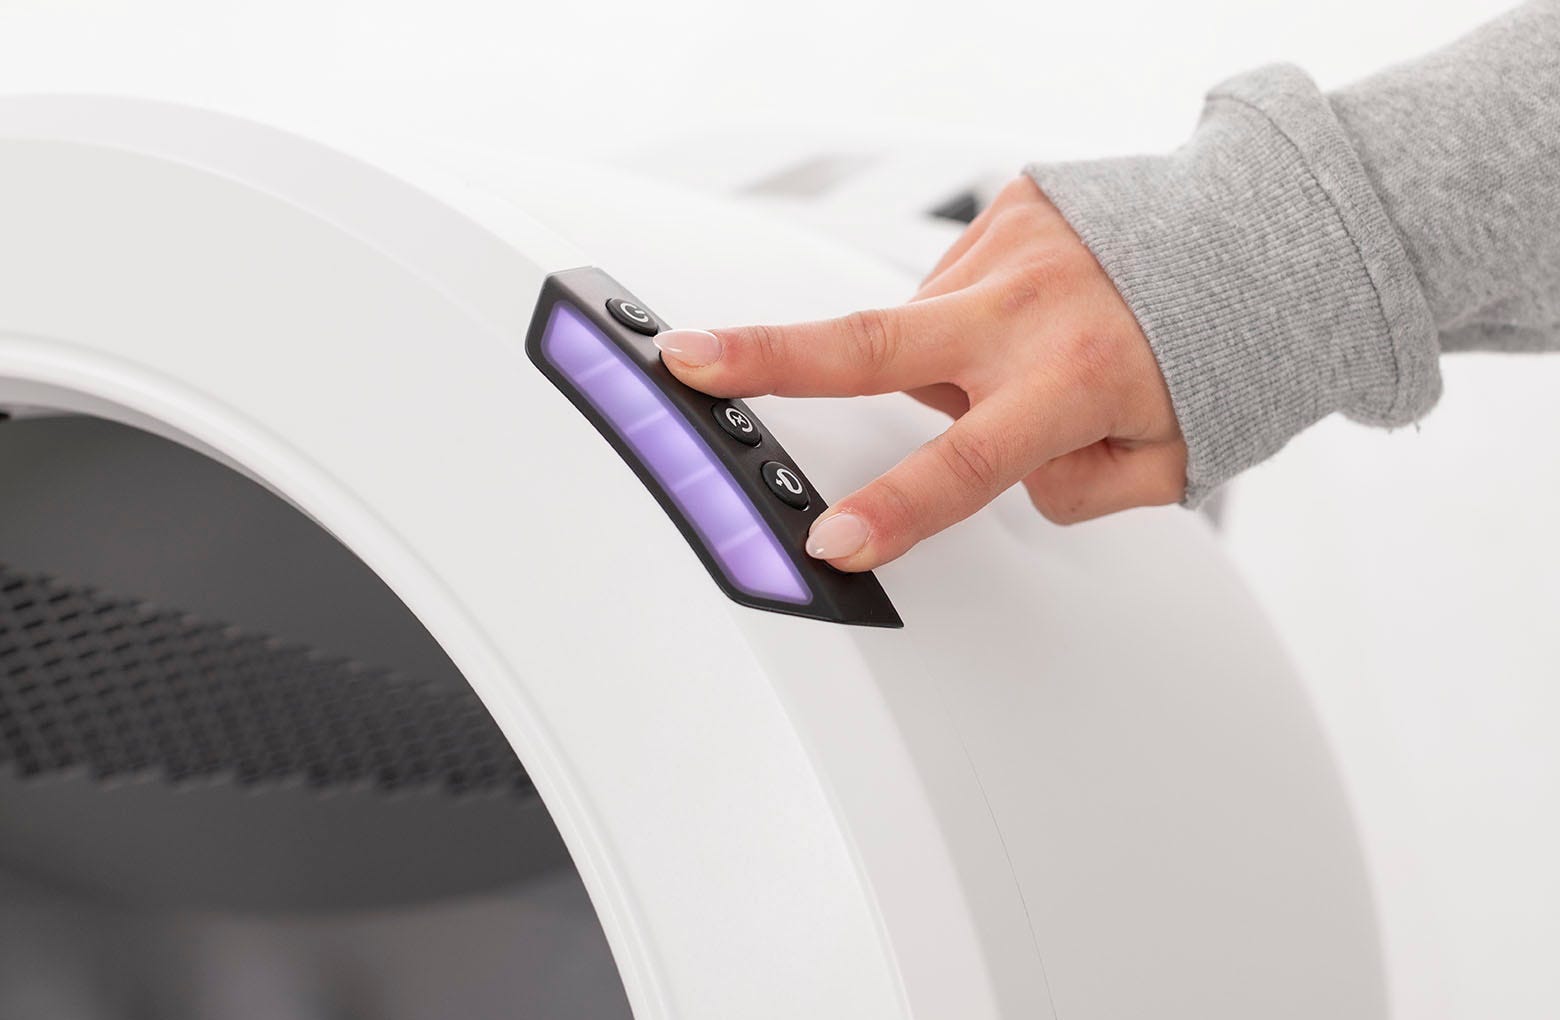
To DISABLE via the Litter-Robot 4 control panel:
Press and hold the Cycle and Connect buttons for 3 seconds. The control panel will flash WHITE and the hopper motor will NOT rotate, indicating the LitterHopper is disabled.
NOTE: Be mindful that pressing the Cycle and Connect buttons multiple times will toggle the enable/disable status.
To ENABLE and DISABLE via the Whisker app:
After the LitterHopper's initial connection, you can easily toggle the switch to enable or disable the LitterHopper directly from the app.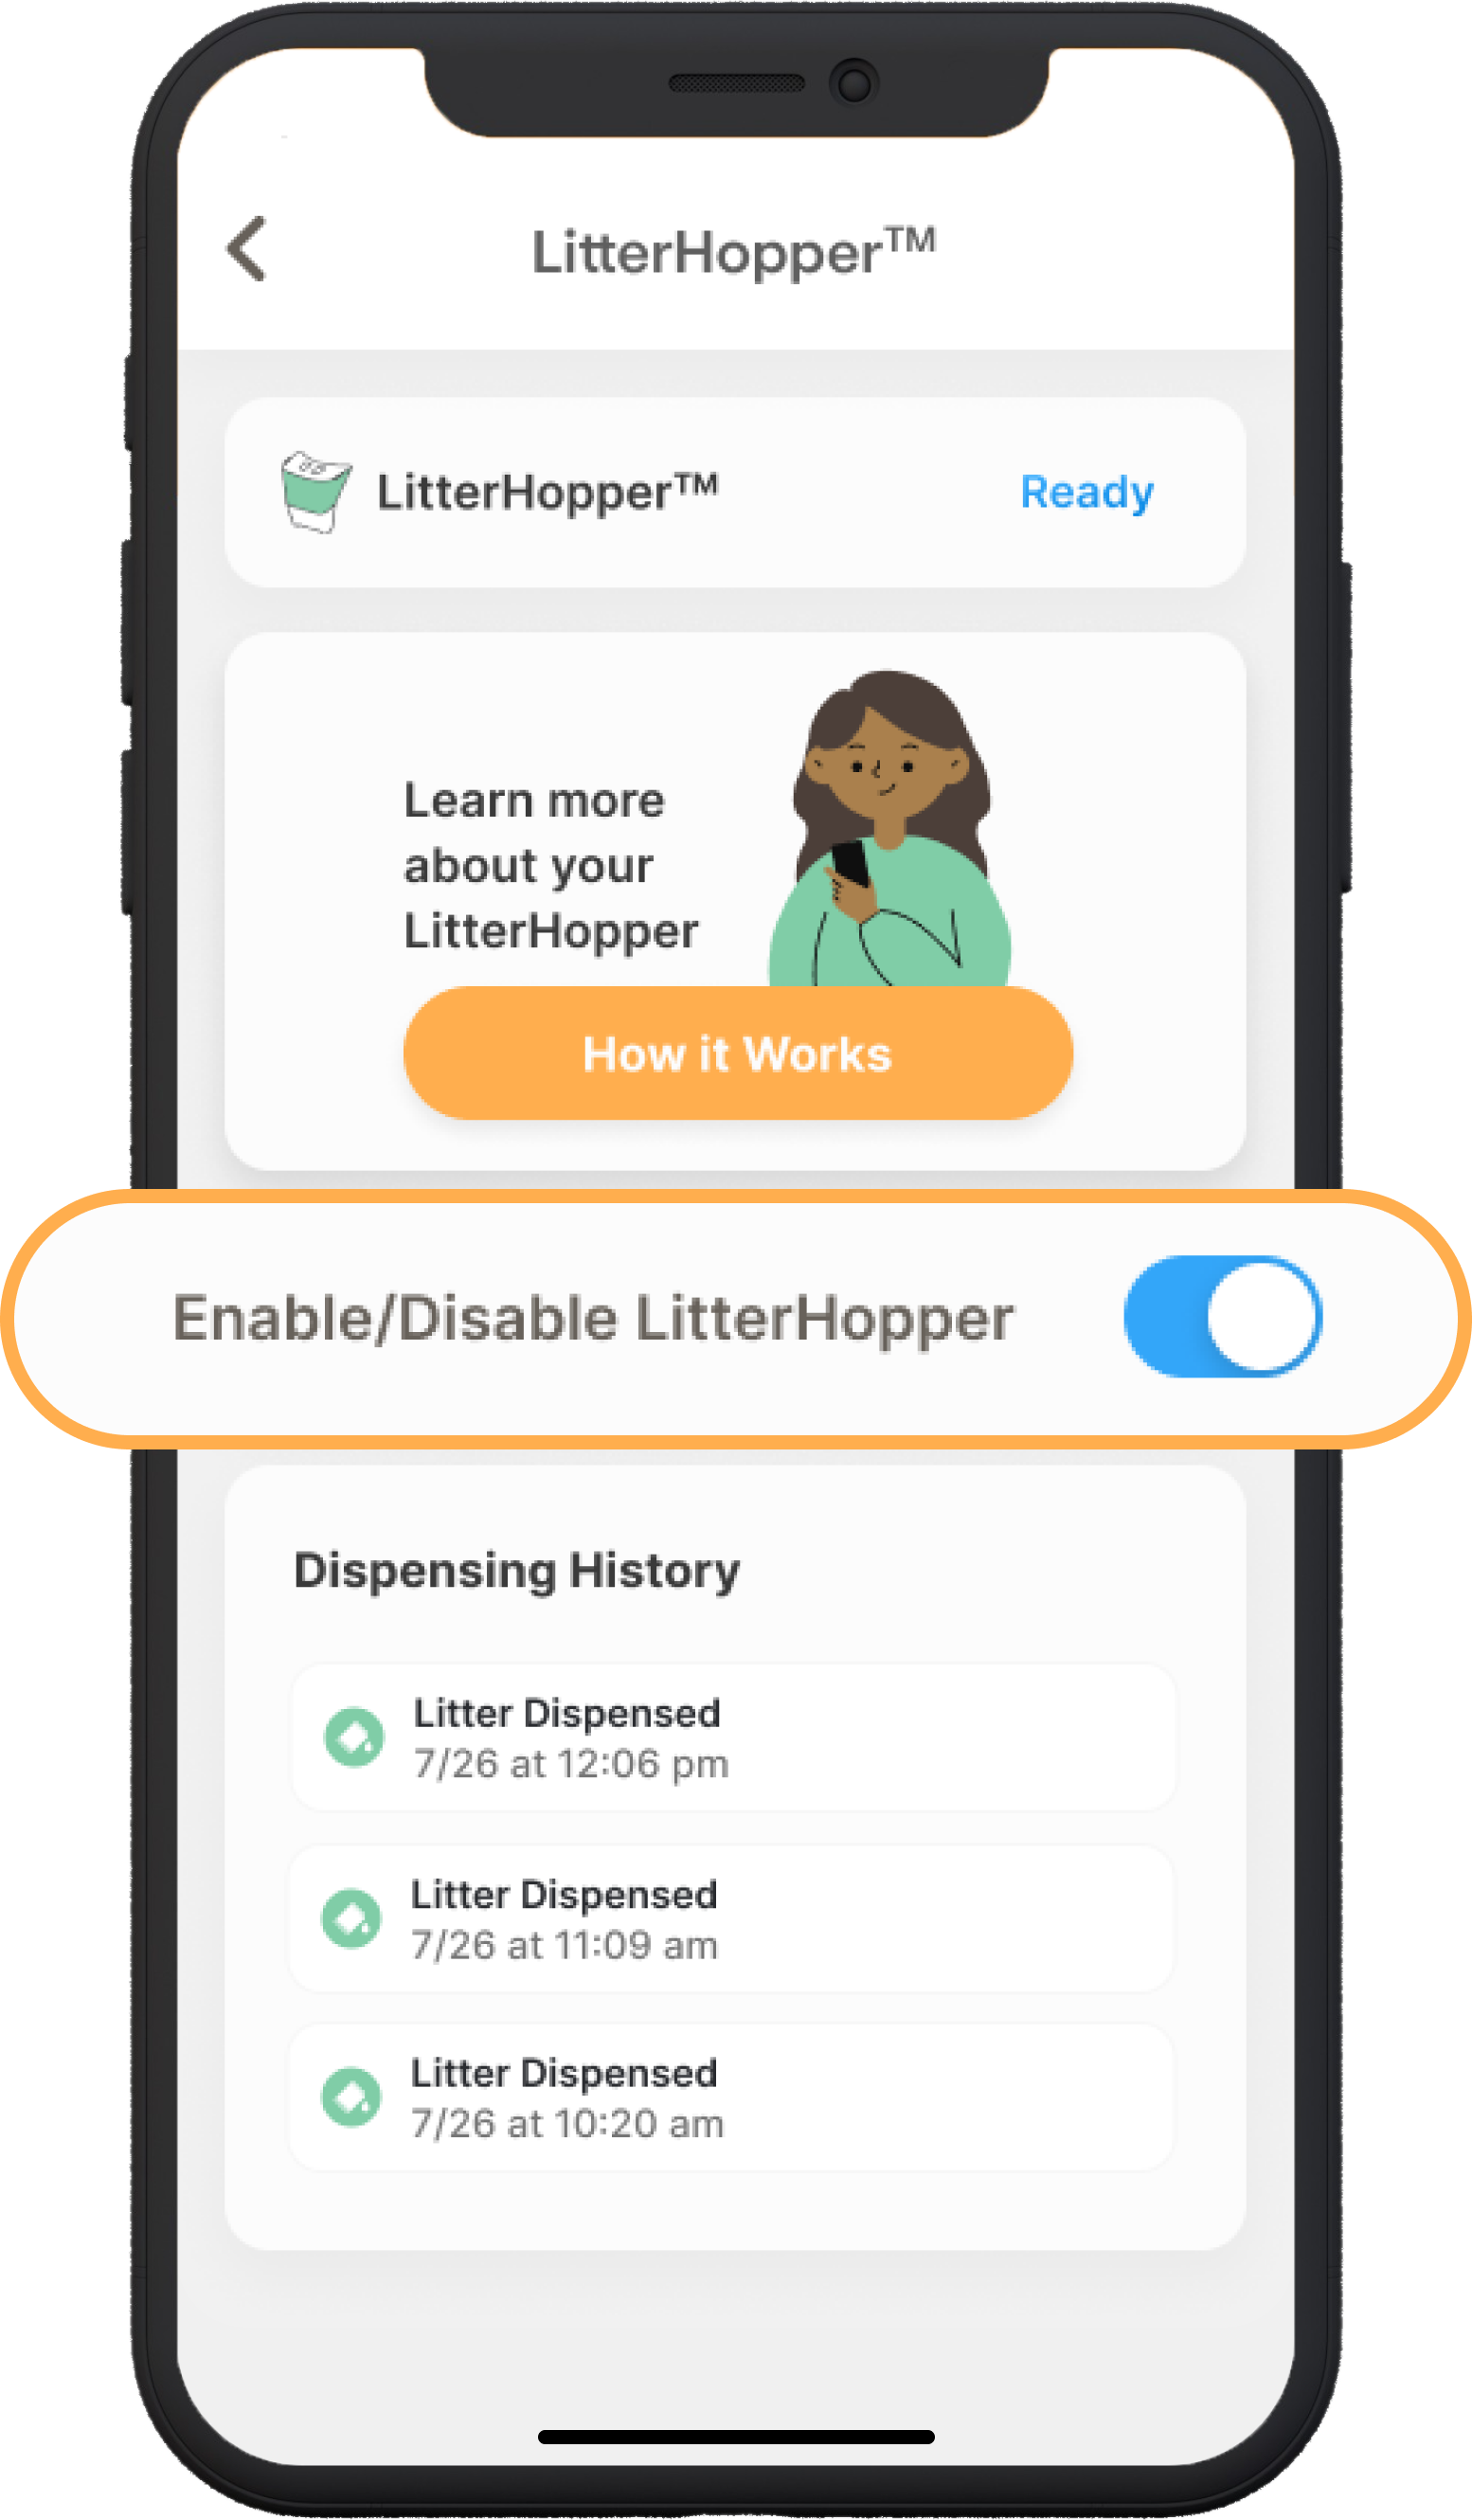
If the control panel flashes WHITE and then starts to alternate between PURPLE and BLUE, this is an indication that there is a LitterHopper error.
To troubleshoot:
1. Visit Whisker Support for LitterHopper troubleshooting resources, or
2. Follow the troubleshooting steps in the Whisker app. If you receive an error notification or see an error status in the app, tap either the notification or status to be directed to a specific troubleshooting resource.
What should I do with my original Litter-Robot 4 Bonnet?
Feel free to recycle or throw away your original bonnet (Be sure to follow local regulations). Or you can store it in the box your LitterHopper arrived in for safekeeping.
Enjoy LitterHopper!
Didn't find what you're looking for?
Phone and Chat support available Mon-Fri: 9AM-9PM EST and Sat-Sun: 9AM-5PM EST, or submit a ticket anytime.