The store will not work correctly in the case when cookies are disabled.

Litter-Robot 4® with LitterHopper™ quick start guide
Visit litter-robot.com/getting-started to access our online setup guide (including tips to acclimate your cat), the user manual, and accessory installation guides.
The LitterHopper is designed to automatically maintain the optimal litter bed level within the globe of your Litter-Robot 4. The 'default' optimal litter bed level is just below the MAX fill line inside the globe. Litter-Robot 4 uses sensors to measure the height of the litter bed level at the end of each clean cycle. If the sensors determine that the litter bed level is below the optimal level, then the LitterHopper will dispense litter into the globe during the NEXT clean cycle. When dispensing, the globe may momentarily pause rotation.
- Ensure proper placement
- If possible, place Litter-Robot in the same location as the old litter box (at least during transition).
- Make sure the robot is indoors on a firm, level surface and in a cool, dry location. Must not be touching any walls or sitting on any cords.
- Place litter mats or rugs in front of the unit.
- Install the LitterHopper anti-tip guard
- Note: If your cat has already been using Litter-Robot 4, remove the globe and reinstall it after Step 3.
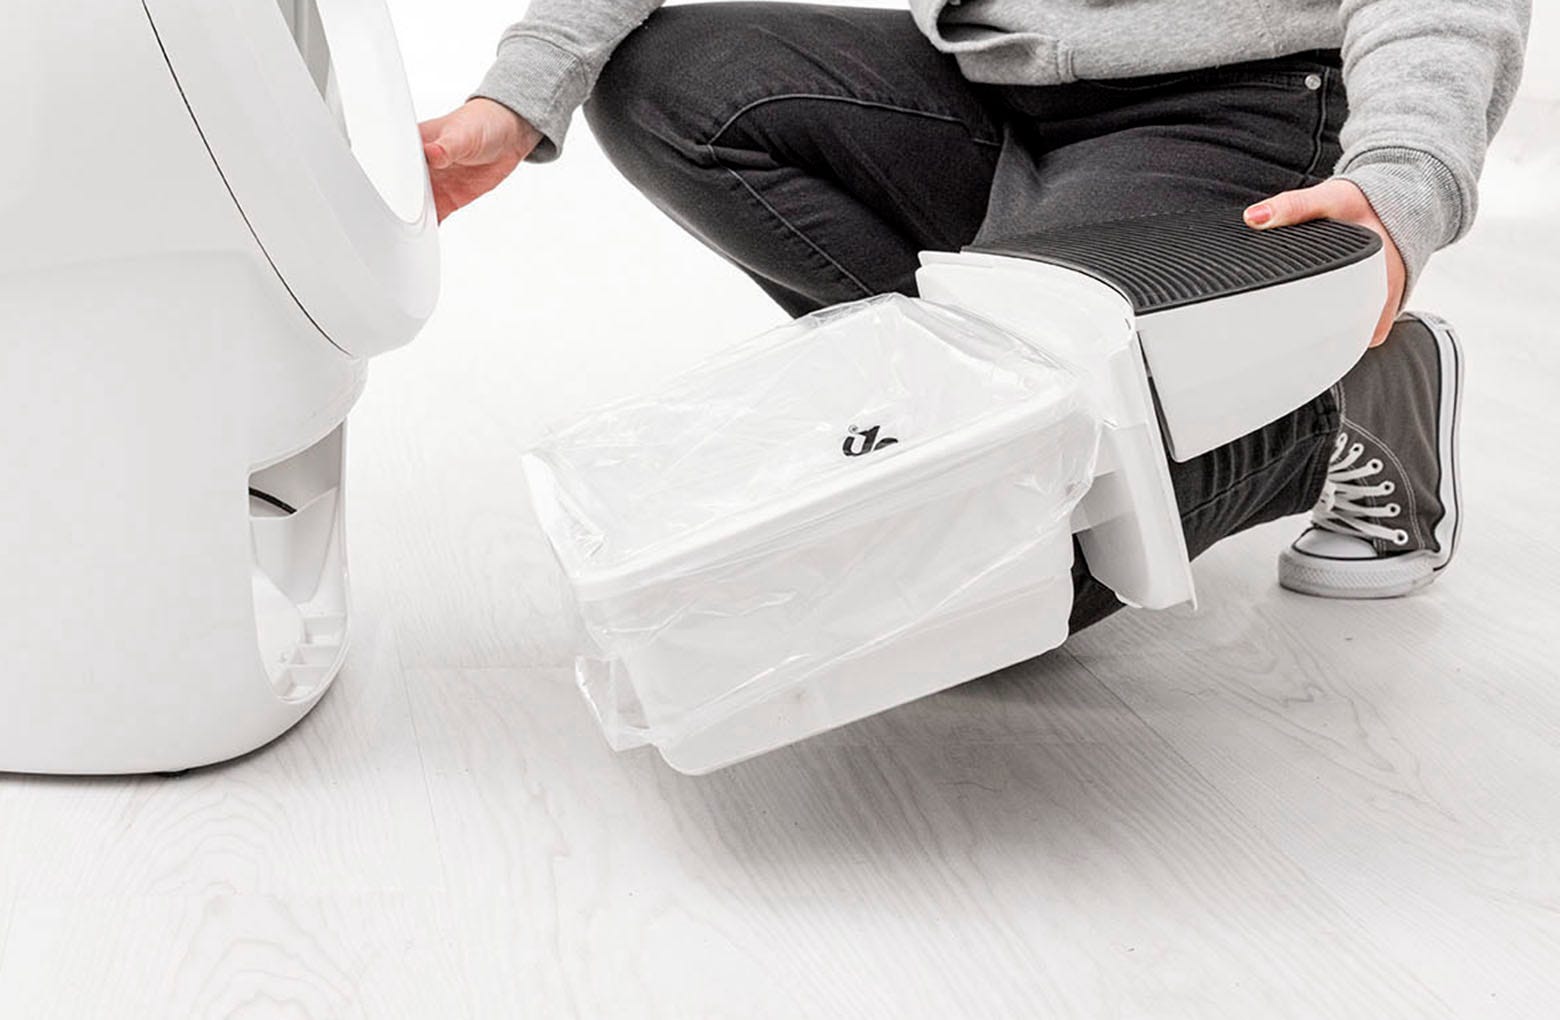
- Remove the waste drawer from the unit.
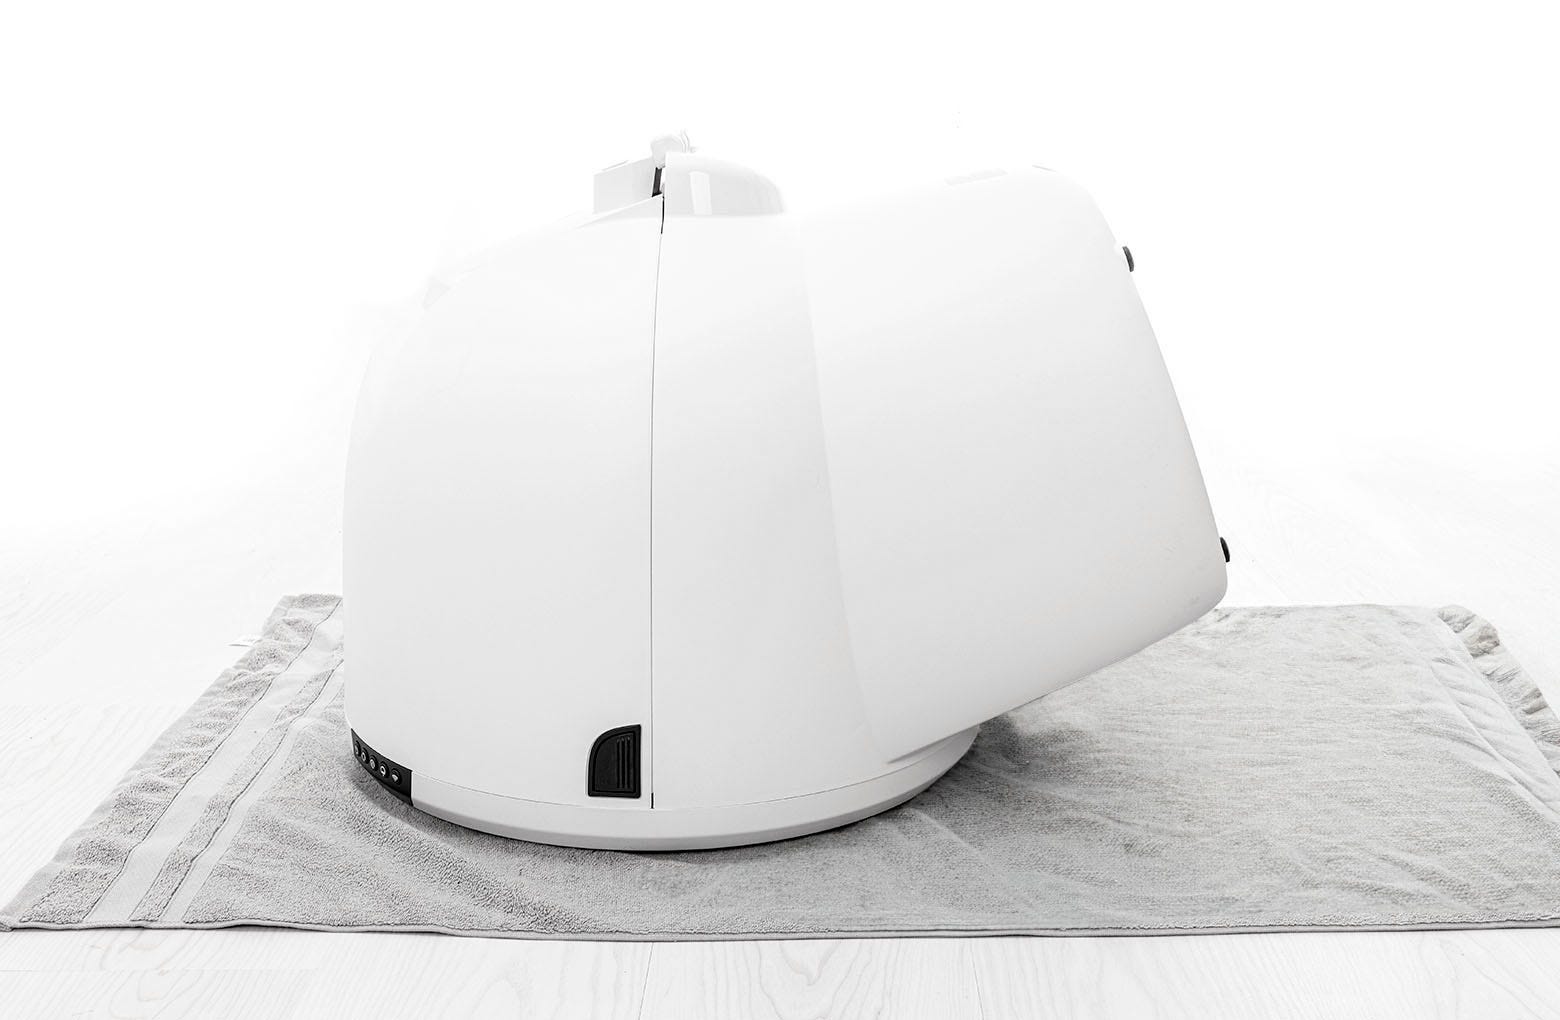
- Place the unit facedown (bezel down) on a solid, flat surface. Use a towel or blanket to protect the bezel from scratching, if on a hard surface.
- Note that a wire runs through the two holes at the bottom rear of the base. Gently pull down the wiring to the lower end of the holes and leave enough room at the top for the anti-tip guard hooks to insert completely.
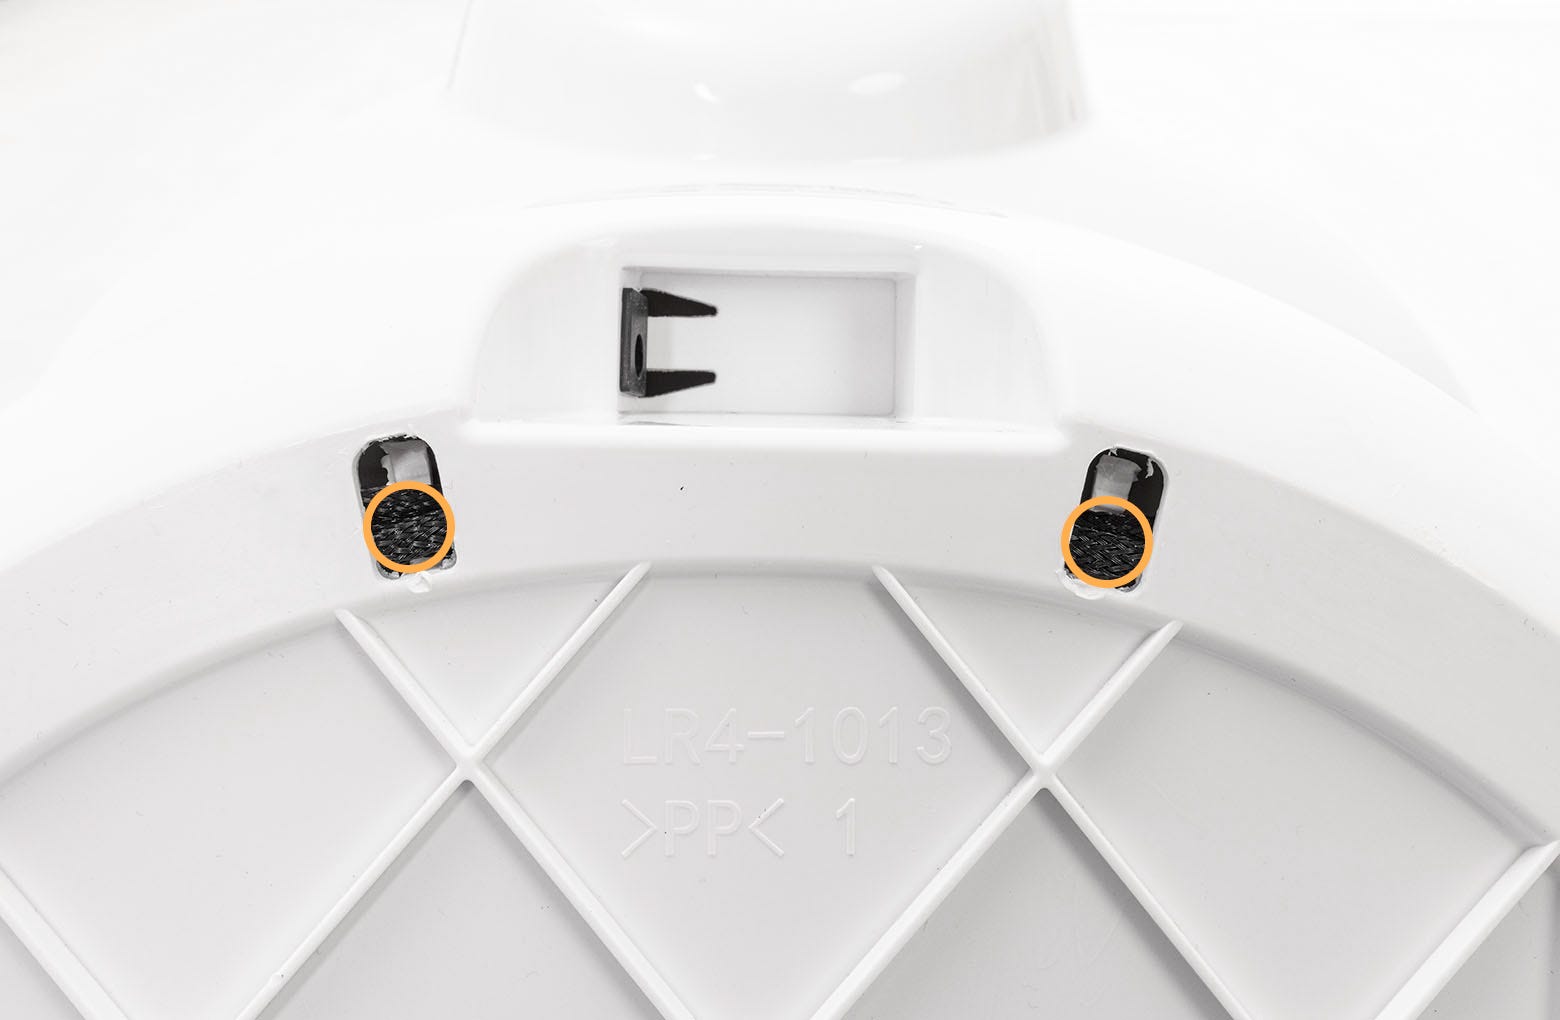
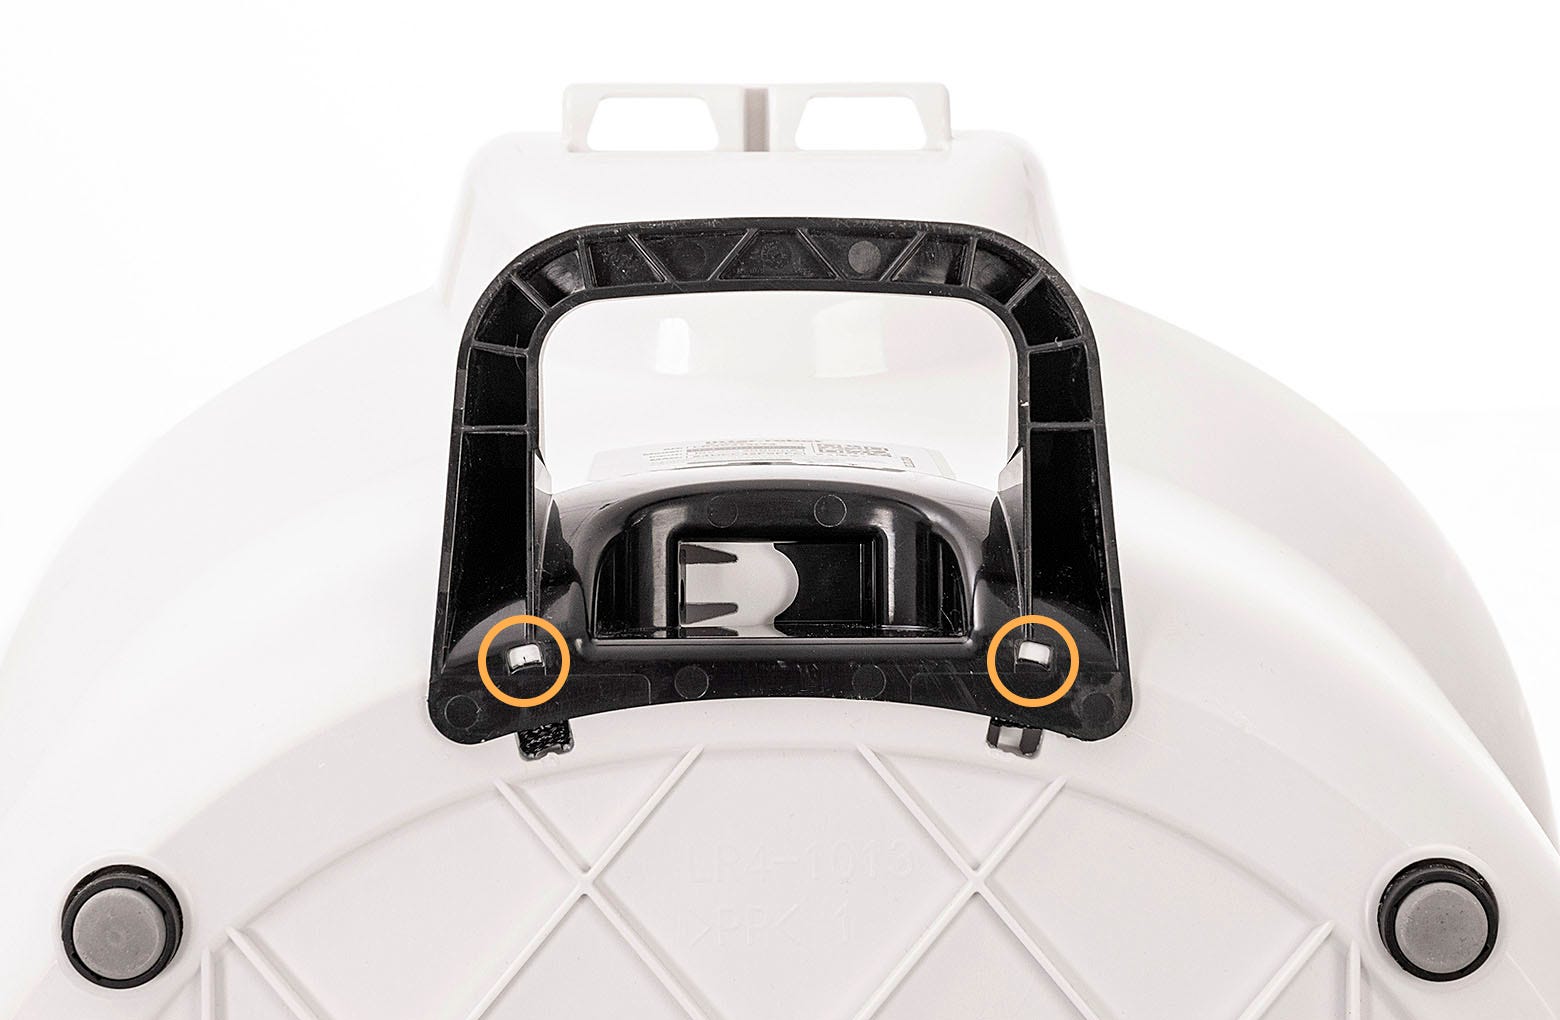
- Press on the anti-tip guard near the small holes until each side snaps into place. This may require some amount of force.
![Image of where the anti-tip guard will snap into place.]() Once installed, the anti-tip guard should feel rigid with no movement and be flush with the base.
Once installed, the anti-tip guard should feel rigid with no movement and be flush with the base.![Image of the correct placement of the anti-tip guard.]()
- Plug the power plug into Litter-Robot 4
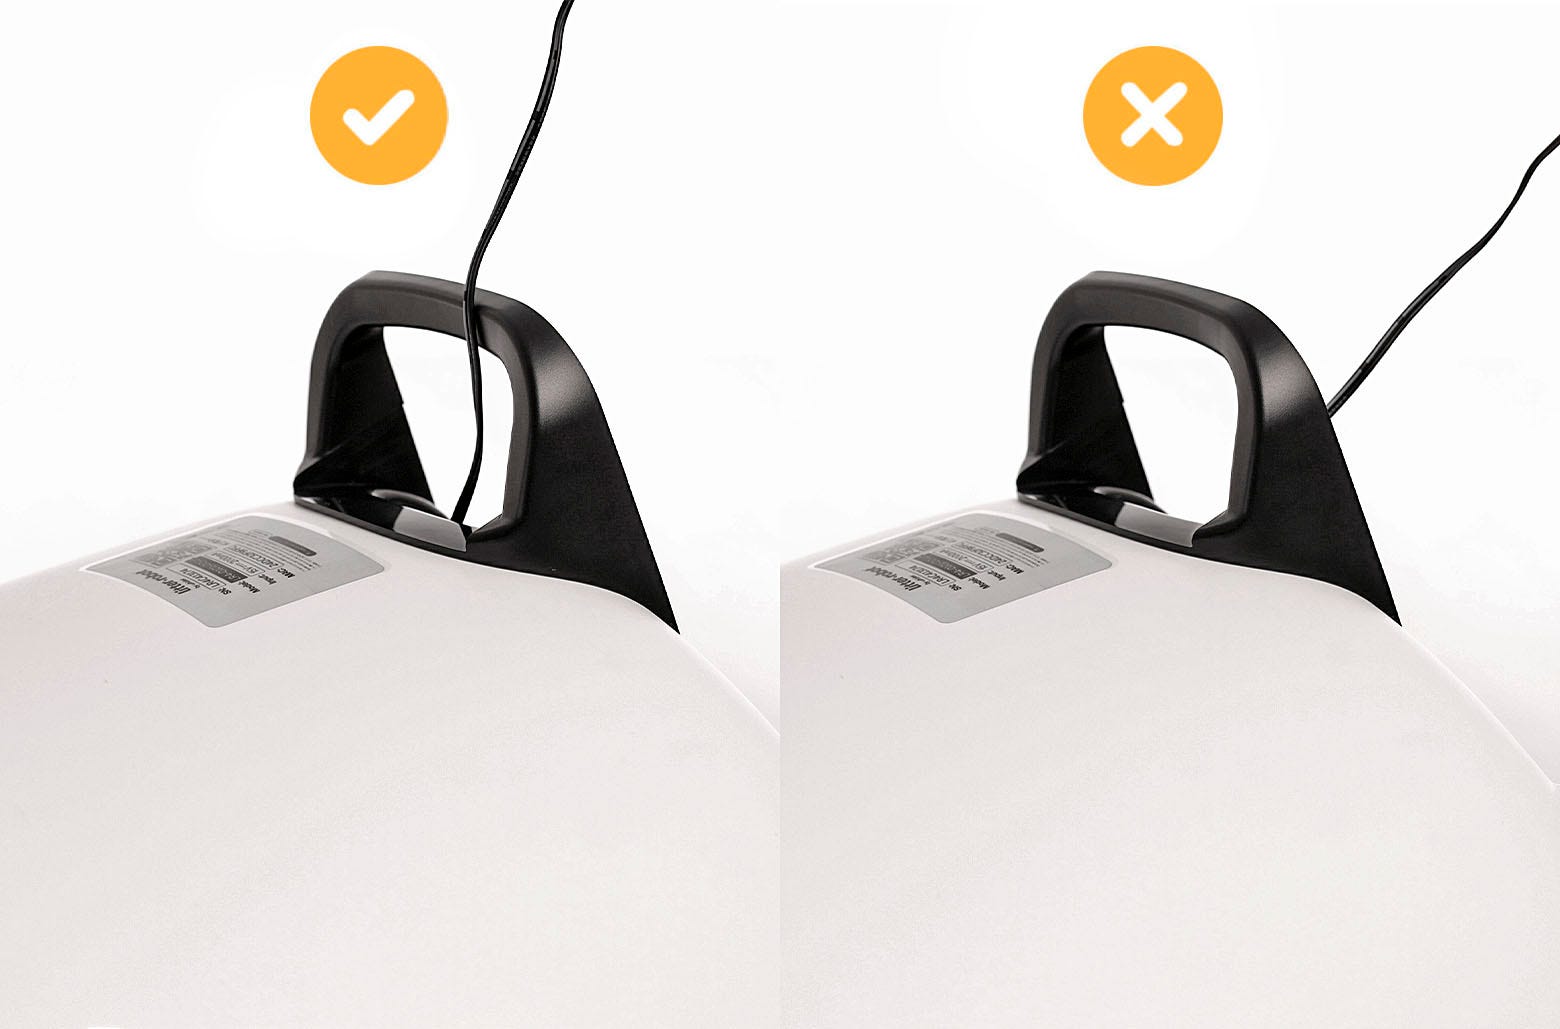
- Route the power cord over the anti-tip guard – NOT under – then plug the power plug into the unit.
![Image of the correct placement of the anti-tip guard.]()
- Tip the unit upright onto its feet. Verify the power cord is NOT trapped under the anti-tip guard.
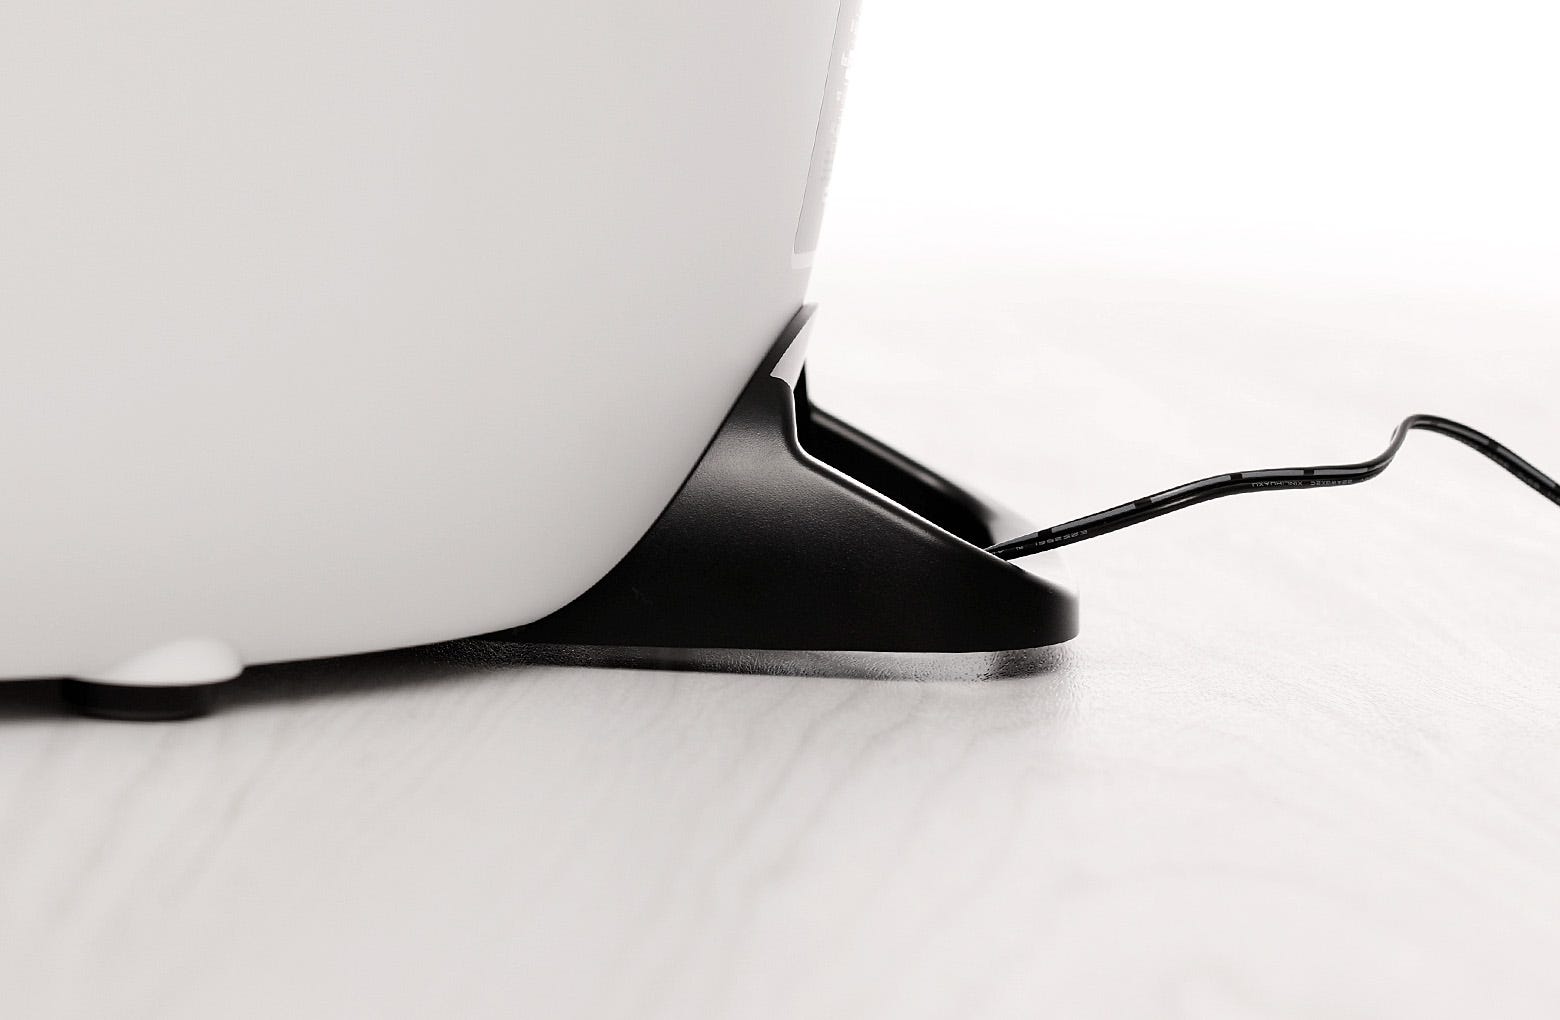
- Verify that the anti-tip guard is NOT contacting the floor. There must always be a small gap between the bottom of the anti-tip guard and the floor. If there is no gap, you may need to place your Litter-Robot on a different floor surface or purchase the carpet tray accessory.
![Image of how the anti-tip guard will be on the floor.]()
- Tip: Slide a piece of paper under the anti-tip guard to confirm it doesn't touch the floor.
- Route the power cord over the anti-tip guard – NOT under – then plug the power plug into the unit.
- Attach the LitterHopper to Litter-Robot 4
- Slide the waste drawer back into the base to install the LitterHopper.
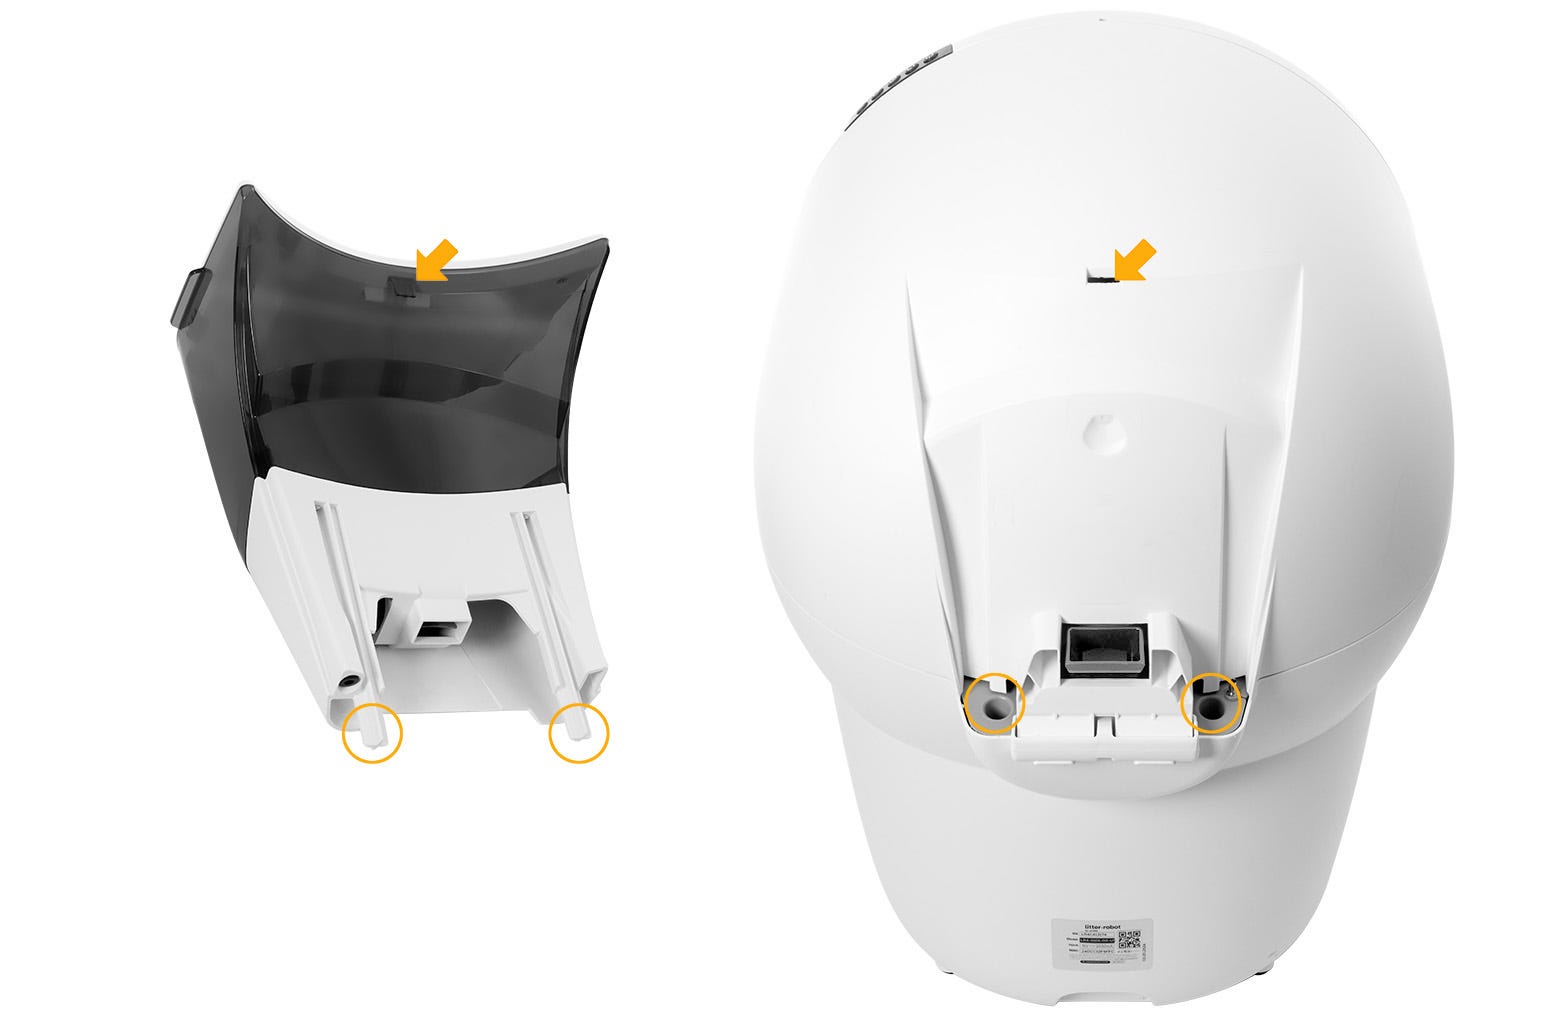
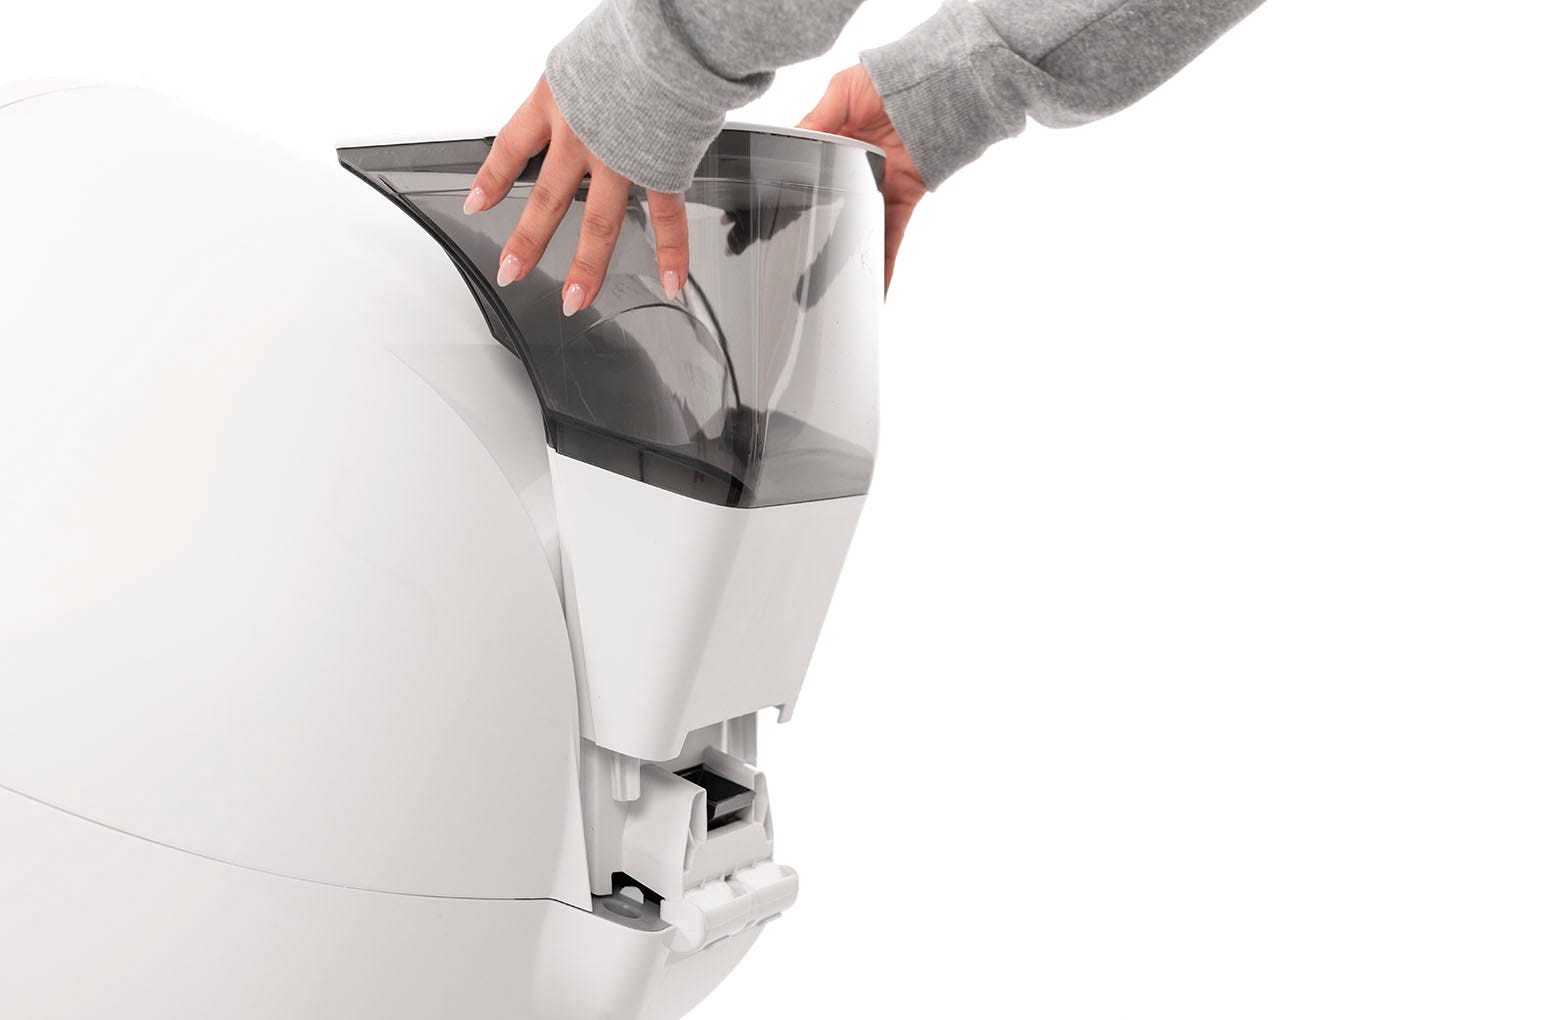
- The LitterHopper attaches to the back of Litter-Robot 4 using two posts at the bottom of the LitterHopper and a hook tab at the top.
![Image showing where the LitterHopper hooks onto the Litter-Robot 4.]()
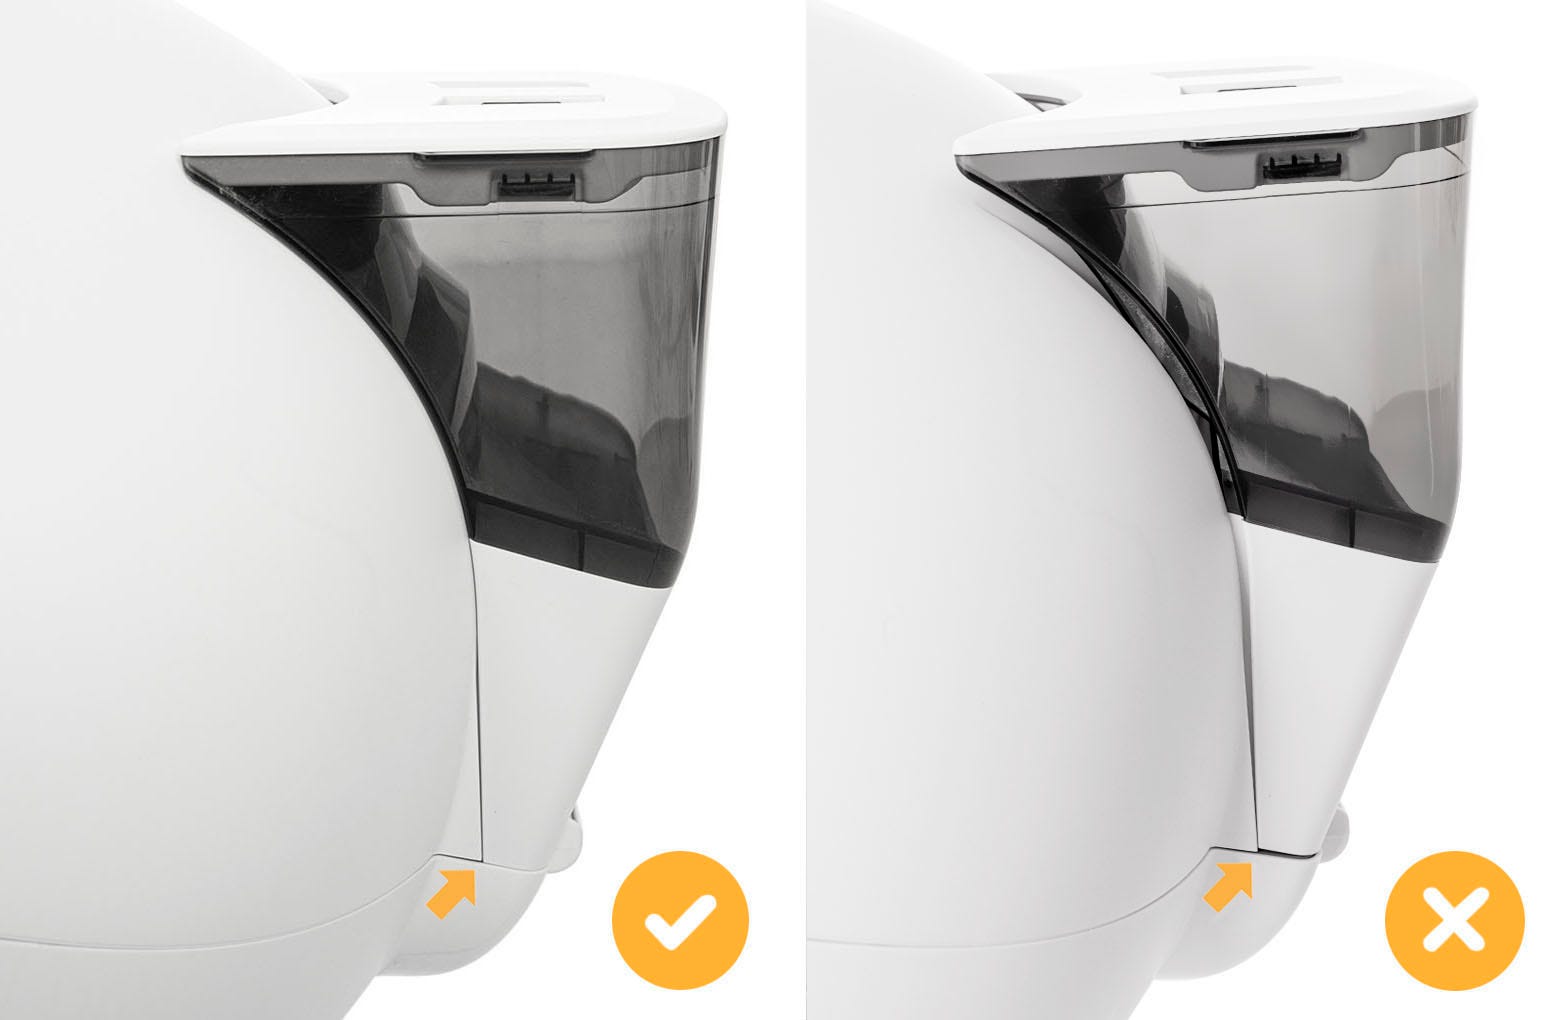
- Litter-Robot 4 has two circular pockets on each side of the hinge at the back of the base and a slot at the back of the bonnet for the LitterHopper hook tab.
![Image placing the LitterHopper onto the Litter-Robot 4.]()
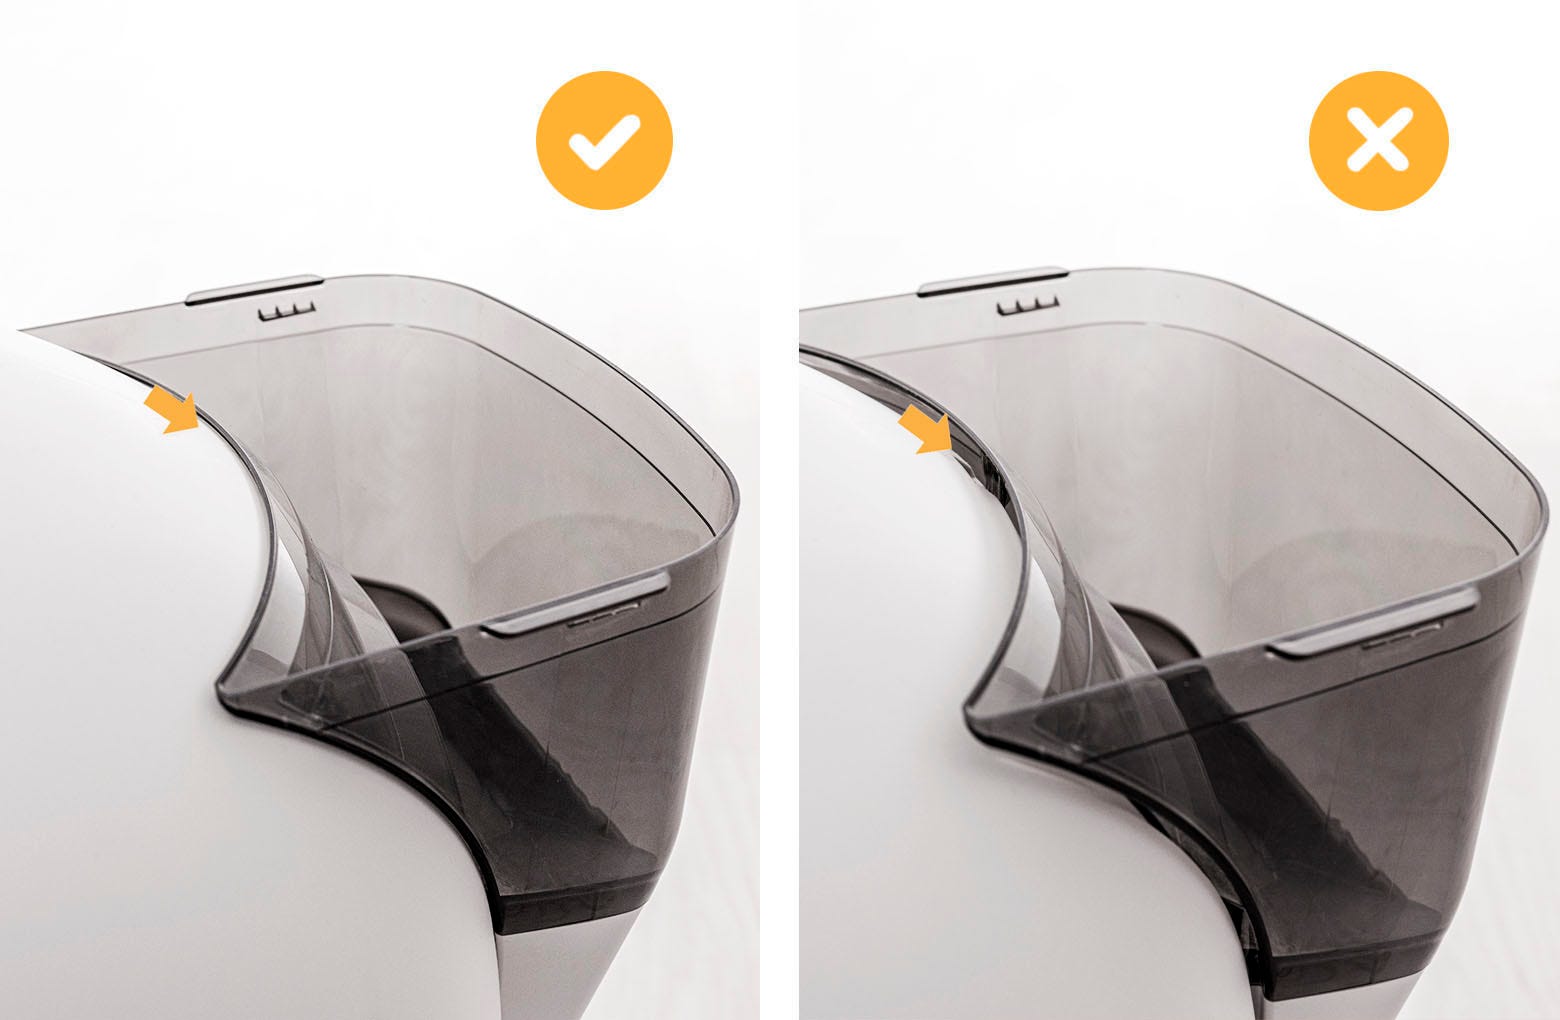
- Align the posts on the LitterHopper with the circular pockets and lower it into place. Make sure the hook tab engages with the slot in the bonnet.
![Image showing correct way to hook LitterHopper onto the bonnet]()
![Image showing the correct way to align LitterHopper]()
- Add litter
- Use clumping litter or litter beads that are small enough to pass through the screen.
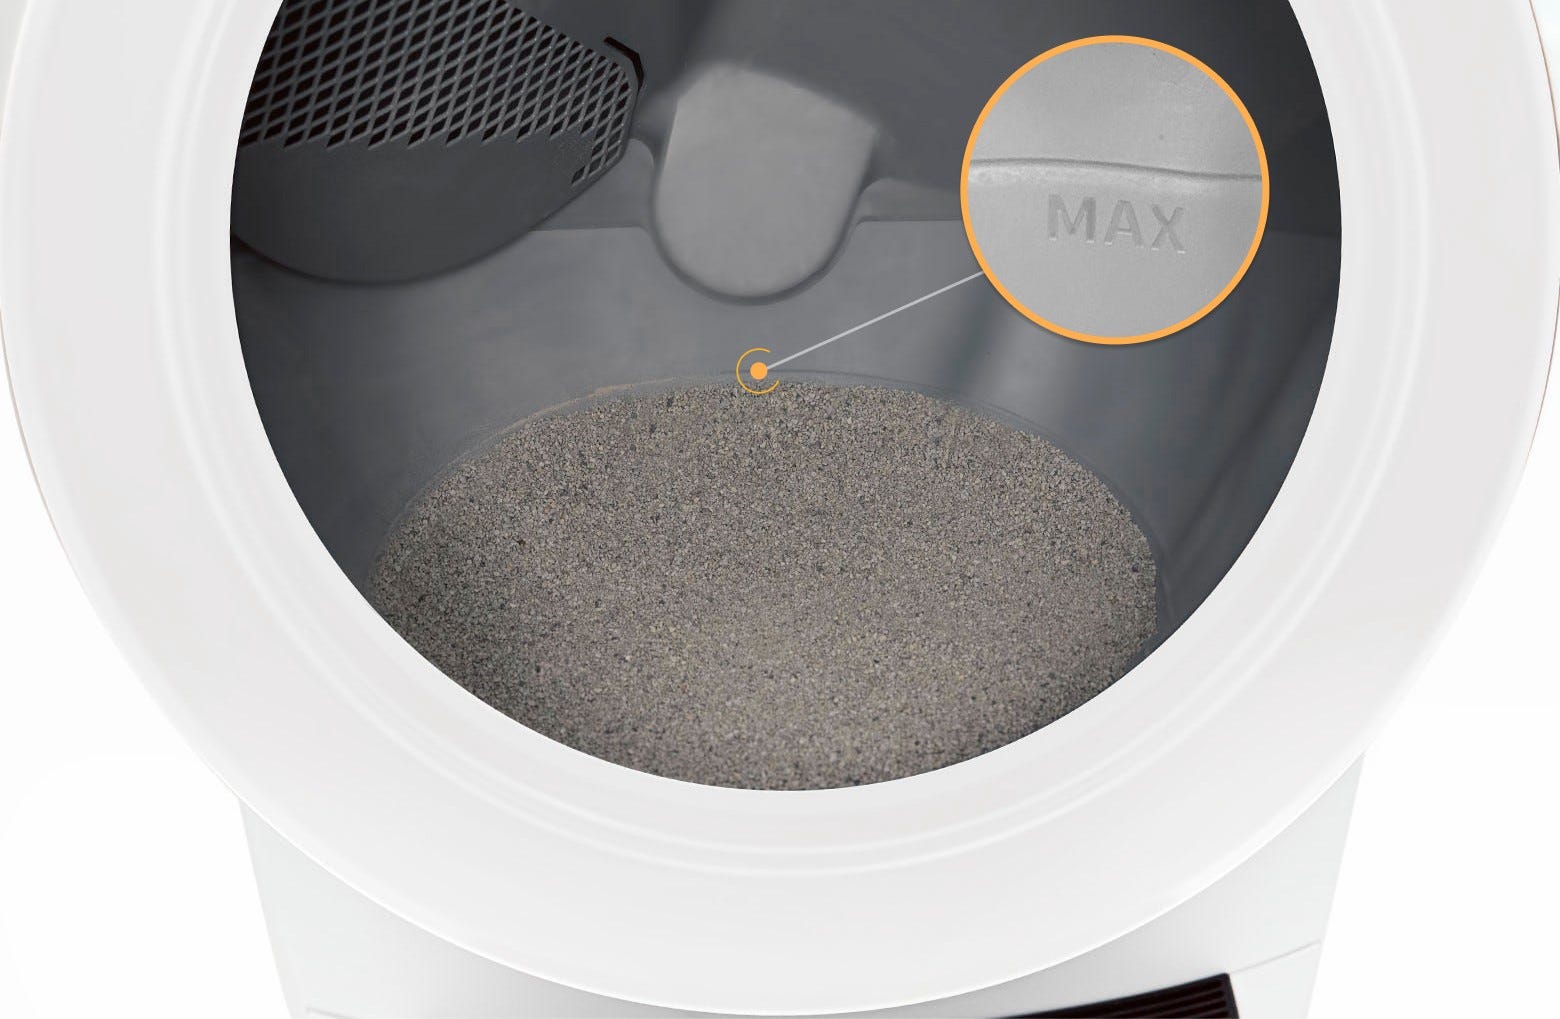
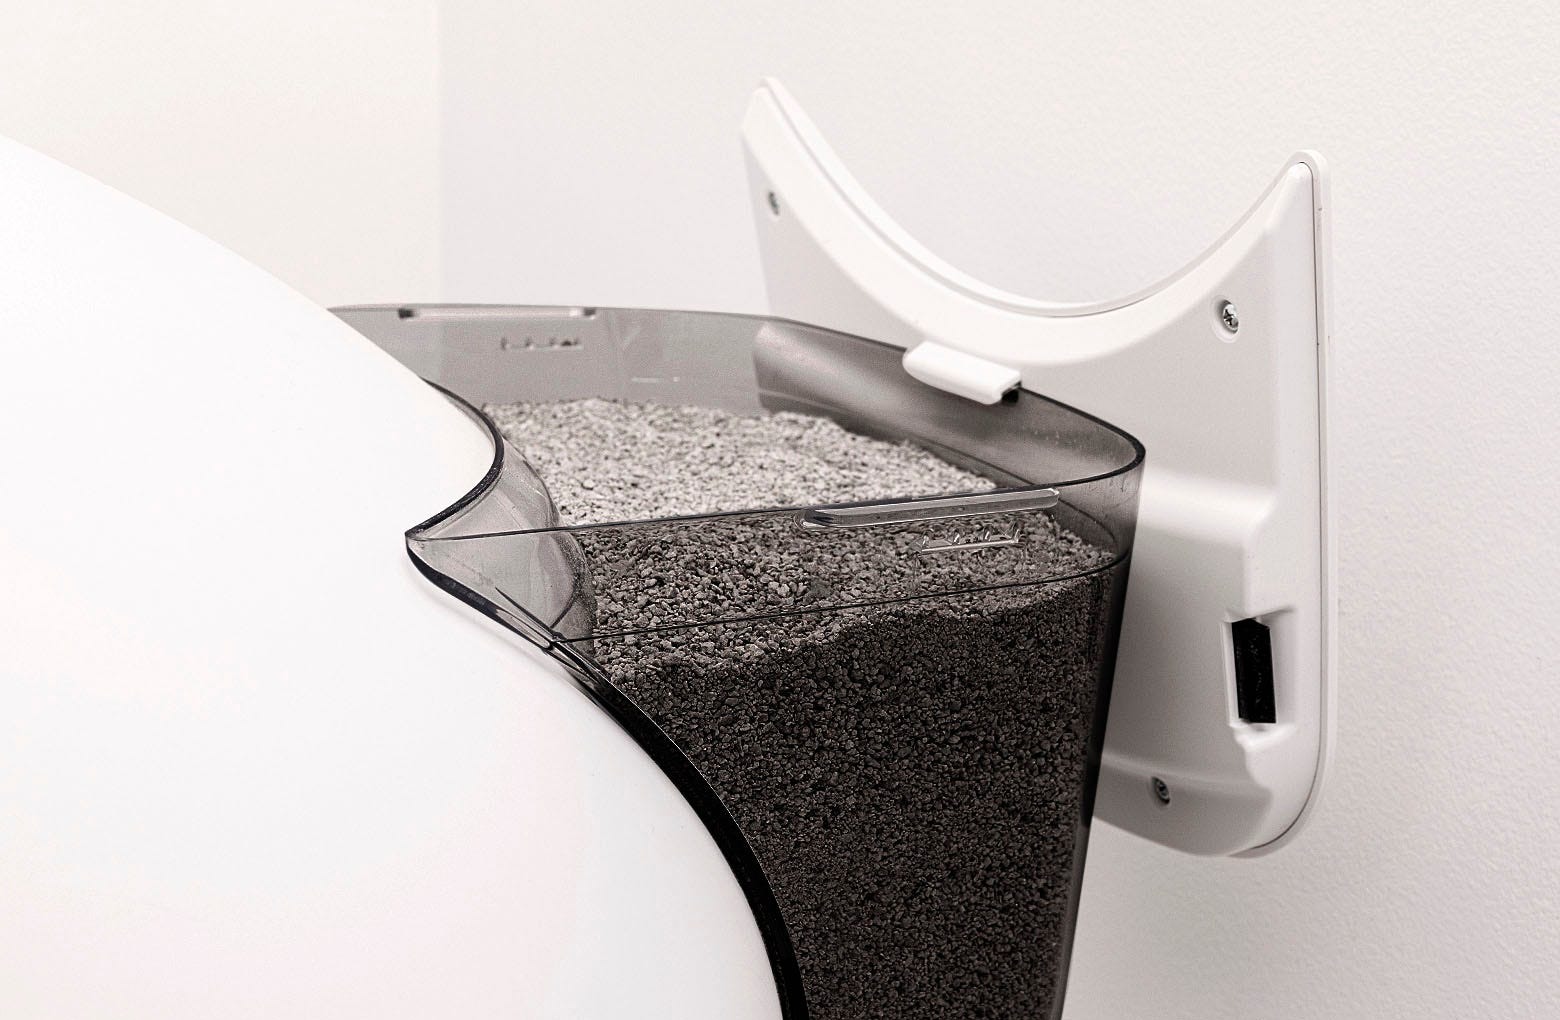
Note: We recommend using clay-clumping litter. Translucent or white-colored litter (most often seen in crystal litter) may impact the litter level and Drawer Full Indicator (DFI) accuracy. - Add litter inside the globe until it is just below the raised MAX fill line when spread flat (8-10 lbs or 3.6-4.5 kg). Be careful not to overfill.
![Image of the optimum litter level]()
- Remove the lid from the LitterHopper and fill the LitterHopper with litter up to the fill line. Replace the lid and make sure it is securely attached to the hopper.
![Image of LitterHopper lid attached to the LitterHopper]()
- Use clumping litter or litter beads that are small enough to pass through the screen.
- Power on
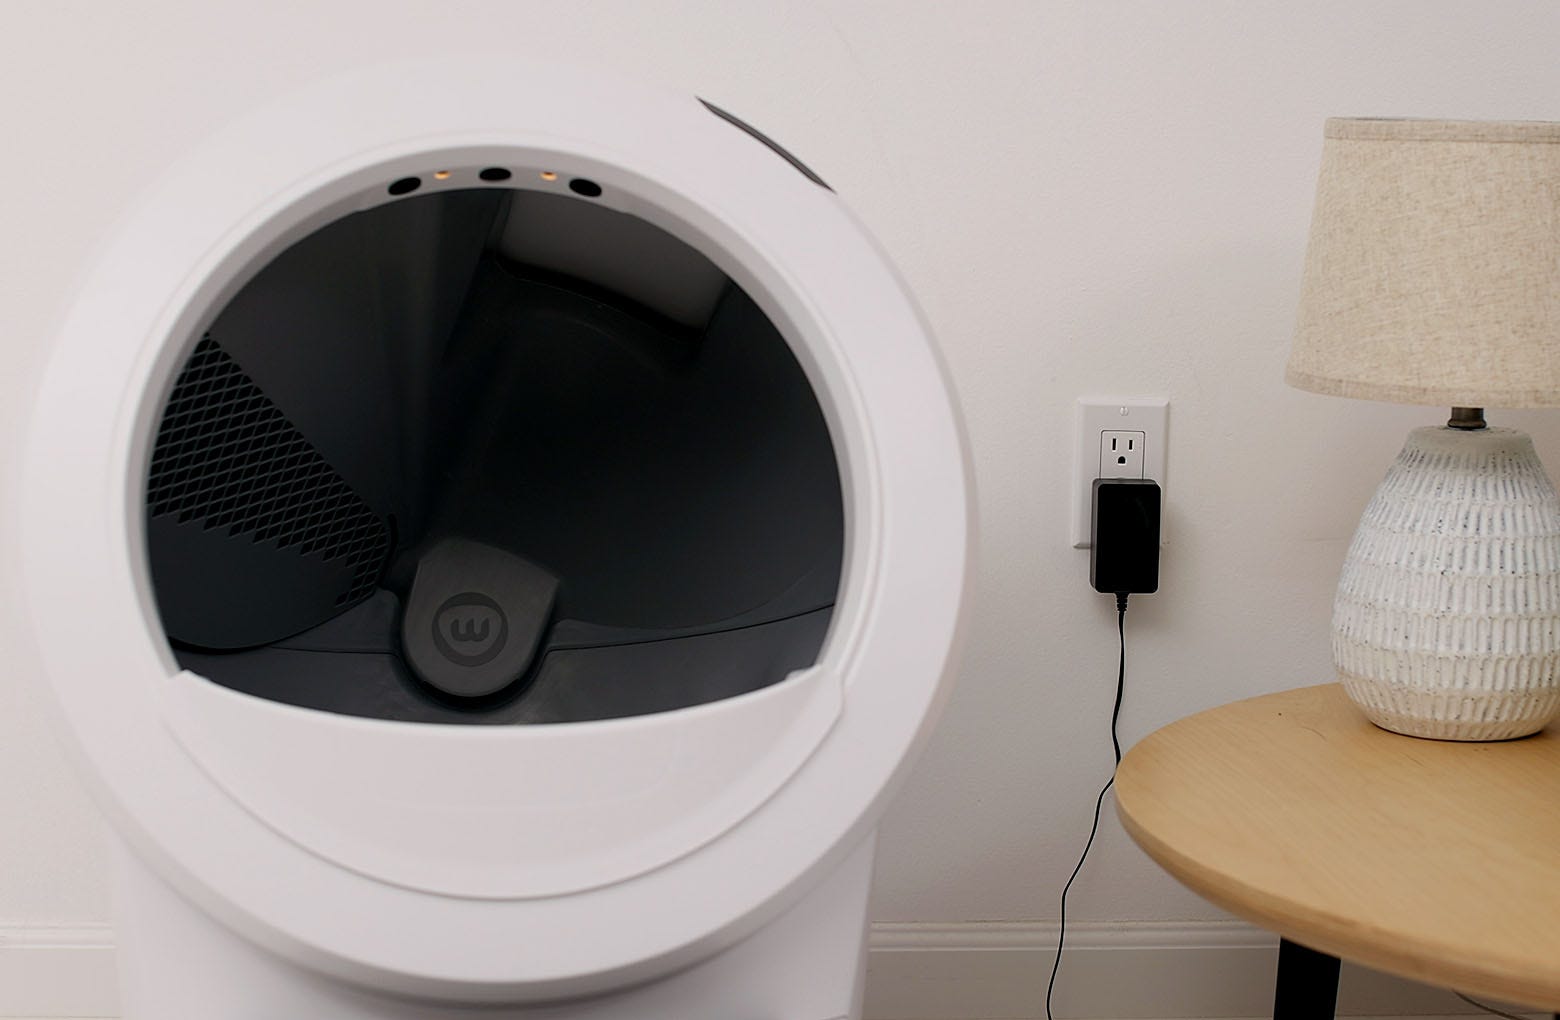
- Plug the AC/DC adapter into a wall outlet.
![Image plugging the power supply into the wall]()
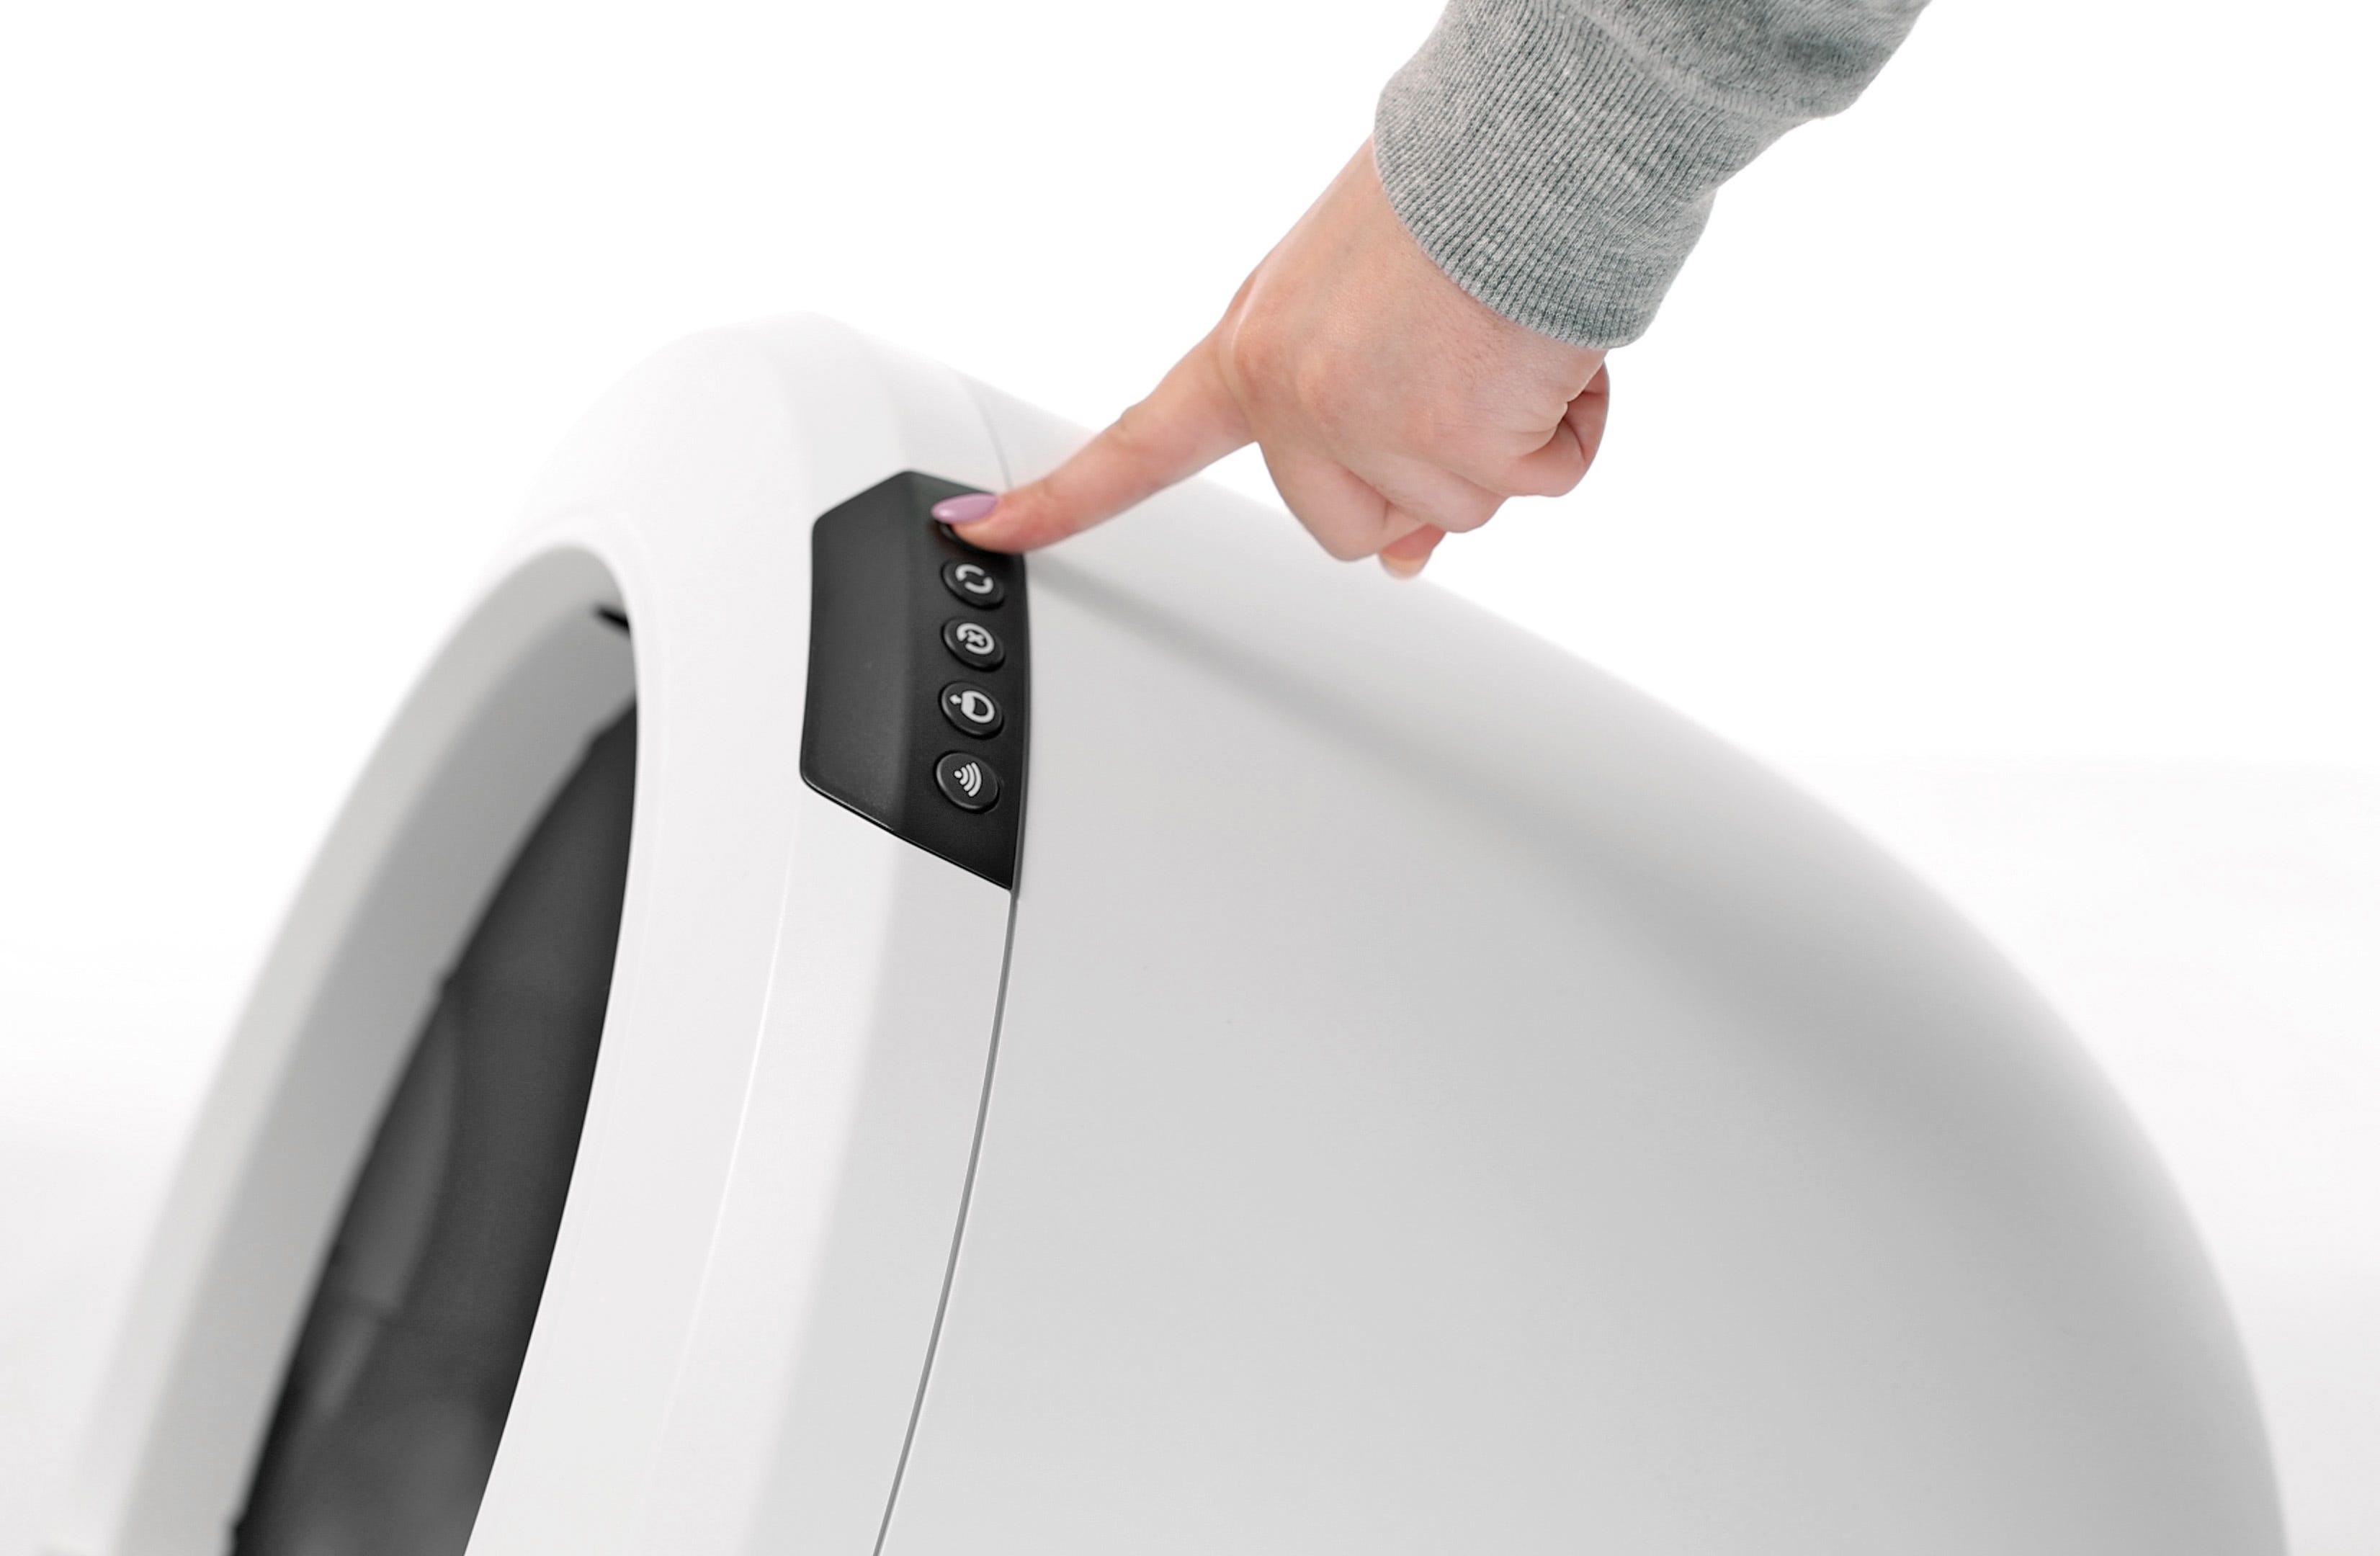
- Press the Power button on the control panel.
![Image of turning on the Litter-Robot]()
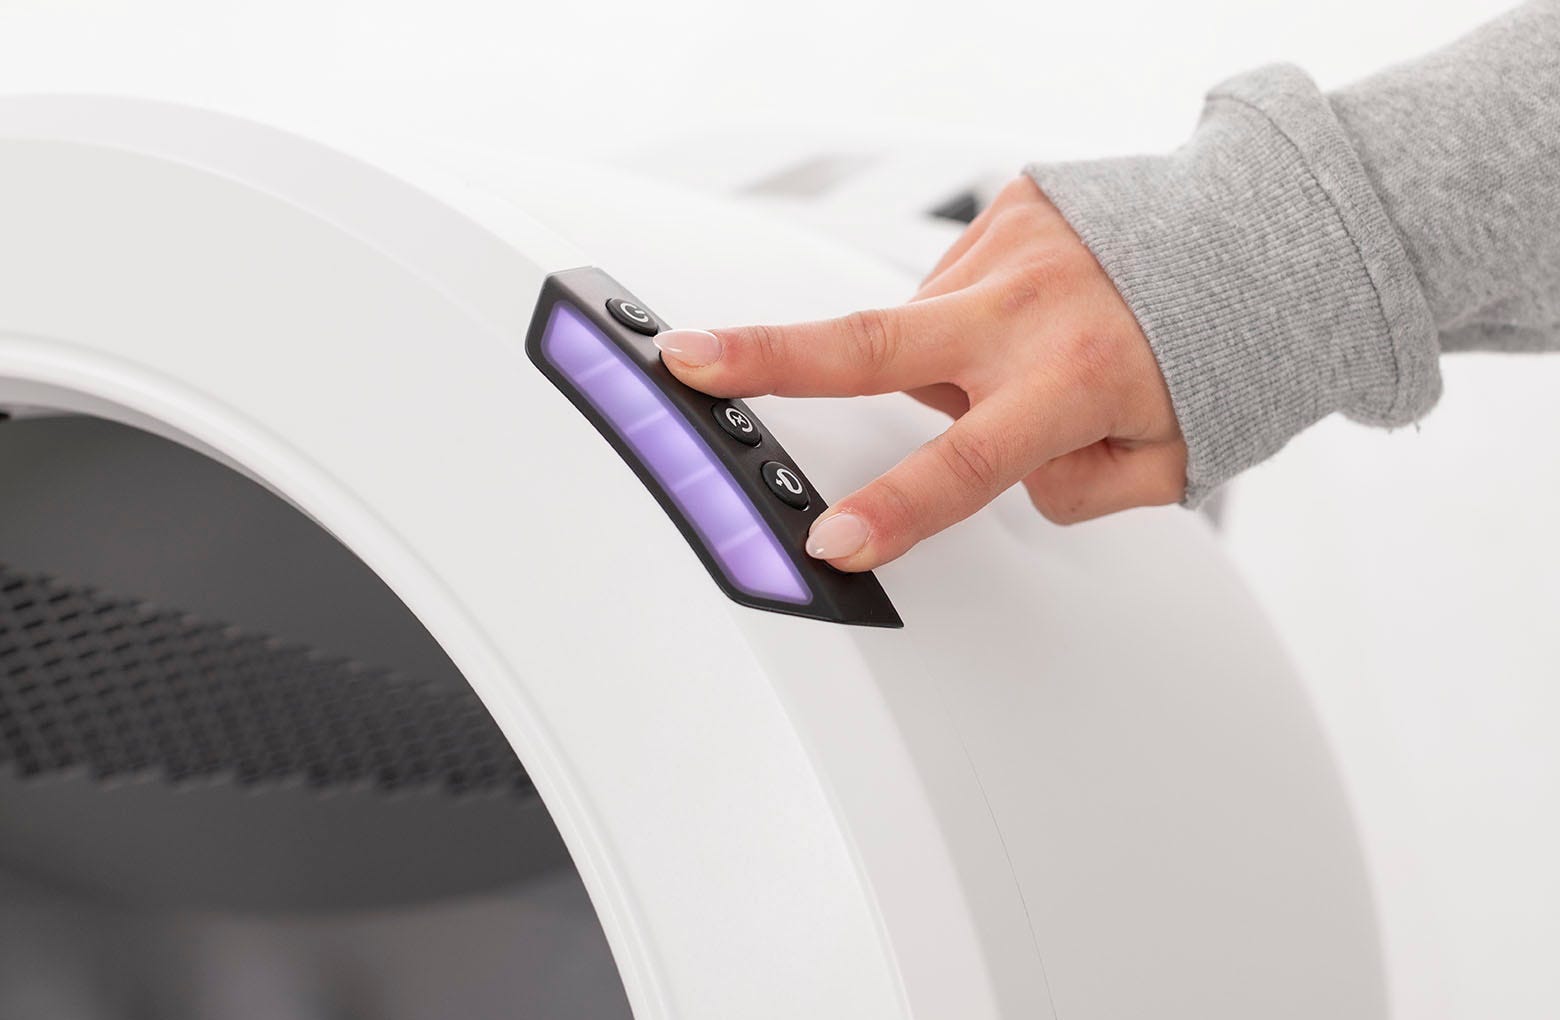
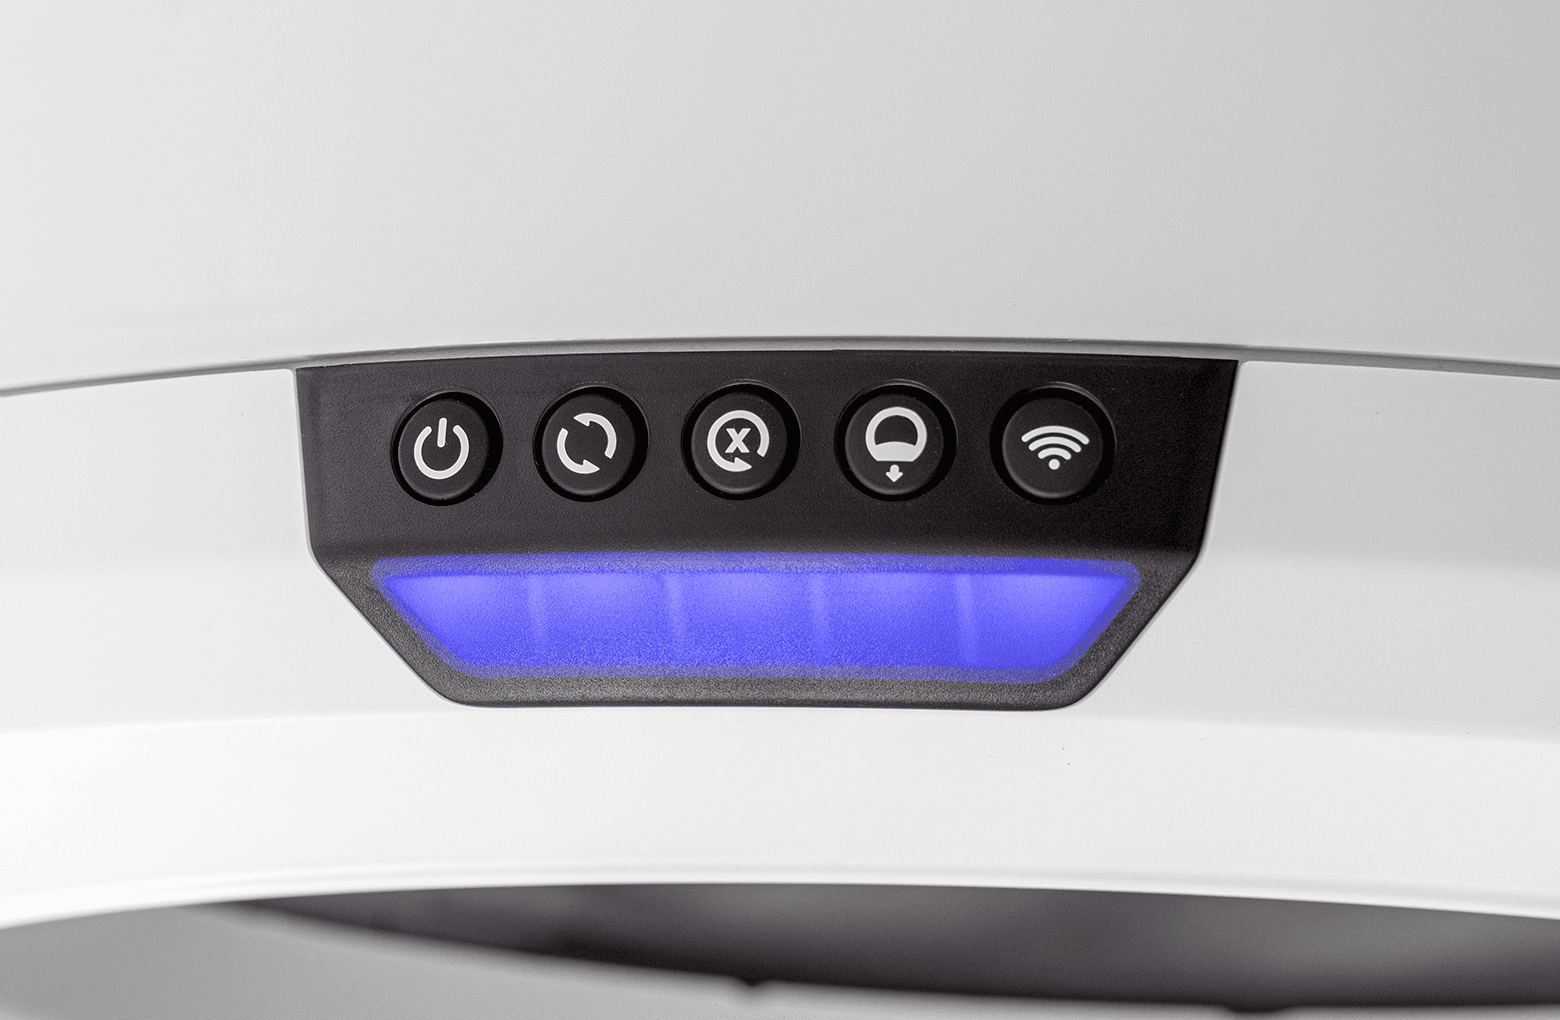
- Please note: After setting up your Litter-Robot 4 without the LitterHopper installed, the control panel lights will flash blue and purple. If you don't have your LitterHopper yet, you'll need to disable the LitterHopper mode. To do this, press and hold the Cycle and Connect buttons on the control panel for 3 seconds.
- Plug the AC/DC adapter into a wall outlet.
- Download the app
- Download the Whisker app and follow the onboarding instructions.
- Note: After onboarding, if the Litter-Robot 4 home screen in the Whisker app shows that your LitterHopper is “Ready,” you can skip Step 8.
- Enable the LitterHopper
- ENABLE via the control panel:
Long press the Cycle and Connect buttons for 3 seconds. The control panel will flash WHITE and the LitterHopper motor will rotate for 1 second, indicating the LitterHopper is enabled. At this point, your setup is complete! You can check the status of your LitterHopper in the Whisker app any time.
- ENABLE via the control panel:
 Once installed, the anti-tip guard should feel rigid with no movement and be flush with the base.
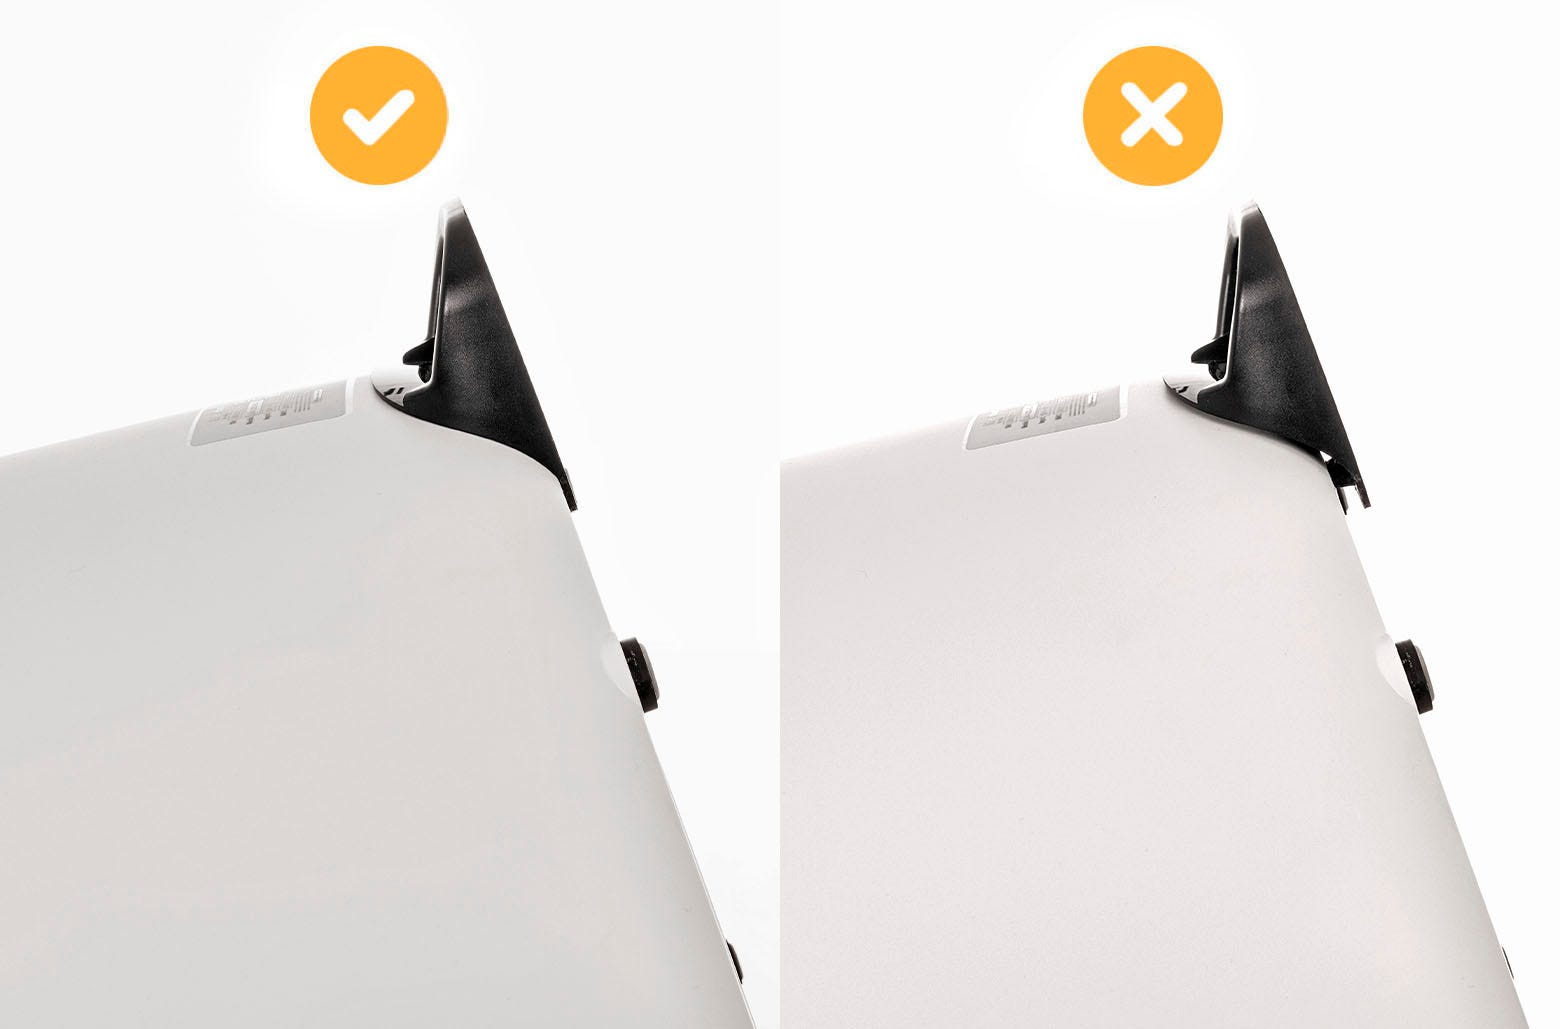
Check your firmware version
- Open the Whisker app on your mobile device. (See how to onboard your unit if you have not done so already.)
- Check your Litter-Robot 4 settings to verify you are updated to the latest firmware version. (Note: Screens may vary as the app gets updated.)
ENABLE via the control panel:
- Long press the Cycle and Connect buttons for 3 seconds. The control panel will flash WHITE and the LitterHopper motor will rotate for 1 second, indicating the LitterHopper is enabled. At this point, your setup is complete! You can check the status of your LitterHopper in the Whisker app any time.
![Image of reseting the Litter-Robot]()
- DISABLE via the control panel:
- Long press the Cycle and Connect buttons for 3 seconds. The control panel will flash WHITE and the hopper motor will NOT rotate, indicating the LitterHopper is disabled.
- Note: Be mindful that pressing the Cycle and Connect buttons multiple times will toggle the enable/disable status.
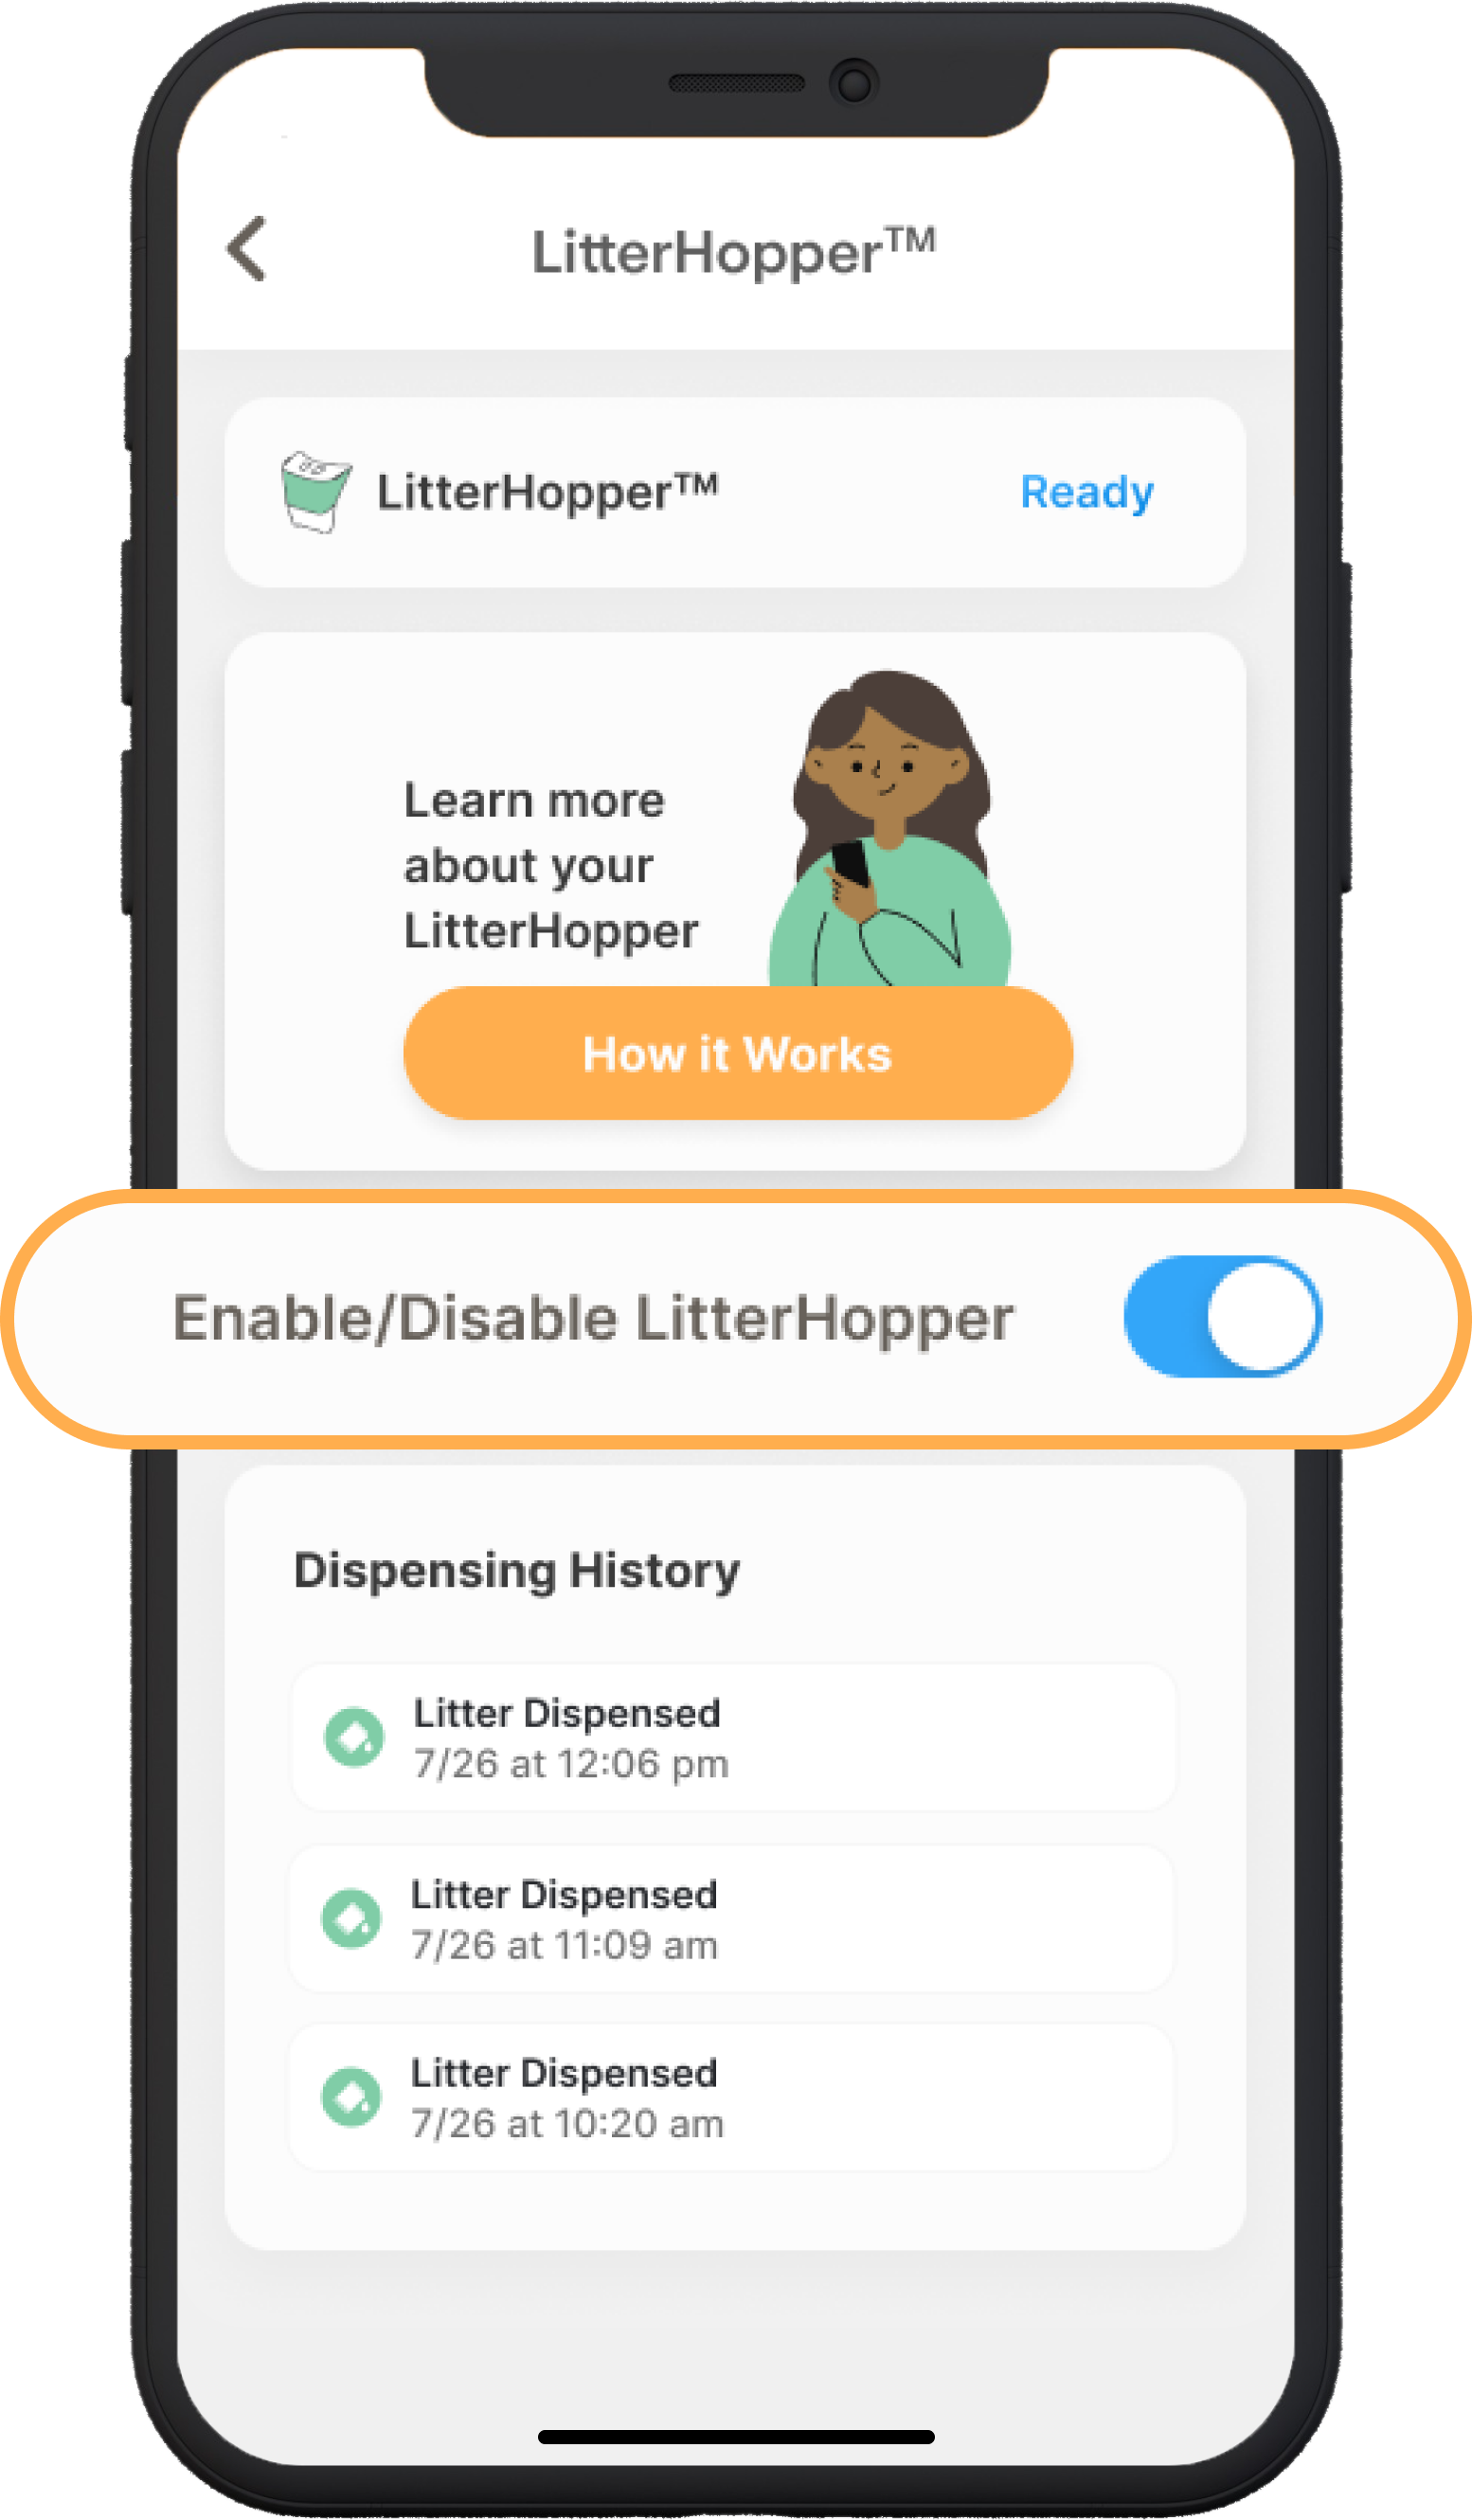
- ENABLE and DISABLE via the Whisker app:
- After the LitterHopper's initial connection, you can easily toggle the switch to enable or disable the LitterHopper directly from the app.
![Image of the enable/disable LitterHopper feature in the Whisker app]()
- Note: If you have physically removed the LitterHopper from your Litter-Robot 4, be sure to disable it using one of the methods above.
- After the LitterHopper's initial connection, you can easily toggle the switch to enable or disable the LitterHopper directly from the app.
Additional resources:
- Litter-Robot 4: LitterHopper™ troubleshooting guide
- Litter-Robot 4: LitterHopper™ not dispensing
- Blue and purple alternating light bar troubleshooting (LitterHopper error)
- Light codes guide
- Control panel buttons
Didn't find what you're looking for?
Phone and Chat support available Mon-Fri: 9AM-9PM EST and Sat-Sun: 9AM-5PM EST, or submit a ticket anytime.